
There is a right way and a wrong way to dry lemon balm. It is a delicate herb that can easily degrade if not handled properly. The process really is quite simple, as long as you follow the right steps. Let me show you!
In this article we’re going to cover the benefits of lemon balm, how to harvest it properly, plus I’ll show you step-by-step how to dry lemon balm using 3 EASY methods.
Let’s drive in!

*Disclosure: This post may contain affiliate links to products (including Amazon). I’ll earn a small commission if you make a purchase through my link, at no additional cost to you! Regardless, I only link to products that I personally use on our homestead or believe in.
Why You Should Dry Lemon Balm
Dried lemon balm is something that I’ve had in my small apothecary for many years now and I could never live without it! It’s one of the few medicinal herbs out there that works wonders AND tastes delicious. Sometimes I just mix up a mug of lemon balm tea just for the simple enjoyment of it.
Benefits of lemon balm
Lemon balm is rich in the volatile oils citral and citronellal, both of which are well known for their calming and antispasmodic properties.
- Soothes stomach upset
- Calms the nervous system
- Promotes relaxation before bed
- Aids in reducing anxiety, stress, sleep issues and depression (Haybar, 2018)
- Combats seasonal affective disorder
- Calms restless behavior, ADD, and ADHD
- Fights against viruses thanks to its rich profile of polyphenols
- Reduces LDL cholesterol and liver enzymes (Jandaghi, 2016)
- Reduces blood sugar, blood pressure and inflammatory markers (Asadi, 2019)
- BONUS: The bees love it! Plant some lemon balm and you’ll encourage pollinators in your garden.
*Please note that lemon balm can act as a thyroid inhibitor, so if you have hypothyroidism, please consult with your provider before using.
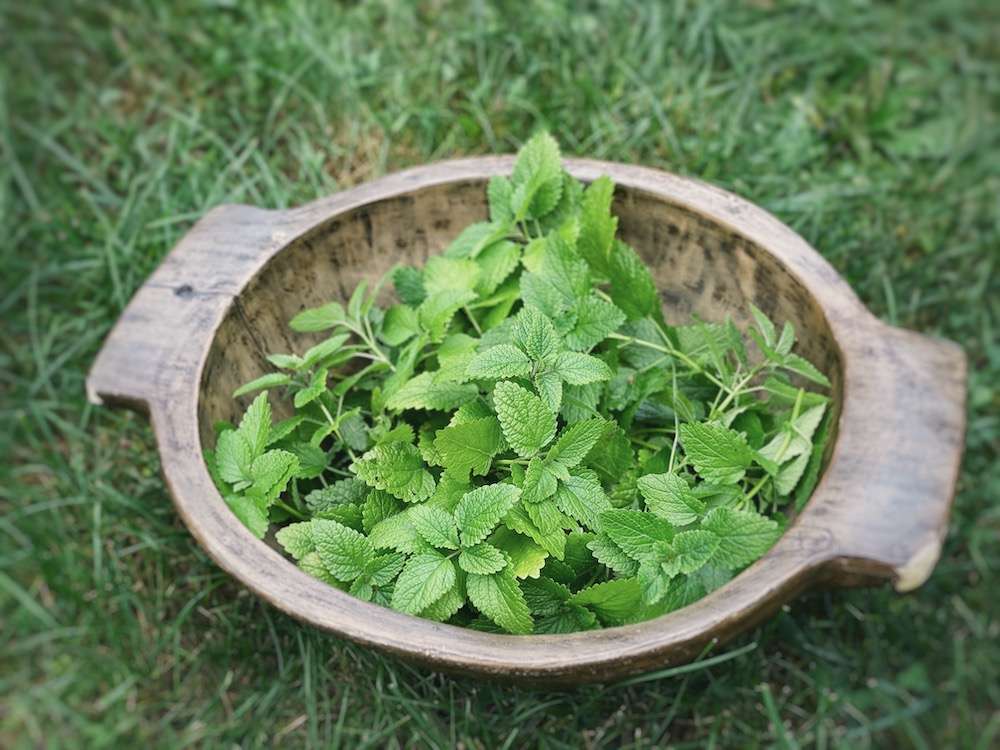
How to Harvest Lemon Balm
Lemon balm isn’t commonly found at the grocery store, so if you’re reading this, you’re likely growing it! Here’s my best tips when it comes to harvesting lemon balm:
- Lemon balm is best harvested in the morning. The ideal time is before the heat of the day, but after the dew has burned off a bit. That ensures that your herbs will have the highest potency, but they aren’t sopping wet, either.
- Lemon balm can be harvested at any time throughout the growing season but it has the best flavor just before it flowers.
- If it happens to flower, prune it back a bit and then you’ll get a flush of new leaves that are perfect for harvesting. Lemon balm is hardy down to zone 4, so don’t rip it out in the fall! It will self-seed and continue to provide for years to come.
- Leave 6” of bottom growth when trimming off your greens so that it can regrow. Also, make sure not to harvest more than ⅔ of the plant at one time.
How to Dry Lemon Balm
Drying lemon balm is easy to do and there are 3 methods that you can use; they all work wonderfully! The key is to keep the temperature nice and low (95 degrees is ideal) while minimizing light exposure. Lemon balm is a delicate herb that can degrade quickly.
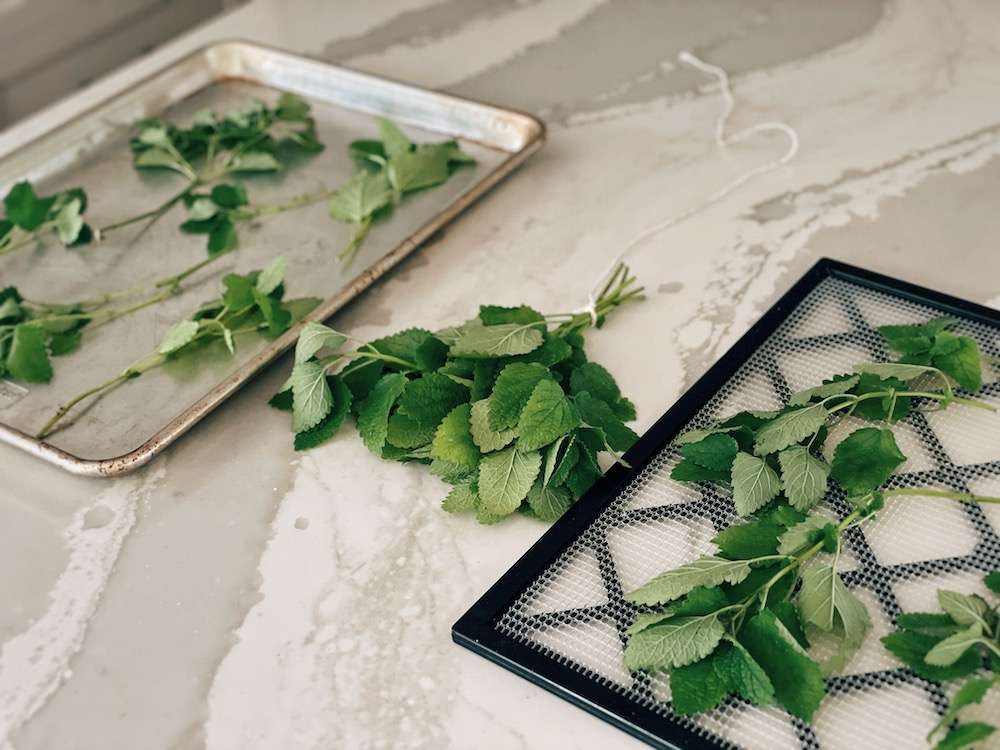
Washing Lemon Balm
Washing lemon balm is optional, depending on the state of your freshly picked herbs.
- If your lemon balm is covered in dirt from a recent rain or watering, I’d give it a good rinse and lay them out on a tea towel for about an hour so it’s not sopping wet.
- If you’ve sprayed anything on or near your lemon balm (even if it’s an organic agent like neem oil or even soapy water), I’d give it a good rinse as well.
- I personally never wash my lemon balm because I rarely spray anything in my garden and I have super sandy soil, so it usually comes into the house clean. If yours is clean as well, no need to wash!
Once your lemon balm is clean, pick off any spent, dead or diseased leaves that you don’t want ending up in your medicinal herbs and tinctures.
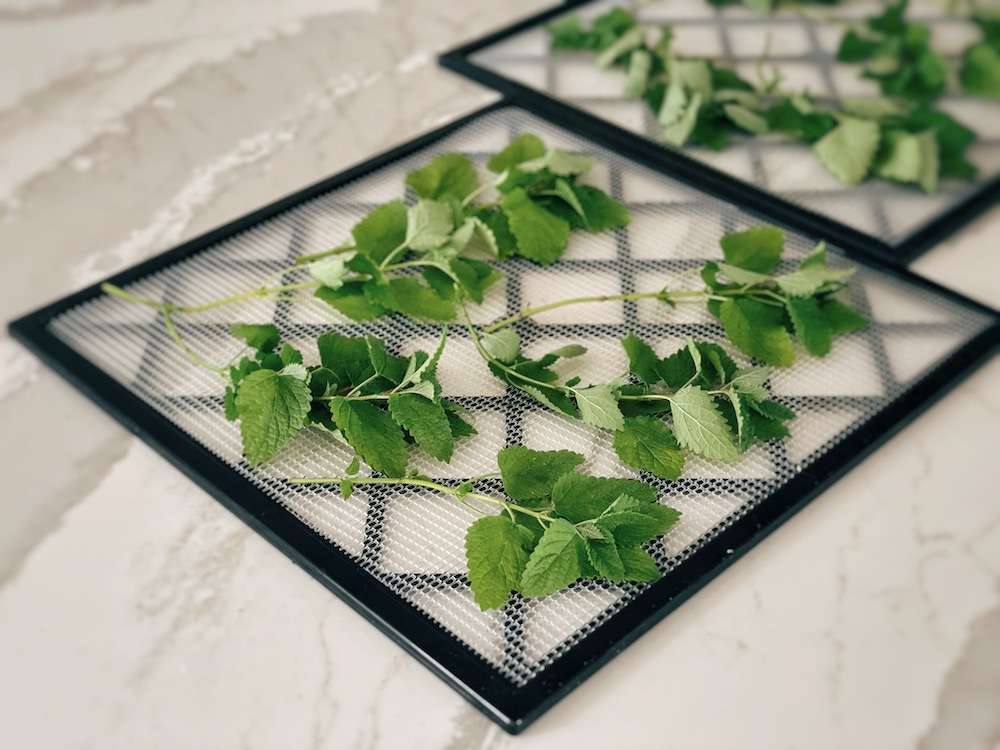
Drying Method #1: Dehydrator
Using a dehydrator to dry lemon balm is my favorite method. It’s simple to do, easy to control the temperature and it works fast.
- Spread the freshly picked bundles of lemon balm onto the dehydrator trays. You can leave the leaves on the stems at this point, or pick them off. It’s up to you! If you leave them on, we’ll just need to remove them once dried.
- Run your dehydrator on its lowest setting (which is 105 degrees for my dehydrator) for about 12 hours.
- After 12 hours, take a look. The leaves should be fully dried and crumble when lightly pressed. If there’s still a bit of softness to the leaves, put them back in for another couple of hours. If there’s any residual moisture left in the leaves, it might mold while in storage.
- If the stems are still on, carefully pick off the leaves and discard the stems. Try to keep the leaves whole as much as possible because they retain maximum nutrients and aroma that way.
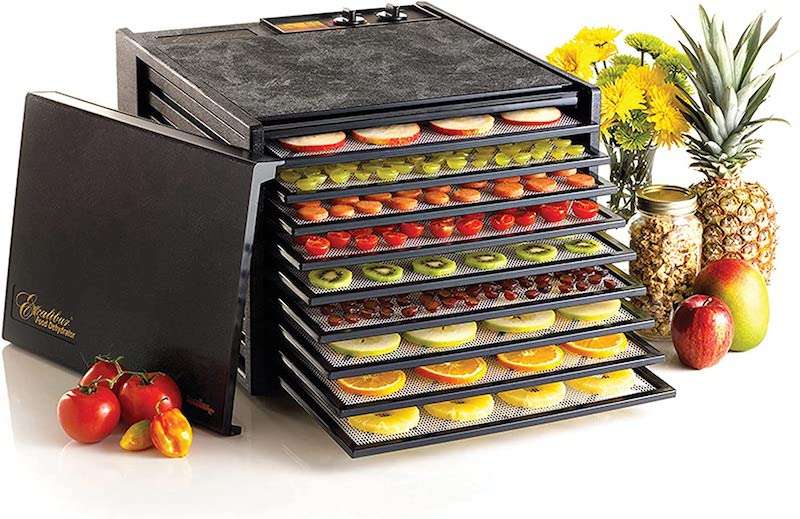
If you don’t own a dehydrator yet, definitely consider one! Mine is running non-stop on our homestead for drying herbs, medicinal plants, chicken livers & hearts for dog treats and even entire meals for our backpacking trips.
The Homesteading RD's Product Picks | |
 | This is the exact dehydrator the I use an love! SIZE: 9-trays and 15 square feet of drying space provides extra-large capacity |
 | This is the upgraded model of the one above and features a timer! Super nice! SIZE: 9-trays and 15 square feet of drying space provides extra-large capacity |
Drying Method #2: Hang dry
This is the simplest method and best one to use if you don’t have a dehydrator, but it takes a bit longer for the herbs to fully dry.
- Tie together a small bundle of lemon balm using some kitchen twine. Good airflow is essential, so multiple, small bundles of only 4-5 stems are better than one big bundle.
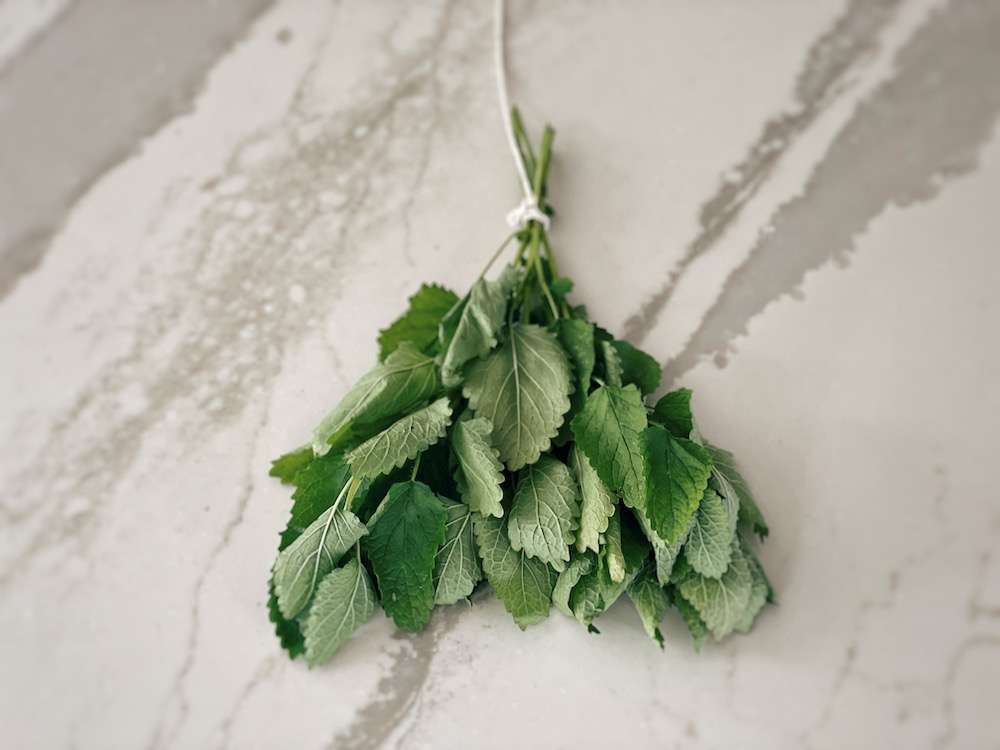
- String up the bundles to hang with stem side up. A dry, dark place with good airflow is best. I like to use my garden shed or laundry room, depending on the season.
- Check on the herbs every 4-5 days to see how they are progressing. They could be finished in as short as 1 week or as long as 1 month, depending on the humidity level of the environment. The leaves should be fully dried and crumble when lightly pressed. If there’s still a bit of softness to the leaves, let them go for a few more days. If there’s any residual moisture left in the leaves, it might mold while in storage.
- Carefully pick off the leaves and discard the stems. Try to keep the leaves whole as much as possible because they retain maximum nutrients and aroma that way.
Drying Method #3: Oven
This is my least favorite method because most ovens don’t get below 170 degrees and lemon balm should ideally be dried at 95 degrees to maintain its potency. However, it is an option if you can’t use the two methods above.
- Preheat your oven at the lowest temperature possible (my lowest is 140 degrees)
- Spread out the lemon balm on a baking sheet and place in the oven with the door ajar. Don’t skip this step! If you keep the oven door closed, the herbs will burn to a crisp.

- Set your timer for 30 min and then check on them in 10 min intervals after that. They are going to dry out very quickly, so keep an eye on them! The leaves should be fully dried and crumble when lightly pressed. If there’s still a bit of softness to the leaves, put them back in for another 10 minutes. If there’s any residual moisture left in the leaves, it might mold while in storage.
- If the stems are still on, carefully pick off the leaves and discard the stems. Try to keep the leaves whole as much as possible because they retain maximum nutrients and aroma that way.
How to Store Dried Lemon Balm
Once your lemon balm is fully dry, it’s time to tuck it away into storage. Dried lemon balm is good to use for up to a year, as long as it is dried and stored properly.
Store the dried lemon balm in an airtight container. While I know it’s tempting to put your beautiful jar on display, don’t do it! Keep it in your cupboard or basement where light exposure is minimal. Light will rapidly degrade your dried lemon balm.
The Homesteading RD's Product Picks | |
 | How cute are these!? These dried herb containers are thicker than other canisters and features a silicone ring on the acacia lid to ensure an air-tight lid. |
How to Use Dried Lemon Balm
I love having dried lemon balm on hand so that I can use it all winter (which is quite long in Minnesota…) until I have fresh lemon balm growing again in the spring. Let’s chat about some of my favorite ways to use it!
Lemon Balm Tea
Lemon balm tea is the most common (and easiest!) way to use dried lemon balm. Simply take a few of the dried leaves and gently crumble them with your (clean) fingers).
- Add 1 heaping tsp of freshly crumbled, dried lemon balm to a tea infuser
- Add 6 oz of boiling water
- Allow to steep for 5 minutes
- Enjoy!
The Homesteading RD's Product Picks | |
 | This is the same tea infuser that I use and love! Made of stainless steel, easy to clean and dishwashable. Unlike traditional tea balls, this tea strainer features a threaded connection design that is easy and securre to open and close. |
Lemon Balm Bath
Looking for a relaxing way to wind down in the evening? Try a lemon balm bath!
- Add ¼ cup of the dried lemon balm to a strainer
- Hold the strainer underneath the bath faucet as it pours out hot water.
- When the tub is halfway full, discard the herbs and continue to fill the tub with cooler water to adjust the temperature to your liking.
Other Articles You’ll Love
- Lemon Balm vs Mint: Which One Should You Use and Grow?
- Soothing Chickweed Salve Recipe
- Dried Radishes for Winter Storage
Final Thoughts
Lemon balm is a great herb to grow in your garden and it’s easy to dry! I love having dried lemon balm in my little apothecary to grab anytime one of us has an upset stomach, feeling tense or just want to enjoy a sweet tea beverage.
*Information in this article was referenced from personal experience and/or from my favorite herbal medicine book Rosemary Gladstar’s Medicinal Herbs – A Beginner’s Guide unless otherwise noted.
The Homesteading RD's Product Picks | |
 | This is my go-to book! Make your own herbal remedies for life’s common ailments. Gladstar profiles 33 common healing plants and includes advice on growing, harvesting, preparing, and using herbs in healing tinctures, oils, and creams. |


Wonderful post. and you Nice used words in this article and beautifully post it. Thanks for sharing.
Impressive website – with clear, nice photos, and helpful information that is referenced! Wow!
Thank you for your great efforts. Your work is much appreciated!
I’ll be back to learn more.
You are too kind – thank you and thanks for being here 🙂
I agree this website is well made, thank u for posting the links to the research pages and also the shopping ideas for equipment.
I don’t see hang drying methods described very much anymore. Thanks for including that!
Agreed! Many are turning away from the old fashioned way of doing things – not me! 🙂
I love lemon balm! I never get a chance to harvest it before some creature eats it but I love that it brings all the bees to the house.
OOO yes, the bees love lemonbalm!
I am new to using lemon balm… love your guide
Yay! It’s a lovely herb to use
We’ve been using a dehydrator in the past, but we’ve taken to the hang-dry method for herbs recently. Great ideas!
I’ve been getting back to hang-drying as well – love the simplicity of it and it’s hard to mess up 🙂
This is a super helpful guide! While it takes longer to dry, I always love the nostalgic look of herbs and flowers that are hanging to dry.
I do, too! 🙂 🙂
Love this post! Learned a lot and now I must try this for myself 🙂
Very informative post! I wasn’t aware of all the health benefits lemon balm offered. Thanks for sharing!
Excellent! Let me know how it goes!
The leaves of lemon balm looks familiar, can’t remember coming across this herb. Maybe its known by a different name in Jamaica. However, I appreciate the health benefits of lemon balm. Awesome post. Love your reels on the gram; they are very educational.
It is an amazing herb! Love having it around. I’d be curious if it grows in Jamaica or not! 🙂 🙂
Love this herb! And it’s so easy to save and use – thanks for the great info!
Yay! So glad to hear that you’re loving it, too!