
Raised garden beds are excellent to grow vegetables in, however, finding inexpensive and toxin-free materials can be a real challenge. You’re probably thinking about using a raised bed liner to create a safe barrier, and you’re onto something there!
I’ve been experimenting with different raised bed materials for years and have finally landed on the perfect combination of durability + low cost + non-toxic materials.
In this article, I’ll share my easy and fairly inexpensive method for building a raised garden bed with a durable, non-toxic liner. All of these materials can be easily found at your local building supply store.
Let’s get building!
*Disclosure: This post may contain affiliate links to products (including Amazon). I’ll earn a small commission if you make a purchase through my link, at no additional cost to you! Regardless, I only link to products that I personally use on our homestead or believe in.
A raised garden bed has some challenges:
- Raised bed materials can be quite expensive – Just one 8 foot cedar 2”x10” board is $76 at the time of this article, and concrete blocks are even more!
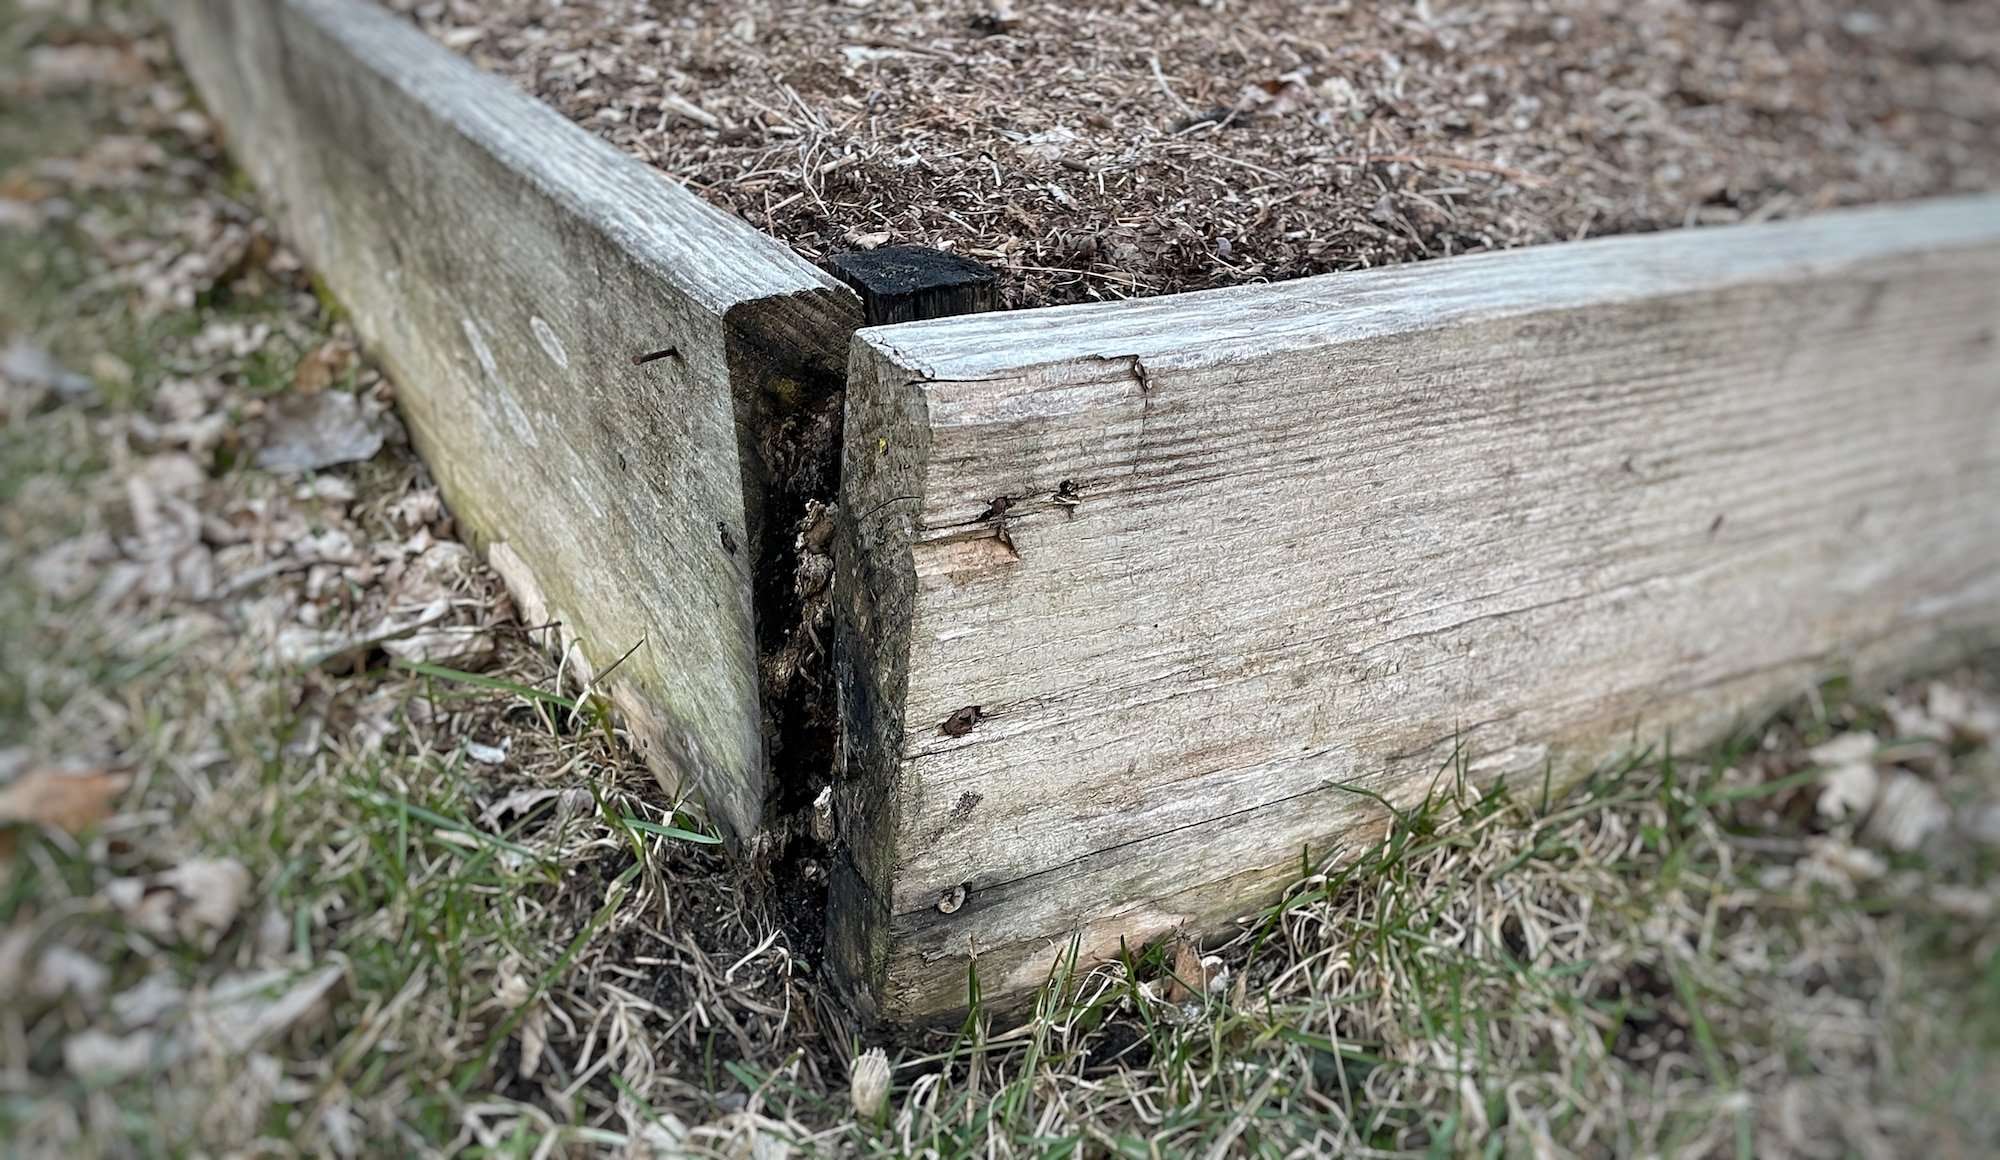
- Natural materials like logs or untreated pine boards can degrade quickly, requiring replacement every few years – see photo below of untreated pine lumber after just 3 years
- Rot-resistant materials can be toxic – pressure treated, creosote railroad ties, etc
- Raised bed materials like concrete and bricks are heavy and hard to move (and expensive!)
Do I Need a Raised Bed Liner?
It depends on your raised bed design, but the short answer is yes. If you are using treated lumber, then you definitely do. There are many advantages to adding a liner along the inside edge of your garden bed.
Non-toxic barrier
If you are using a rot-resistant material like pressure-treated wood, then I highly recommend using a raised bed liner to keep the chemicals from leaching into the soil (and eventually your food). Pressure-treated wood is appealing to use because it’s inexpensive and will last up to 10 years, unlike most types of untreated wood.
Prior to 2003, arsenic was the chemical of choice for treated lumber. No thanks! Today, the most common chemical used is alkaline copper quat (ACQ). While this is a less toxic option than arsenic, it’s still not something that I want to mix with my food.
Keeps dirt in place
If you are using logs or bricks that don’t seal your garden space quite as well, adding a liner can help keep the dirt in place. This will save you money and work in the long run by not needing to replace garden soil year after year!
Adds stability
Added soil puts a lot of pressure on the sides of your raised bed. Adding a raised bed liner can add extra support and rigidity, increasing the lifespan of your raised bed. This is especially helpful if you are using thinner or flexible materials.
Moderate temperature
A raised bed liner also helps moderate temperature fluctuations within your garden bed. Here in the upper midwest, our temperatures can vary widely, so this is a plus! Plants are hardy and can handle a lot, but keeping the soil at a consistent temperature certainly helps.
Common Raised Bed Liner Materials
There are several different materials out there that are commonly used as a raised bed liner. However, they all have their own shortfalls. Let’s break them down!
Plastic
Most gardening books recommend using plastic to line your raised beds, however, I’m not a big fan. It doesn’t breathe well, so the moisture will cling to your raised bed materials causing them to break down faster. It’s a nightmare to work with and it’s hard to get it to lay neatly.
Plastic also breaks down quickly and won’t last much longer than 2 years. You’ll end up with plastic shards in your soil and have to dig out the soil to replace the plastic again. Lastly, who wants plastic surrounding their garden? I don’t.

Landscaping fabric
Using landscaping fabric seems like a simple solution, however, the material is too thin to offer any benefits regarding stability or temperature moderation. Plus, landscaping fabric is a manufactured product that often contains chemicals and petroleum.
Lastly, while landscaping fabric is meant to be a physical barrier for weeds, it’s still permeable and I would worry about pressure-treated wood chemicals leaching through it. That would defeat the whole purpose of using it.
Cardboard
This is the least offensive option of the 3. It’s cheap, and would provide stability and temperature moderation. It’s a substantial enough barrier that it would likely prevent chemicals from leaching into the soil as well.
However, cardboard quickly decomposes and would need to be replaced year after year. I know I don’t have time for that!
What Should I Line My Raised Bed With?
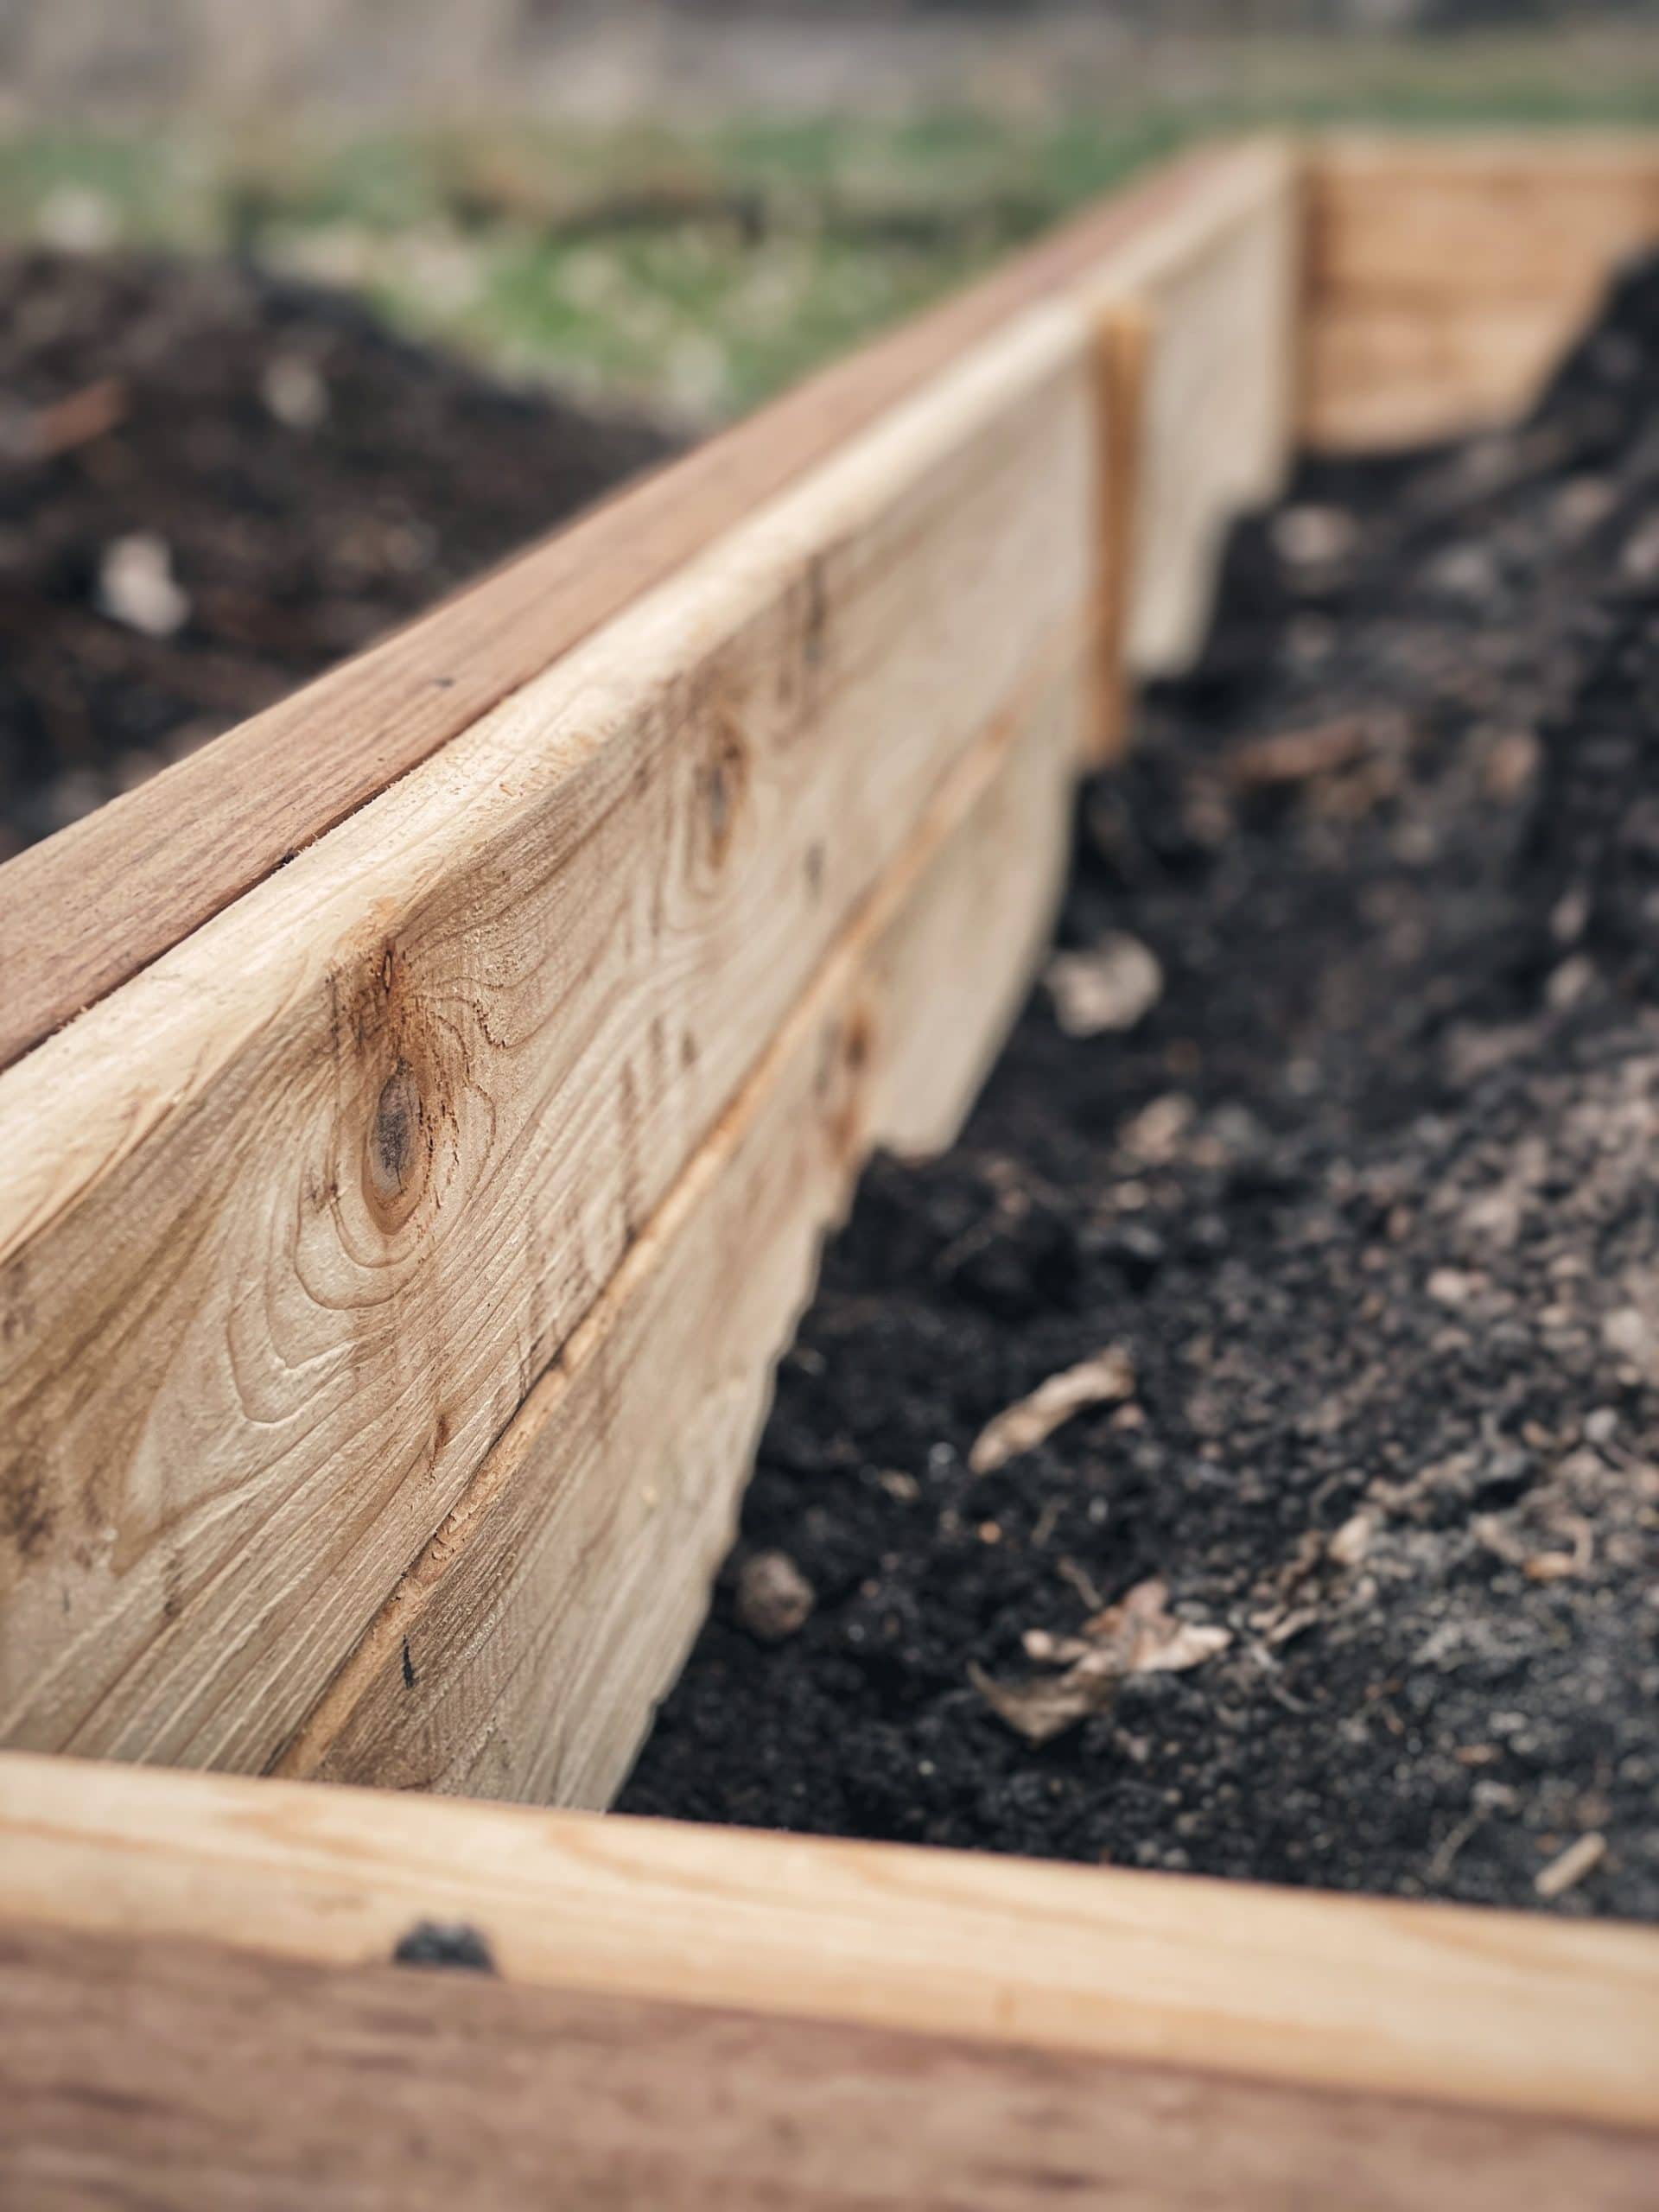
Now here’s my secret weapon: cedar decking! While my favorite raised bed material is 2”x10” cedar boards because cedar is naturally rot-resistant and doesn’t need a liner, these boards are VERY expensive. Just one 8 foot 2”x10” board is $76. Eek!
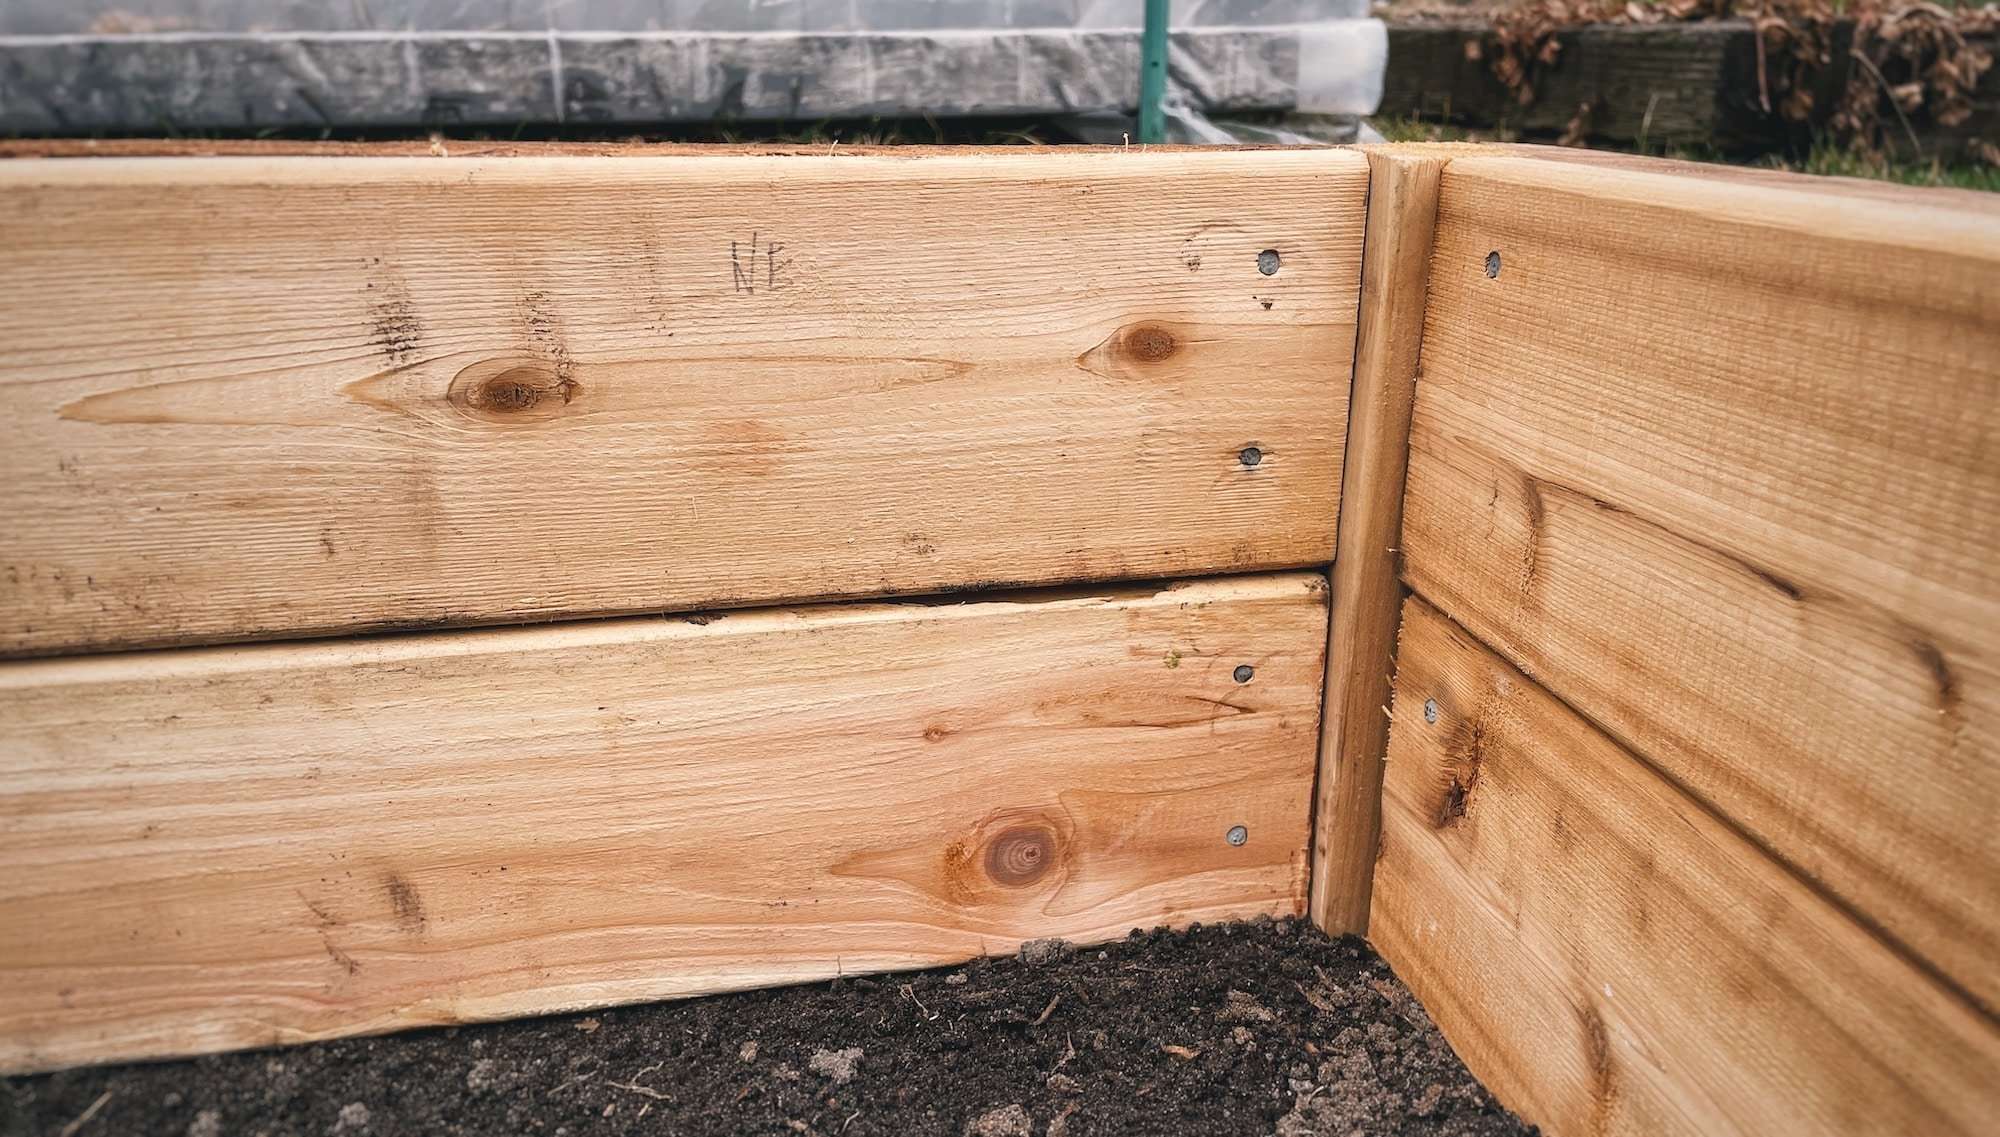
So, my new favorite option is utilizing 2″x10″ cedar-tone, pressure-treated lumber and then lining it with inexpensive, thin, cedar decking! This way, we are utilizing materials that have a long lifespan while keeping the toxins out of your food, AND without breaking the bank! What a deal!
How to Build a 4’x8’ Raised Bed with a Toxin-Free Liner
Here we go! Here’s everything you need to know to make your own raised bed with a toxin-free, cedar lining!
Building materials
- Raised Bed: 3 x CedarTone Pressure Treated Lumber (2” x 10” x 8’) – $17 each
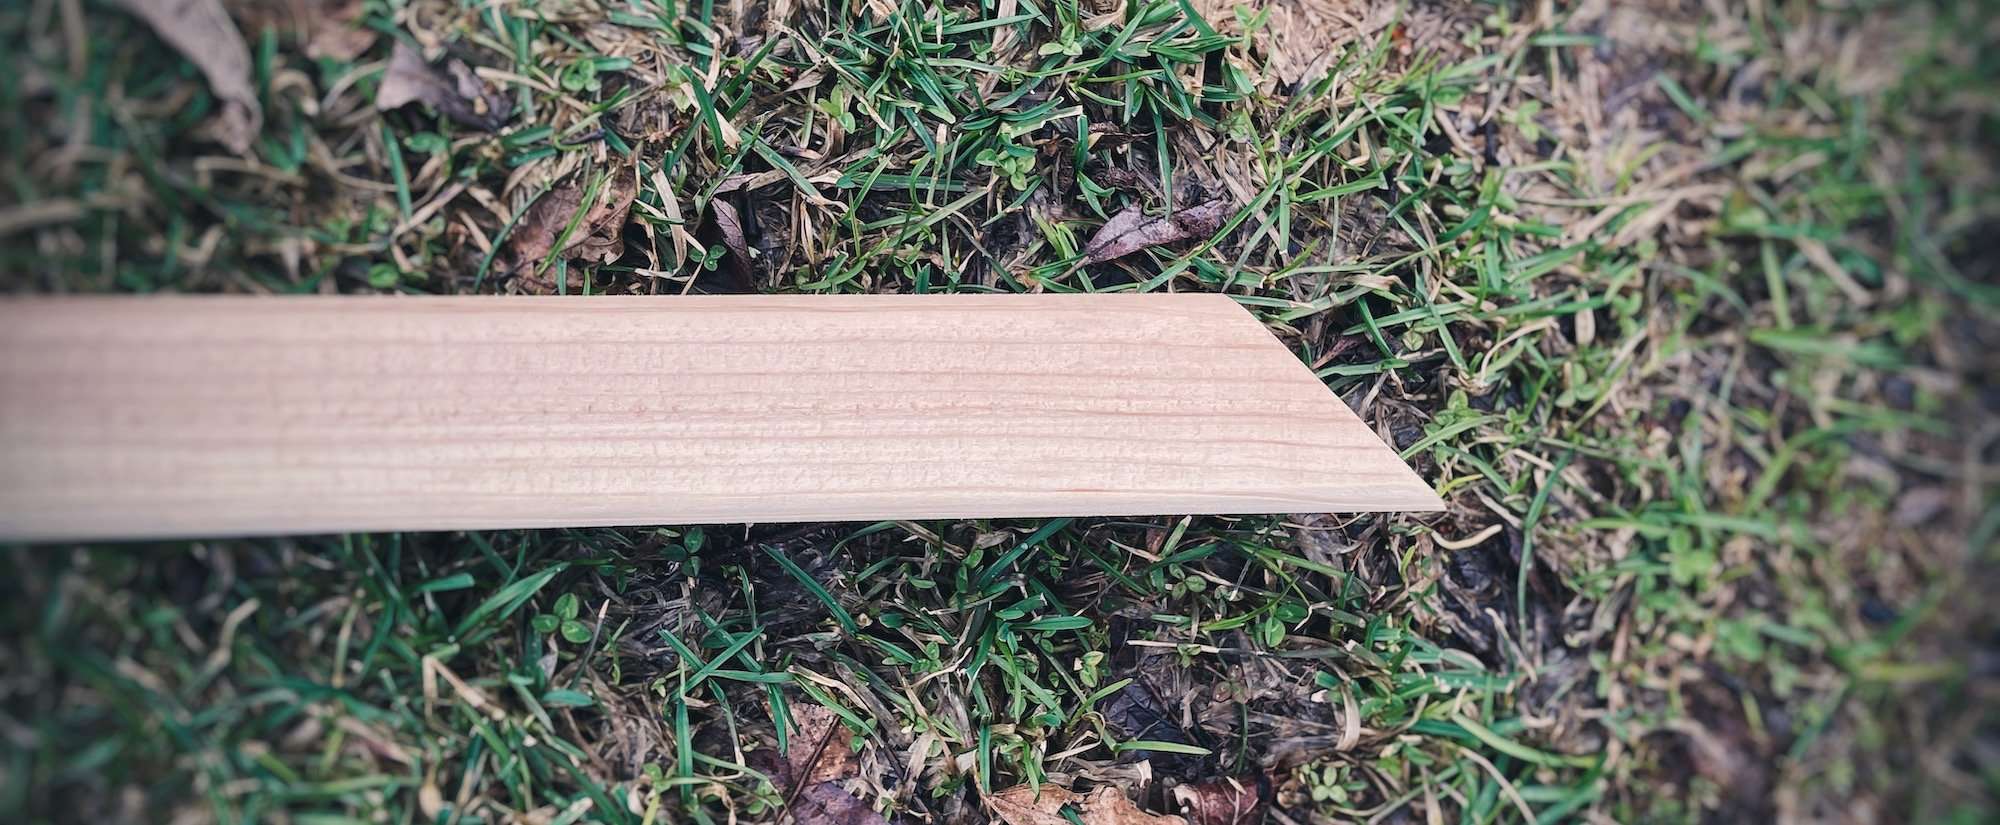
- Raised Bed Liner: 6 x Red Cedar Decking (5/4” x 5” x 8’) – $7 each
- Corner Stakes: 3 x Red Cedar Lumber (2” x 2” x 4’) – $4 each
- Screws for Raised Bed & Stakes: 1 box of 3″ Deck Screws – $9 per box
- Nails for Liner: 1 box of 2″ Galvanized Nails -$5 per box
- Compost and Top Soil: 26 cubic feet (or 1 full yard) in total
Tools
- Shovel
- Rake
- Tape Measure
- Power Drill
- Hammer
- Rubber Mallet (optional)
- Miter Saw (optional – can have lumber cut at building supply store and use a pull saw to cut the cedar decking to fit)
Step-by-step instructions
Step 1: Prepare your materials
Cut 1 piece of CedarTone Pressure Treated Lumber in half so that you have two 4-foot long pieces. Then, cut all 3 of the 2”x2” red cedar lumber pieces in half (at a 45-degree angle) so that you have six 2-foot long pieces with a pointy end.
*If you don’t have a power saw, have your 2×10″ and 2×2″ boards cut at the building supply store. You can use a simple pull saw to cut the cedar decking boards to fit, later.
Step 2: Start building
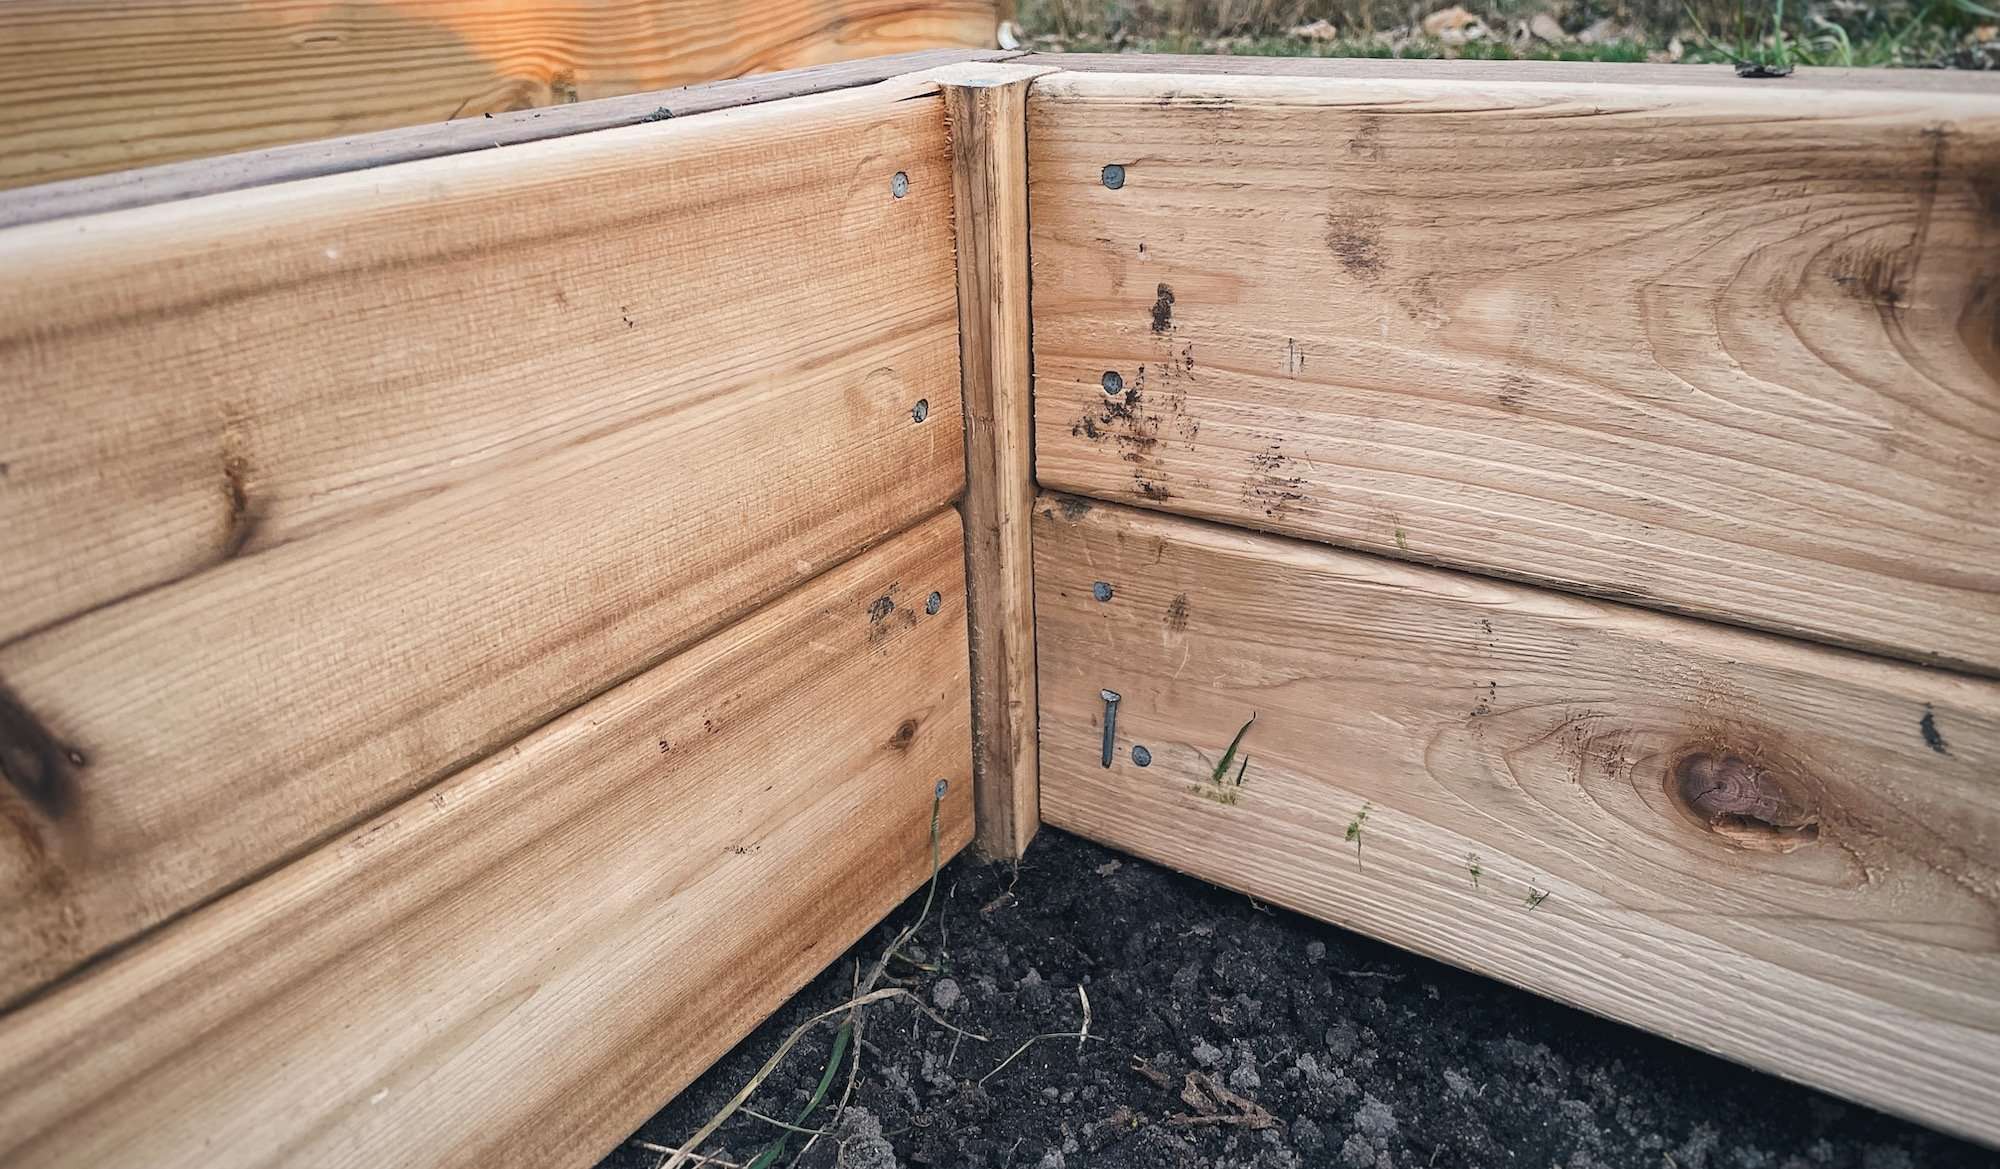
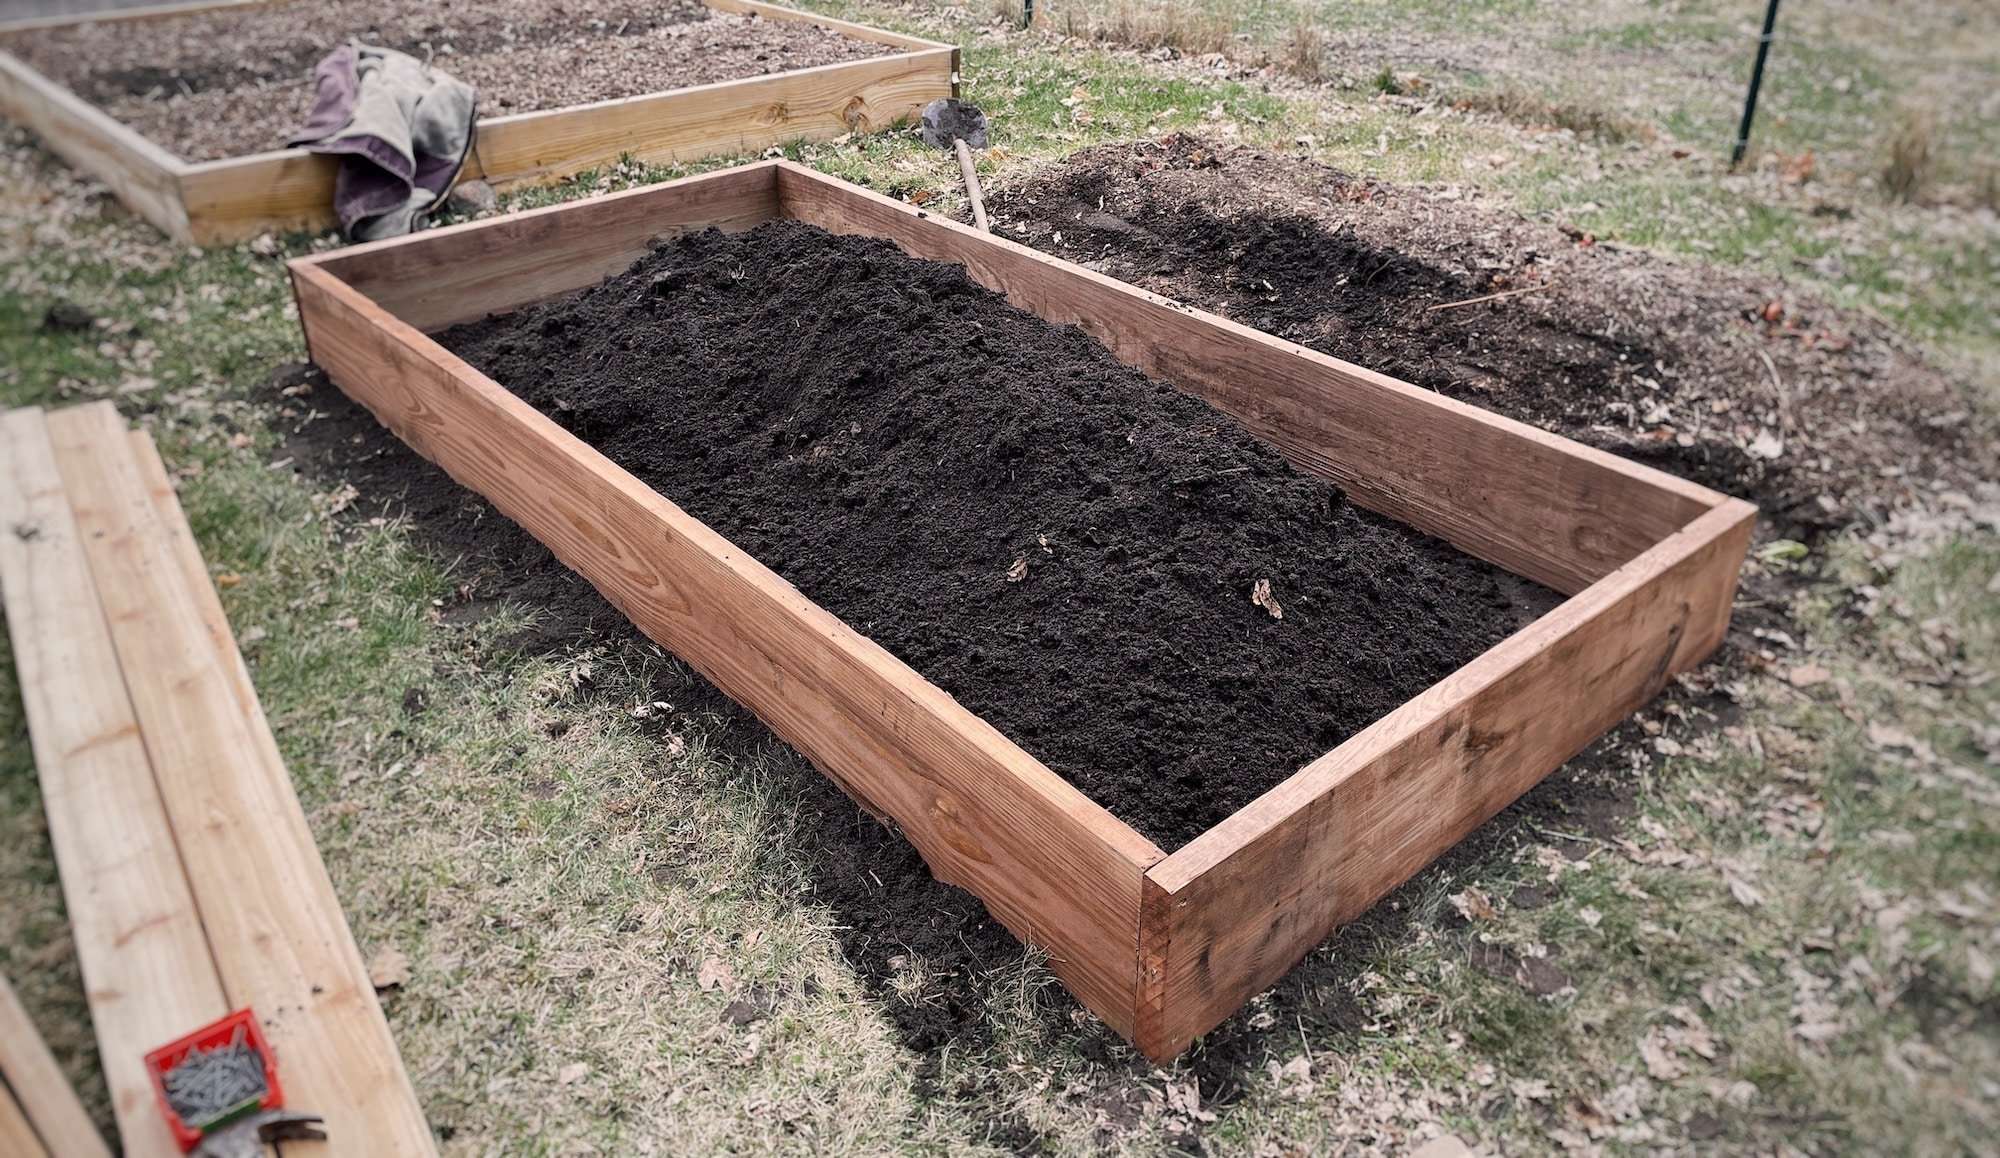
Using a shovel, remove the top layer of sod and place it in a pile. Smooth the newly exposed dirt area with a rake. Set the CedarTone Pressure Treated Lumber pieces into place and screw them together using 5 screws per corner. You may need to pre-drill your holes to prevent the wood from cracking.
Step 3: Finalize placement
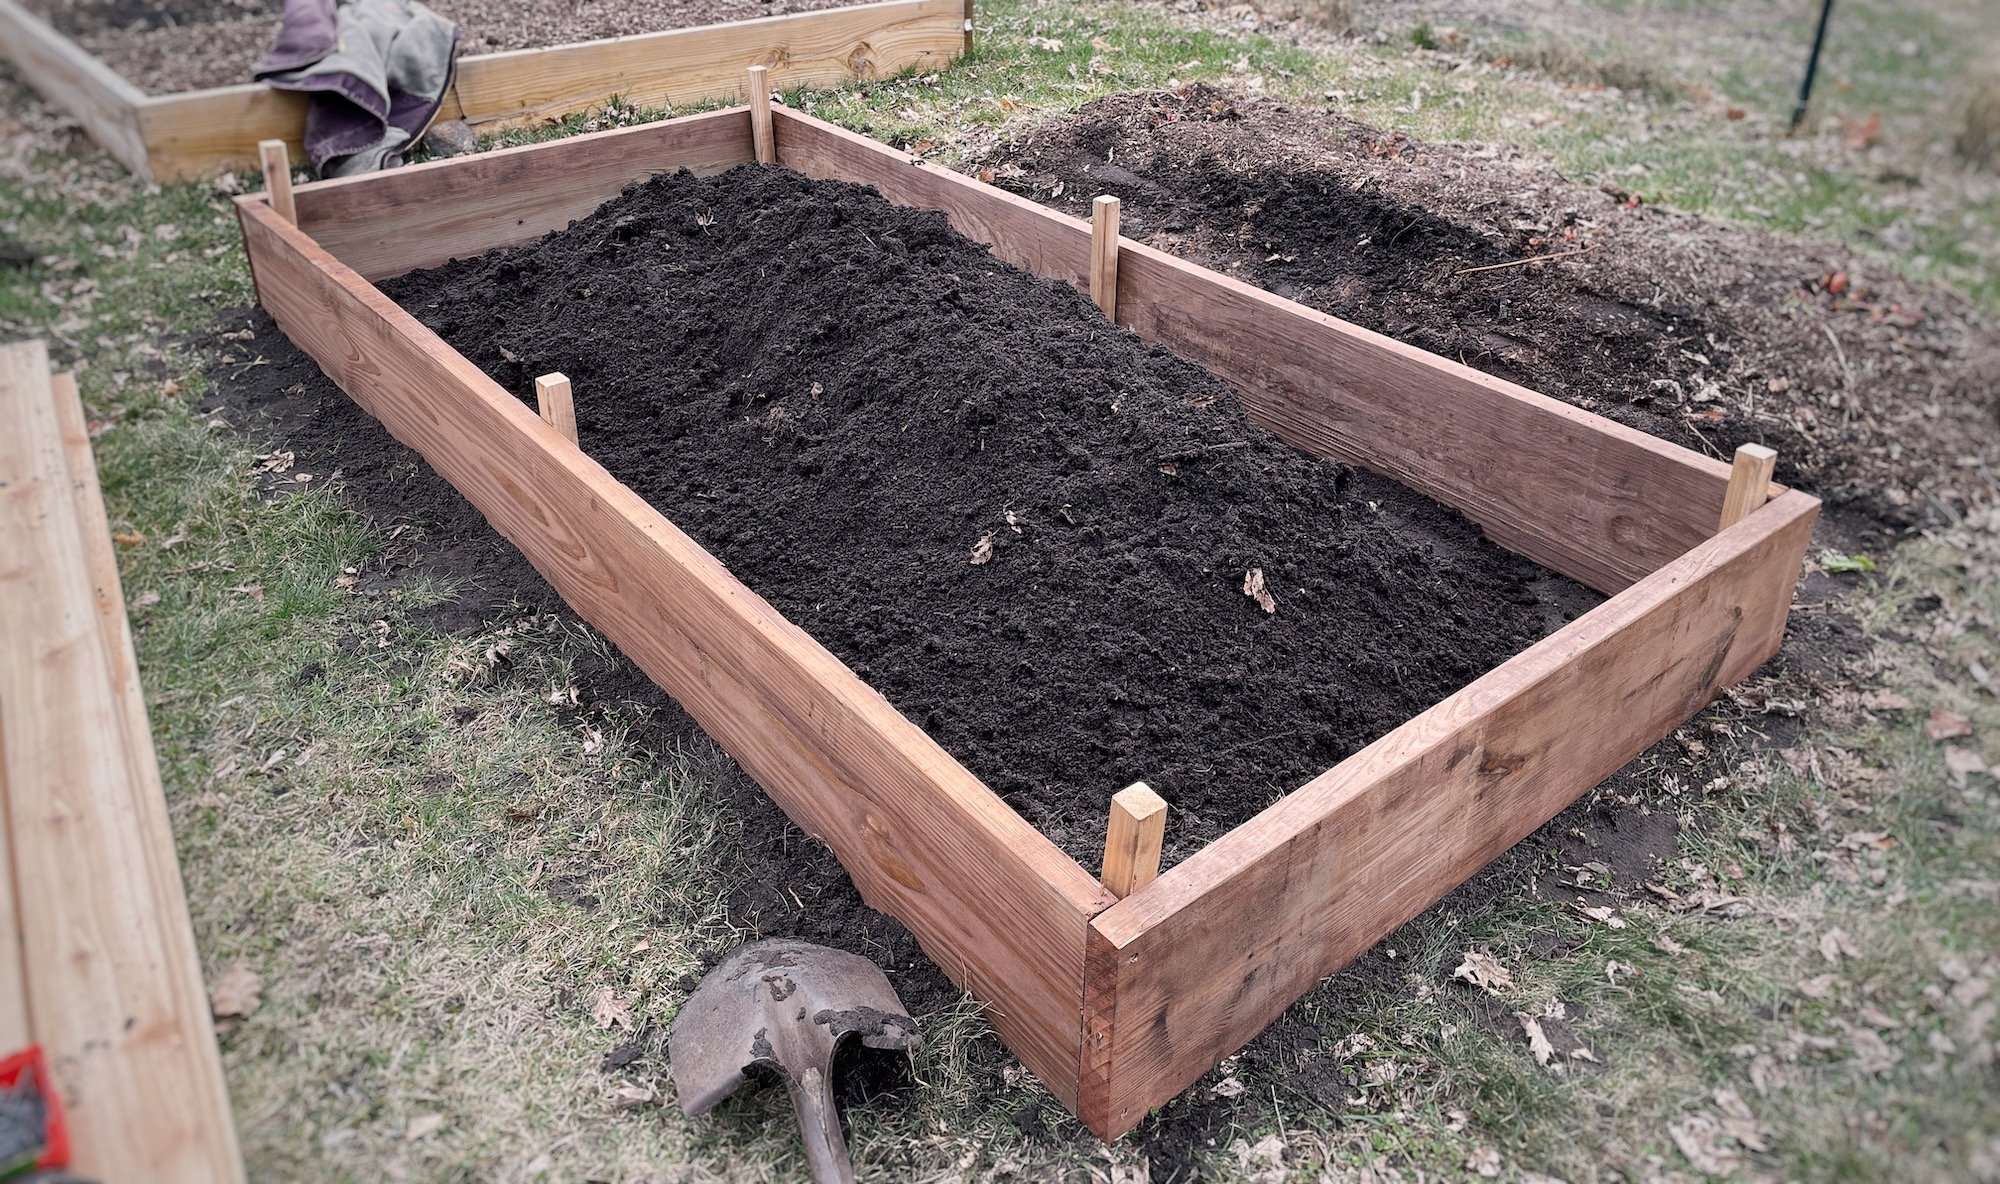
Assess the raised bed placement and adjust it if necessary. Make sure it’s square! Now stake it down by driving one of the angled 2”x2” Red Cedar pieces into each corner using a rubber mallet until the top flat edge is flush with the top edge of the raised bed. Make a mark in the middle of the 8’ long raised bed pieces and drive in 2 more stakes here to provide stability to these long edges.
Continue pounding the stakes in until they are flush with the top of the top of the 2×10 boards. Secure the stakes in place using 3″ deck screws screws for each piece, drilling from the outside in.
*If you don’t have a rubber mallet, place a piece of scrap wood on top of the stake (to protect it), then use a standard hammer to drive it down.
Step 4: Add the cedar lining
Measure the length between each stake and cut your Red Cedar Decking materials accordingly. Since these pieces are only 5” wide, we will cut 2 pieces for each section and stack them vertically to cover the whole inner side of the treated lumber. Secure the cedar boards in place using 2″ galvanized nails.
*TIP: Mark each cedar piece so you remember where they go after they’ve been cut!

Step 5: Fill it up!
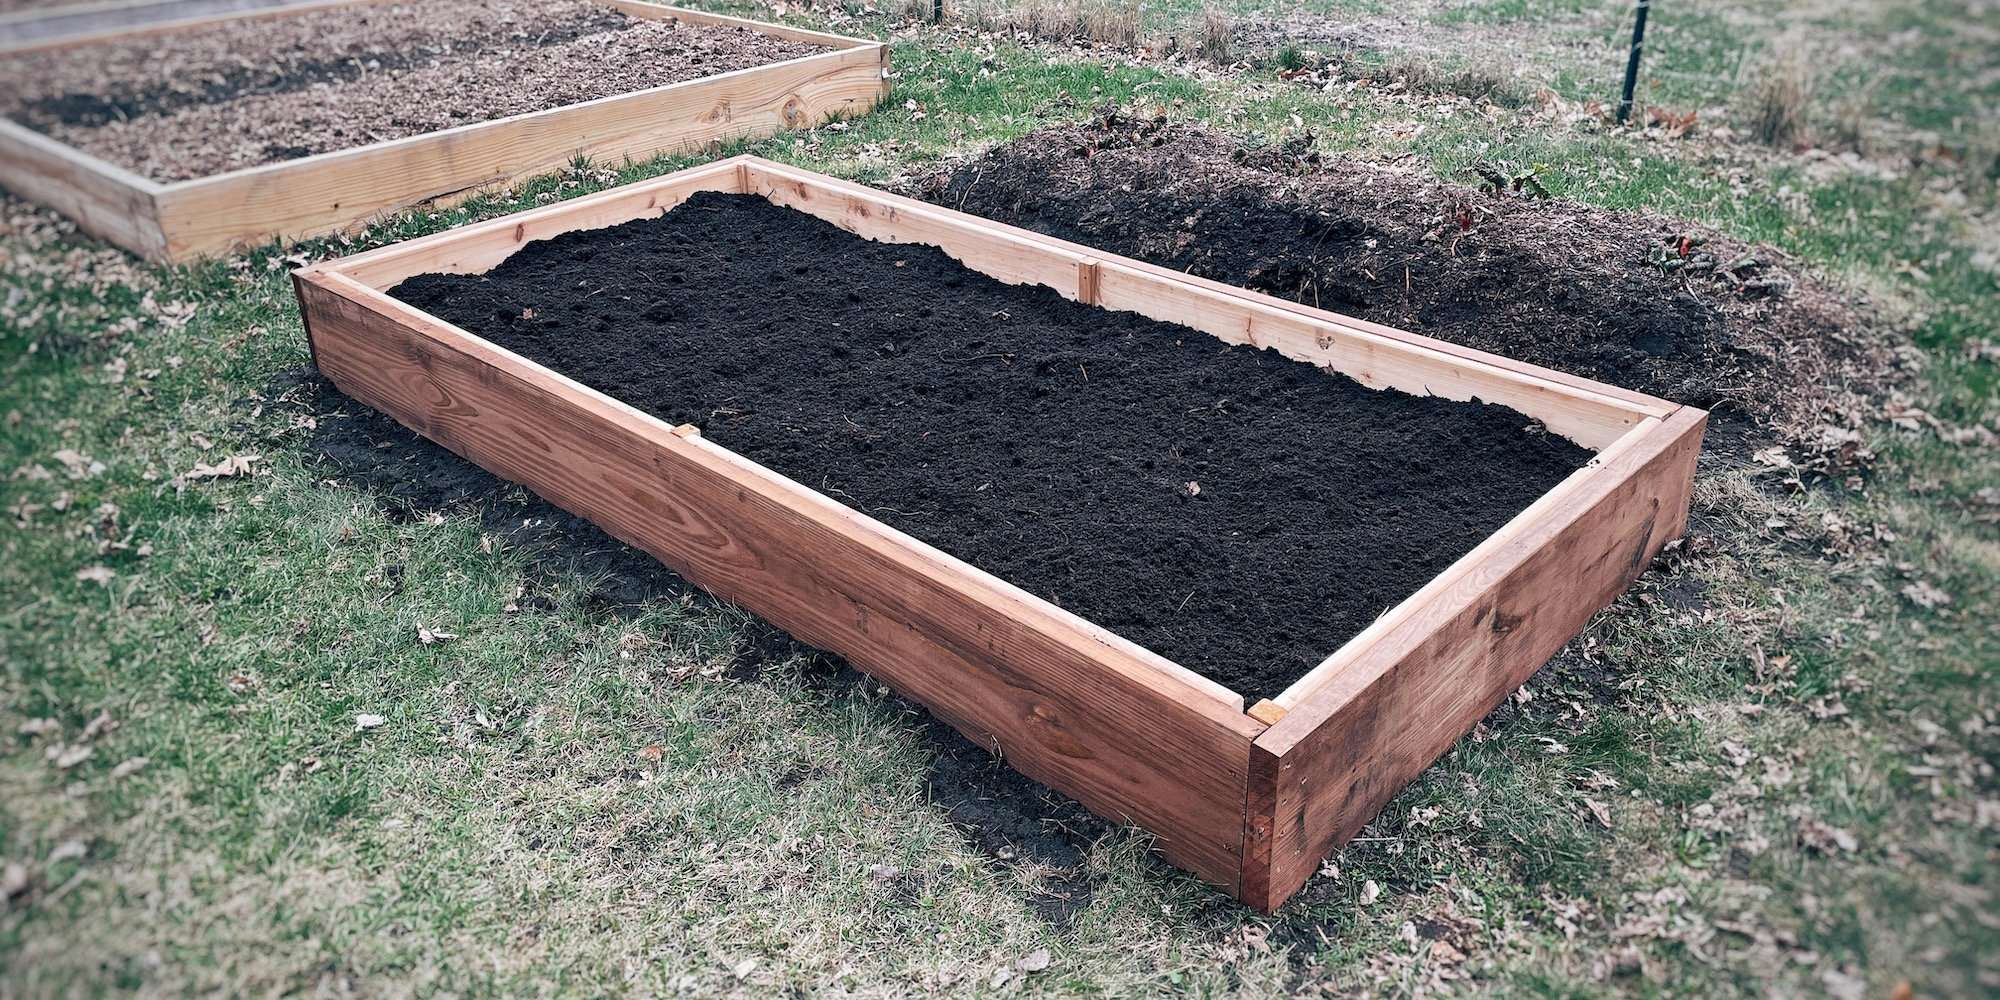
Return the sod upside down to the bottom of the raised bed and break it up with a shovel. Add a 1” layer of compost on top of the sod, then fill with quality topsoil and a bit more compost. Fill the raised bed until it’s 1-2” from the top of the frame. It might settle some overtime and need a few more inches on top.
Total Cost: $119
Yes, there are cheaper raised bed options out there, however, they lack durability and/or toxin-free materials. My design is the best option for combining long-lasting materials that won’t leach chemicals into your food. Plus, this design is also less expensive than other long-lasting, toxin-free materials like true cedar lumber, cinder blocks, or bricks.
This raised bed design with a non-toxic cedar lining is built to last and will save you money and work down the road!
Other Articles You’ll Love
- What is the Best Plastic for a Greenhouse?
- How to Make a Predator-Proof Chicken Tractor
- 5 Winter Tasks Every Gardener Should Do
Final Thoughts
Choosing what to use for raised bed materials is one of the most challenging things, in my opinion. There is no perfect material that’s inexpensive, durable, and non-toxic. Often, you have to sacrifice at least 1 of those, until now!
Using my method of combining durable pressure-treated wood with a natural cedar raised bed liner, you have the best of both worlds! Plus, both materials are easily obtainable and fairly inexpensive compared to other options out there.


Hi, Hoping to do this myself but the links to the cedar decking are dead. Do you have another source?
Shoot! Looks like they only carry it in this size now: https://www.menards.com/main/building-materials/lumber-boards/cedar-wood-products/cedar-boards-decking-lumber-timbers/5-4-x-6-red-cedar-decking/1072642/p-1444422319232-c-5674.htm?exp=false
You could rip it down to size
I’m not convinced you won’t have some leaching of those chemicals- possibly through the cedar decking lining and definitely into the ground around and underneath the bed, from the unlined edge that sits on the ground.
I think a better idea would be to line the untreated boards with the cedar decking, to help slow the rotting.
Another idea- something I have been thinking of trying, would be to place cedar or cypress wood chips around the perimeter of the beds and the soil in the center. Bed boards always seem to rot from the inside bottom edges, where it stays more consistently wet, so thinking that would be worth a try. Or gravel/ small river rocks, etc.
I saw a video of a farmer who made raised beds with cattle panels lined with hardware cloth, formed into circles. Then, he filled by placing a few inches of wood chips on the inner perimeter, compost and soil in center, and continuing up, filling in layers that way.
Thanks for this option! I recently picked up a free raised bed and later noticed that it’s marked as treated with methyl bromide 😳 still not sure if I’m comfortable using it to grow food but I’m happy to have a non-plastic option for lining it if I do decide to
Oh no! Yes, I’d definitely consider adding a cedar lining.
Hey great article. What would be a good option for the bottom of elevated cedar planters?
We have elevated cedar planters and the bottom slats are spaced 1/4 inch apart so soil will obviously fall through. Any ideas to keep it non toxic?
You still want some drainage, so you don’t want to plug the holes completely, but you could try a thin layer of 1/2″ pebbles or fine wire mesh.
We have more raised garden beds to build this summer. I’m totally doing it this way!! We are dealing with invasive morning glory getting into our garden beds. What do you recommend to put on the bottom of the bed? We put down 2 layers of cardboard last year when we built the beds, but the morning glory came right through. Any suggestions or recommendations when it comes to morning glory? Thanks!!
Wow! I’ve never dealt with anything THAT invasive before! I would have thought that 2 layers of cardboard would be sufficient. I’d hate to put down a permanent barrier because then you’ll isolate your soil environment from the earth (microbiome, worms, etc.), but maybe that’s your only option at this point?
Hi Katie!
This is an awesome article and so helpful! I bought a raised bed on wheels and then started thinking about the liner and started googling organic fabric liner – but then realized the chemicals would leach through that too… gonna try the cedar decking for the sides AND the bottom I suppose… unless you have any other suggestions for the bottom so it drains while still insulating for temperature variation?
Thanks so much for any thoughts! 🙂
I’m glad this was helpful and yes, totally agree with picking cedar over fabric/plastic liners. For the bottom, I would use cedar boards that are less wide (or rip them in half or into thirds) so that you can have some space inbetween to allow for drainage.
Sounds great and I was already pricing everything up, but then I thought…
Given that both sets of planks will soak up moisture, how do you stop the chemicals from the treated wood simply leaching into the non-treated wood? Or am I missing something?
Thanks for your insights!
I’d say it’s pretty unlikely that the chemicals would leach entirely through the cedar board into the garden soil. Possibly, but I think the risk is pretty low.
Great article! One question, unless missed it. How does draining occur? Do i have to drill holes and fill with some stone before I put the topsoil in?
The raised bed shouldn’t have anything on the bottom of it, so it will freely drain 🙂
Hi Katie,
Thank you so much for this non-toxic tutorial, it is just what I need! I will be building my raised beds on a large concrete patio – any recommendations for a base liner so that my soil is not directly on the concrete? 🙂
Mara
Mara – I’m doing the same this year – what did you figure out for your raised bed on concrete? Thanks so much!
This post is perfect timing – I’m just about to start planting some veggies and need to build raised boxes first. Thanks for the tips and the great photos.
I’m so glad to hear it! Best of luck!
What amazing information!! I’m pinning this so I can come back to build my own bed like this!
I’m so glad to hear it! You’ll be very happy with this design! 🙂
Very informative. I never thought that certain materials used in raised bed gardening can potentially leach toxins into the crops grown. Thanks for sharing.
Yes, chemicals seem to be everywhere these days… and I definitely don’t want them in my food!
This is great! I’ve been wanting to do raised beds again. I see a weekend project in my near future! Thank you for sharing.
Raised beds are so great! I love how easy they are to build and work in. Have fun!
Beautiful raised beds. I used repurposed Trex decking. It’s a plastic composite and it will never deteriorate. Anyhow, not everyone has access to that. I was lucky enough to salvage mine when someone replaced their deck.
Moving on to our new property, I went with concrete blocks on my new beds. You are spot on with the cost of lumber (but it’s not that high where I live, but, in all fairness, I live in western Washington state, in the heart of the timber industry…but we have seen prices soar, for sure, but not that high). I bought concrete blocks for around $1.50 each. They are 8x8x16. When I’m finished, I’ll have plunked down roughly $200 for them, but I have a 2×16 foot bed and I’ll have a 12-inch x 75 foot bed to grow beans in and I’ll have 2 other shorter beds for them, too. I’m planting out close to 100 varieties this year.
Anyhow, I enjoyed reading your perspective on what constitutes a good garden bed. I’m always open to reading new ideas.
You really hit the jackpot on materials – I’m jealous! Thanks for sharing some awesome alternatives. I love hearing everyone’s methods!
Great post! I am getting raised garden beds for our yard. But I just may make them see that it is easier & cheaper from your post. Thanks for sharing 😉
Raised beds are so great to work in – you’ll love them!
Great post and your pictures are really beautiful and make it easy to see what you’re talking about.
Thank you so much! I’m all about the visuals 🙂
Those are some GREAT looking beds! Cedar lining is all you do? That’s interesting! I love it, though!!
Yep! Easy peasy and I won’t have to touch them for 10+ years!
Love this post! Thank you for the helpful tips. 😊
You’re welcome!