
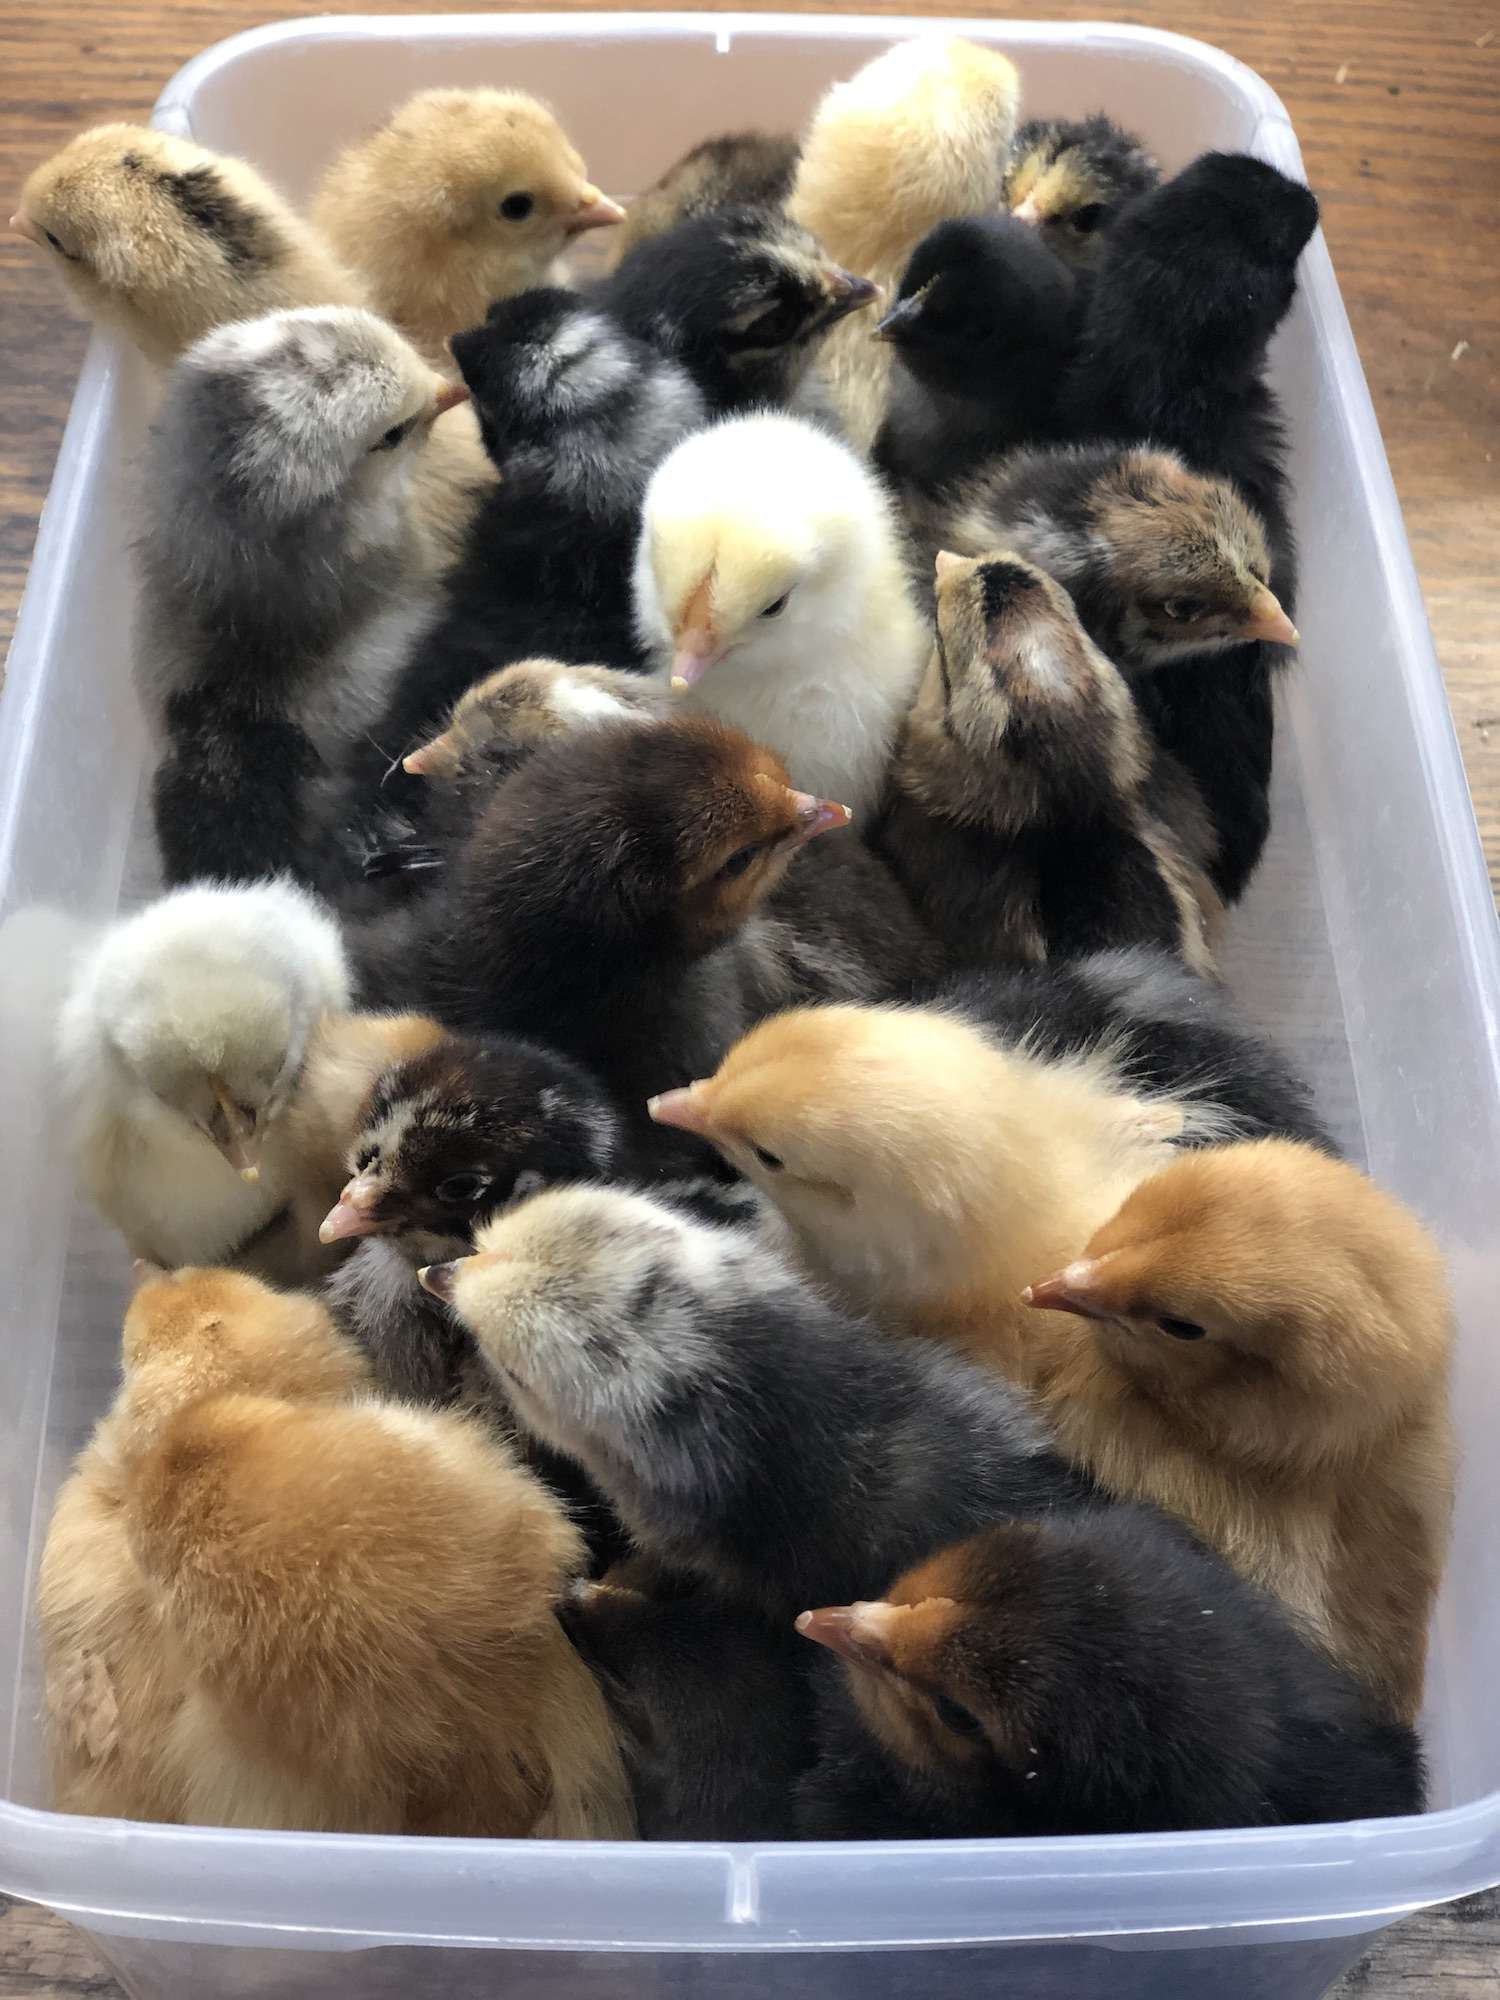
Hatching chicken eggs is such a fun and rewarding experience. However, it can also be stressful! There’s nothing more heartbreaking than waiting a full 21 days only to experience a failed hatch. Believe me, I’ve been there!
I’ve hatched hundreds of chicks over the years and in this article, I’m going to share all of my best tips when it comes to hatching chicken eggs. Follow my key steps and you’ll have happy, healthy chicks peeping in the incubator before you know it!
Let’s jump in!
*Disclosure: This post may contain affiliate links to products (including Amazon). I’ll earn a small commission if you make a purchase through my link, at no additional cost to you! Regardless, I only link to products that I personally use on our homestead or believe in.
Supplies for Hatching Chicken Eggs
The first step for hatching chicken eggs is to make sure that you have all of the essential supplies. Thankfully, hatching is pretty straightforward and doesn’t require much!
Hatching Eggs
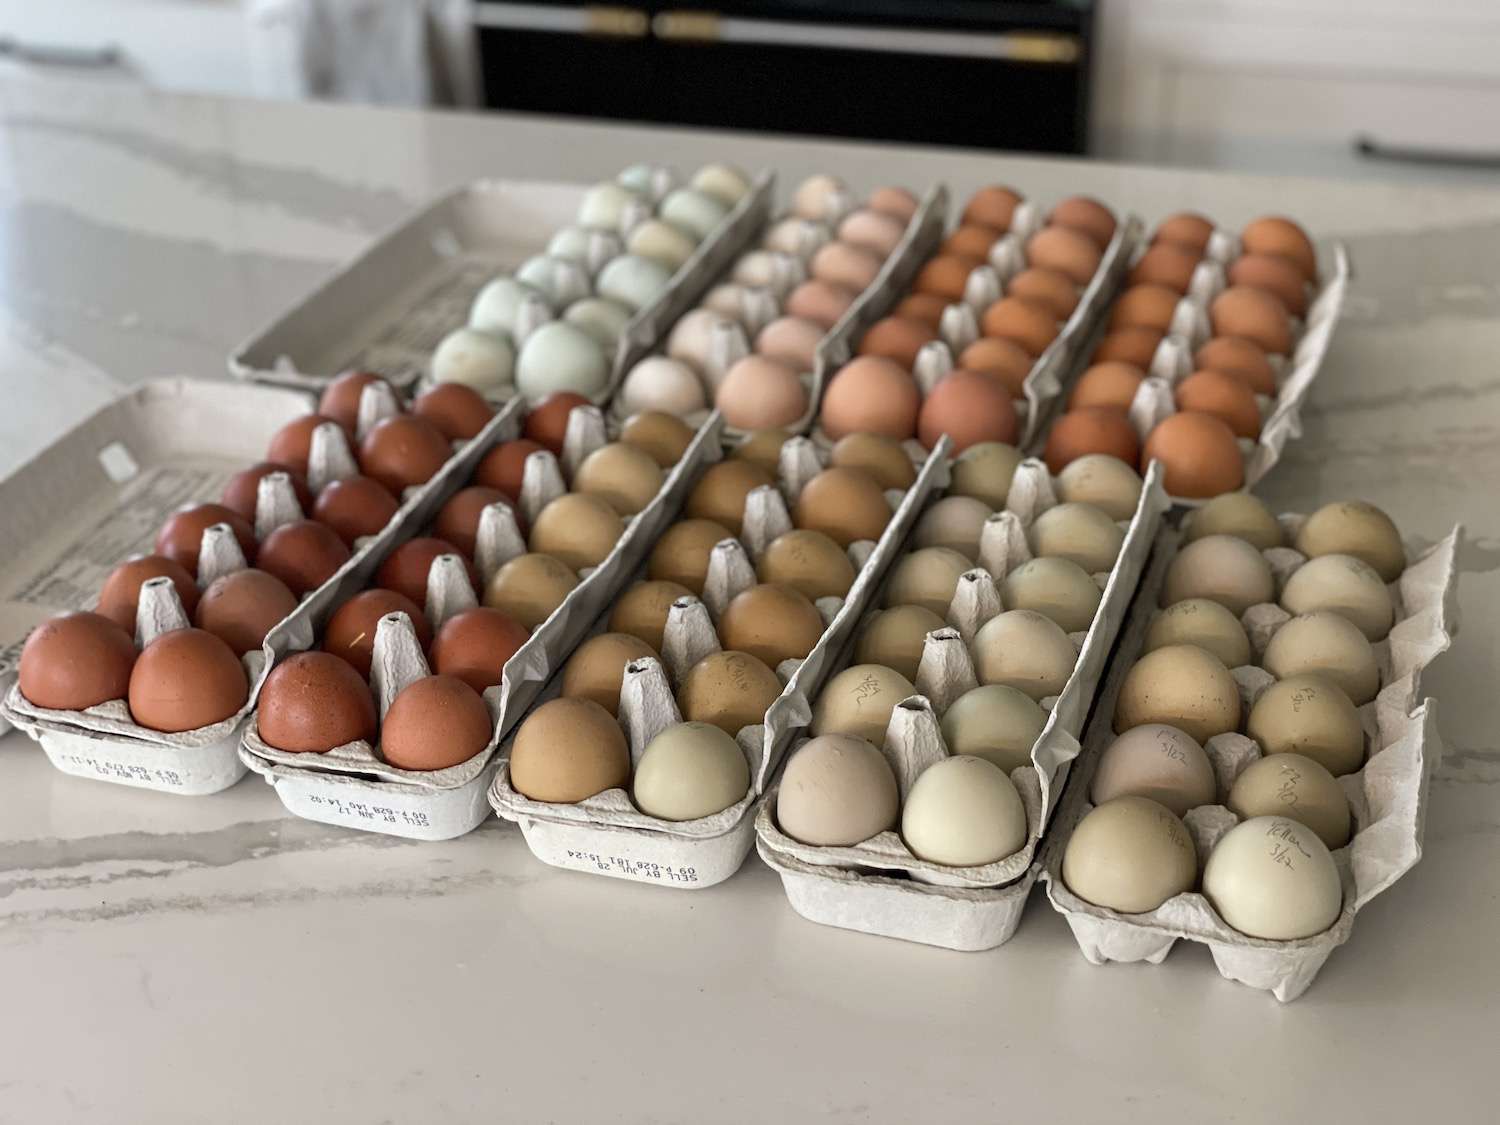
If you want to incubate and hatch some baby chicks, then you’re going to need viable, fertile eggs. You can’t use the eggs from the grocery store!
What makes eggs viable for hatching?
- Fertile – There needs to be a rooster around to fertilize those eggs!
- Fresh – Eggs should be 0-7 days old, ideally (up to 10 days old is acceptable)
- Temperature – Eggs should be stored at 55 degrees (then brought up to room temperature just before loading the incubator)
- Handling – The eggs should be stored with the large end up and tilted from one side to the other twice daily to keep the yolk from sticking to the inside of the eggshell
As you can see, grocery store eggs don’t meet any of these requirements and should not be used.
Where to find hatching eggs?
- Hatcheries
- Local breeders – look for ones that are NPIP certified
- Neighbors who have a rooster
- Facebook chicken groups
Incubator
When it comes to incubators, you really do get what you pay for. I recommend going for the nicest model that you can afford because it will save you a headache during the incubation process and a heartache later.
Features to look for in an incubator:
- Forced-air
- Automated temperature control
- Automated humidity control
- Digital display
- Egg turner
- Alarm
- Ideal capacity for your needs
- Ease of cleaning
- Viewing window
To see a detailed list of my favorite egg incubators on the market, check out my article The 8 Best Egg Incubators! I’m confident that you’ll find one there that fits your needs. However, these two are by far the most popular:
The Homesteading RD's Product Picks | |

| The Manna Pro Nurture Right 360 Incubator is a great budget pick if you want to hatch a decent number of eggs (it fits 22). It is fully automatic, with the exception of humidity control. You’ll need to manually add water yourself to keep it consistent. |
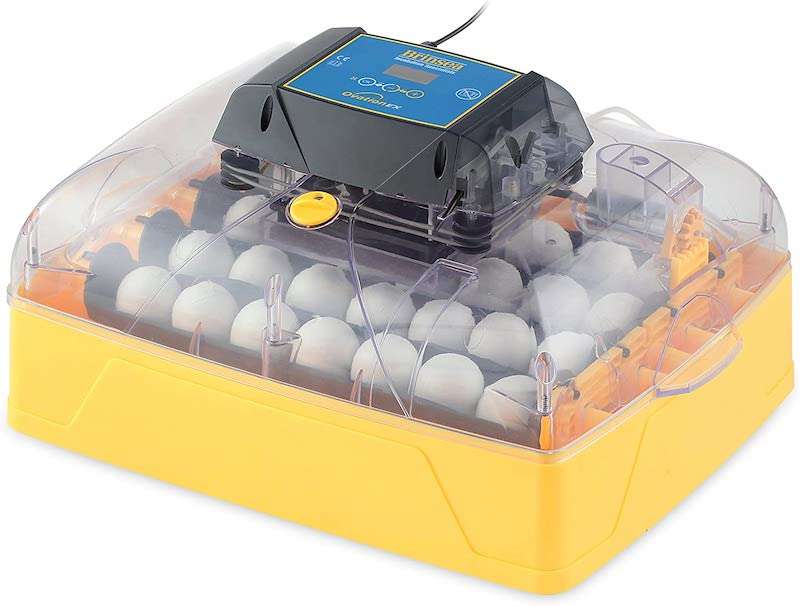
| Brinsea is the best incubator brand out there and is incredibly precise. It is fully automatic (including humidity) so it’s a true “set it and forget it” kind of incubator. All of the pieces come apart for easy cleaning and it has a big viewing window. |
External thermometer and hydrometer
If you read any part of this article, make sure you read this part!!! One of the main reasons I see hatches fail is that the user puts too much trust into the incubator. Yes, it might state 99.5 degrees on the digital display, but is it really 99.5 degrees in there?
Most of the time, it’s off a bit. The same goes for humidity. I highly, highly recommend placing several external thermometers and hydrometers in your incubator to cross-check before adding eggs.
If your incubator is actually running a bit high or low, don’t worry, just adjust the settings until your supplemental thermometers and hydrometers are reading properly.
*TIP: Make sure that the thermometer is reading at “egg height” (the top surface of the egg).
The Homesteading RD's Product Picks | |
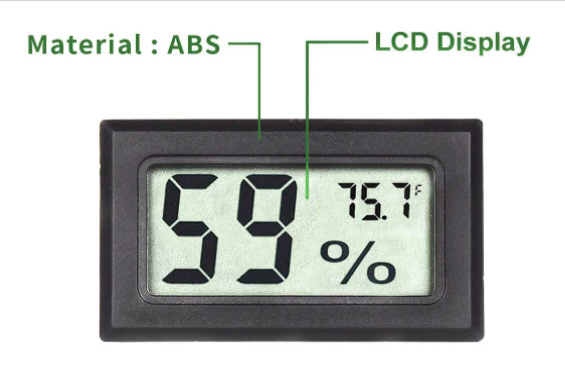
| I love these things! They are cheap and easy to throw into the incubator. They aren't super percise, so I always use 2-3 and take an average to be sure. |
Egg Candler
This tool isn’t absolutely necessary, but it’s very useful while making incubating fun and educational. An egg candler works by illuminating the inside of a developing egg.
Benefits of using an egg candler:
- Monitor for non-developing eggs (also called “clears”) or eggs that have stopped developing, so you can remove them – you don’t want rotten eggs exploding in there!
- Monitor the egg air cells so you can adjust the humidity settings, if needed
- Enjoy watching your babies develop 🙂
The Homesteading RD's Product Picks | |
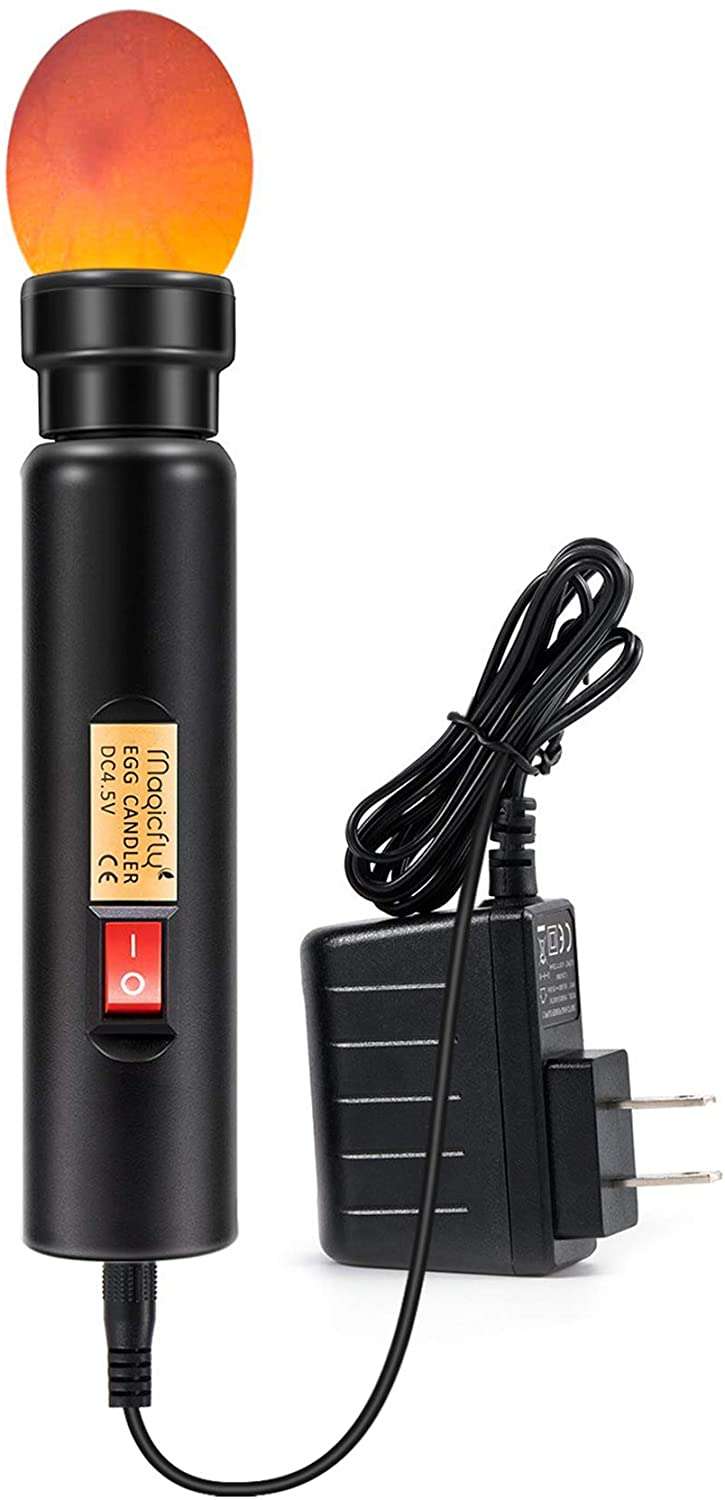
| This it the BEST egg candler on the market and is worth every penny! Take the guesswork out of incubating by using an egg candler, and have fun watching your chicks grow! |
Hatching Chicken Eggs: How-To
Woo hoo! So you have your incubator set up and calibrated, and your fertile eggs secured. Let’s chat about the best steps to hatching chicken eggs so you can be successful.
Temperature goals
Getting the temperature just right is absolutely critical. Even a 1-degree difference can impact your hatch!
Why temperature matters in incubation:
- If the temperature runs 1 degree high, then you’ll have an early hatch with chicks prone to splayed legs and trouble walking
- If temperature runs 1 degree low, then you’ll have a late hatch with chicks prone to crooked toes, thin legs, and unhealed navels
Temperature goals during incubation:
- Still-air incubator: 102 degrees (measured at the top of the eggs)
- Forced-air incubator: 99.5 degrees (measured at the top of the eggs)
Make sure that you have several additional thermometers placed in your incubator (at egg height) to confirm that the built-in thermometer of your incubator is reading true. Place them in different spots to ensure that the temperature is evenly distributed as well.
*TIP: Always defer to your incubator’s operating manual if they recommend a different temperature goal.
Humidity goals
It’s important to provide ideal humidity conditions throughout the incubation period. It will affect air cell development and how much moisture evaporates from the egg. The egg will actually lose 12-14% of its weight as the chick develops!
Why humidity matters in incubation:
- If humidity runs too high, then the egg doesn’t lose enough moisture resulting in large, mushy chicks that can drown at hatching time.
- If humidity runs too low, then the egg loses too much moisture resulting in dry, “shrink-wrapped” chicks that fail to hatch.
Humidity goals during incubation:
- Day 0-17: 35-40% (I use 40% for standard eggs and 35% for heavily tinted eggs)
- Day 18-21: 65-70% – this higher humidity level allows the chick to rotate freely and position for the hatch. You may need to add extra wet sponges to achieve this high level.
*You’ll see that my humidity goals are lower than you’ll find in most incubation manuals. I’ve found out over many heartbreaking hatches, that the recommended 55-60% is much too high. Plus, you can save a shrink-wrapped chick. You can’t save a drown one.
*Don’t forget your additional hydrometers to cross-check!
A great way to monitor whether you’re on track or not is by watching the air cells with your egg candler. If your air cells are too big, increase the humidity and if they are too small, decrease the humidity.
![]()
Humidity is one of the hardest things to get right, in my opinion. Most incubators on the market require you to manually add water to channels built into the bottom of the incubator. Not only is this easy to forget about and makes travel impossible, but it’s not very adjustable either.
Using an incubator that automatically manages humidity for you is worth the extra cost. I’ve even gone on international vacations while my automatic incubators were running and could relax knowing they were taking care of it all for me.
I’ve found my hatch successes to vary even by adjusting the humidity by even 3-5%! You’d never be able to achieve that precision with manual adjustments.
*TIP: Thankfully, the success of the hatch weighs more heavily on overall humidity throughout the incubation period and occasional spikes aren’t a big deal.
Egg Turning
A hen naturally adjusts and rotates her eggs with her beak throughout the day. This movement allows the yolk to remain centered and free-floating, rather than sticking to the shell. It’s important to mimic this behavior in the incubator as well.
Methods:
- Automatic egg turning – most modern incubators today feature an automatic egg turner, which is so great and will save you a lot of time (let alone accidental egg trauma, and disruption of the incubator humidity levels)
- Manual egg turning – if you don’t have an automatic turner, you’ll need to do it by hand. Mark an “X” on one side and an “O” on the other side of the egg and flip between the two.
Timing:
- Day 0-17: Turn the eggs 3 times per day if doing it by hand. Automatic turners might rotate them as much as hourly, which is okay because it’s gentle and the incubator lid is not removed.
- Days 18-21: Stop manually turning the eggs or turn off the automatic turner. If you can remove the turning device from the incubator, do that as well. The chicks are orienting themselves for the hatch at this time and shouldn’t be jostled!
Loading the incubator
Now that we have the incubation basics (temperature, humidity, and turning) covered, let’s get started!
Turn on your incubator and let it run for at least 24 hours before putting in the eggs. If the eggs are at 55 degrees, let them gradually come up to room temperature during this time as well.
Then, place your eggs in the incubator, with the large end up. This is important because it will keep the air cell suspended where it needs to be for proper development. If your incubator design has the eggs laying on a flat surface, that’s okay too. They’ll naturally tip downward.
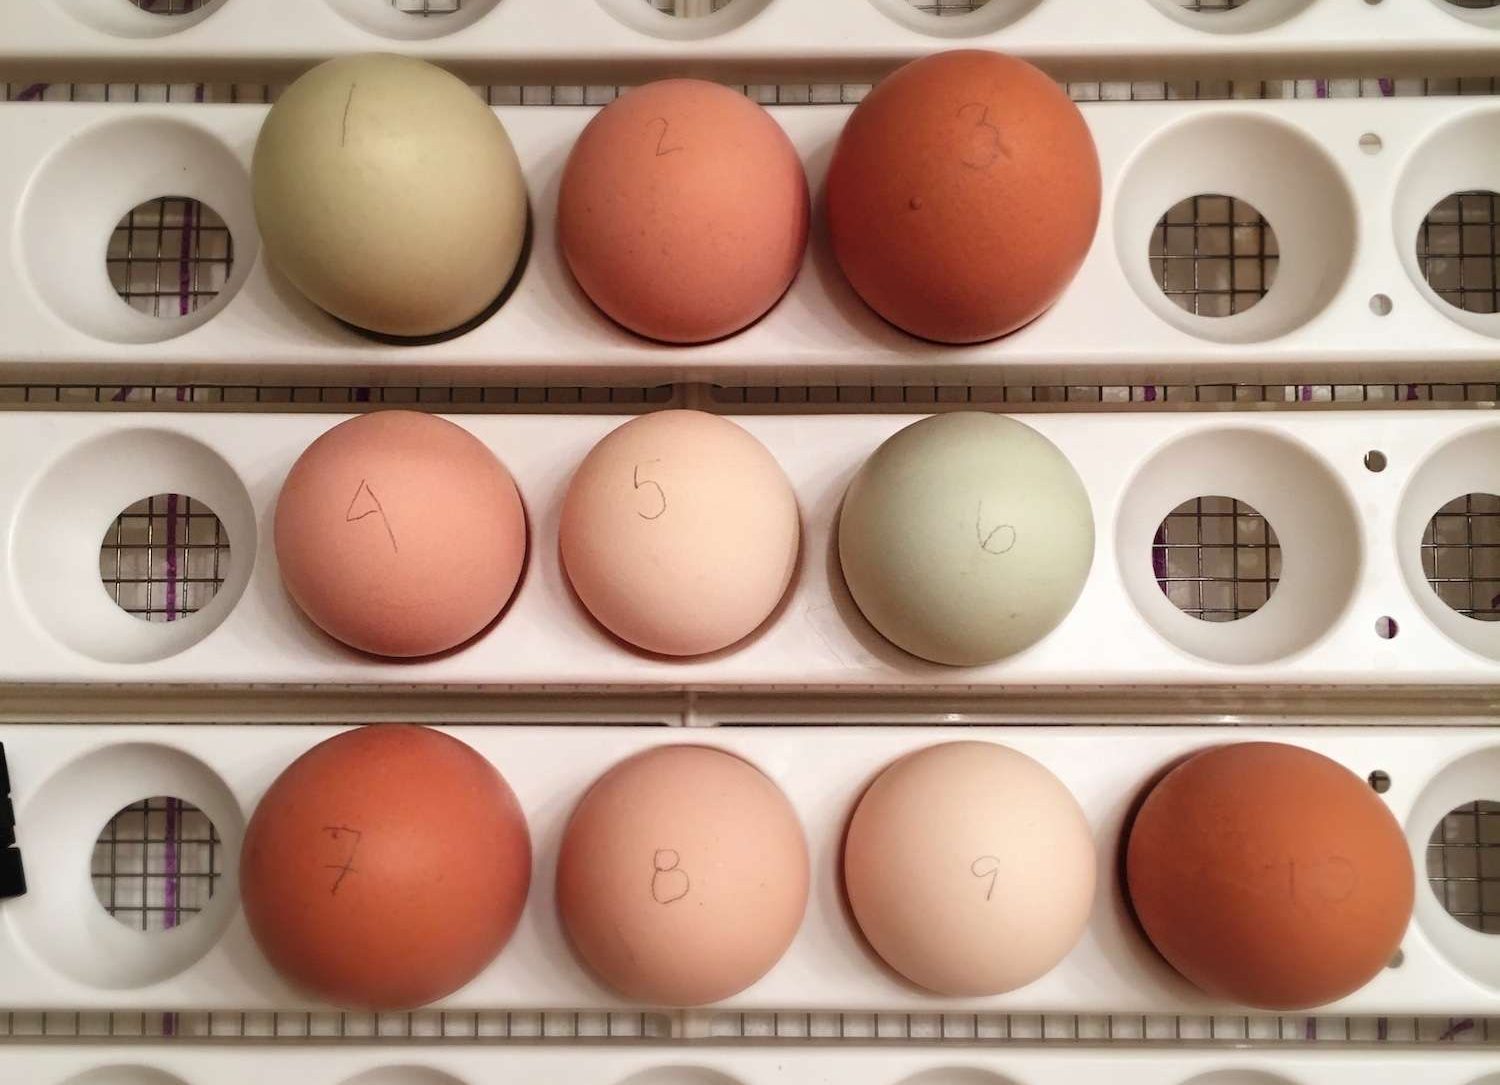
Lastly, I like to number my eggs with a pencil, so I can track each one on a spreadsheet. You can get your own copy of my Incubation Tracker on Etsy or go for the full Ultimate Chicken Planner!! I highly recommend it!
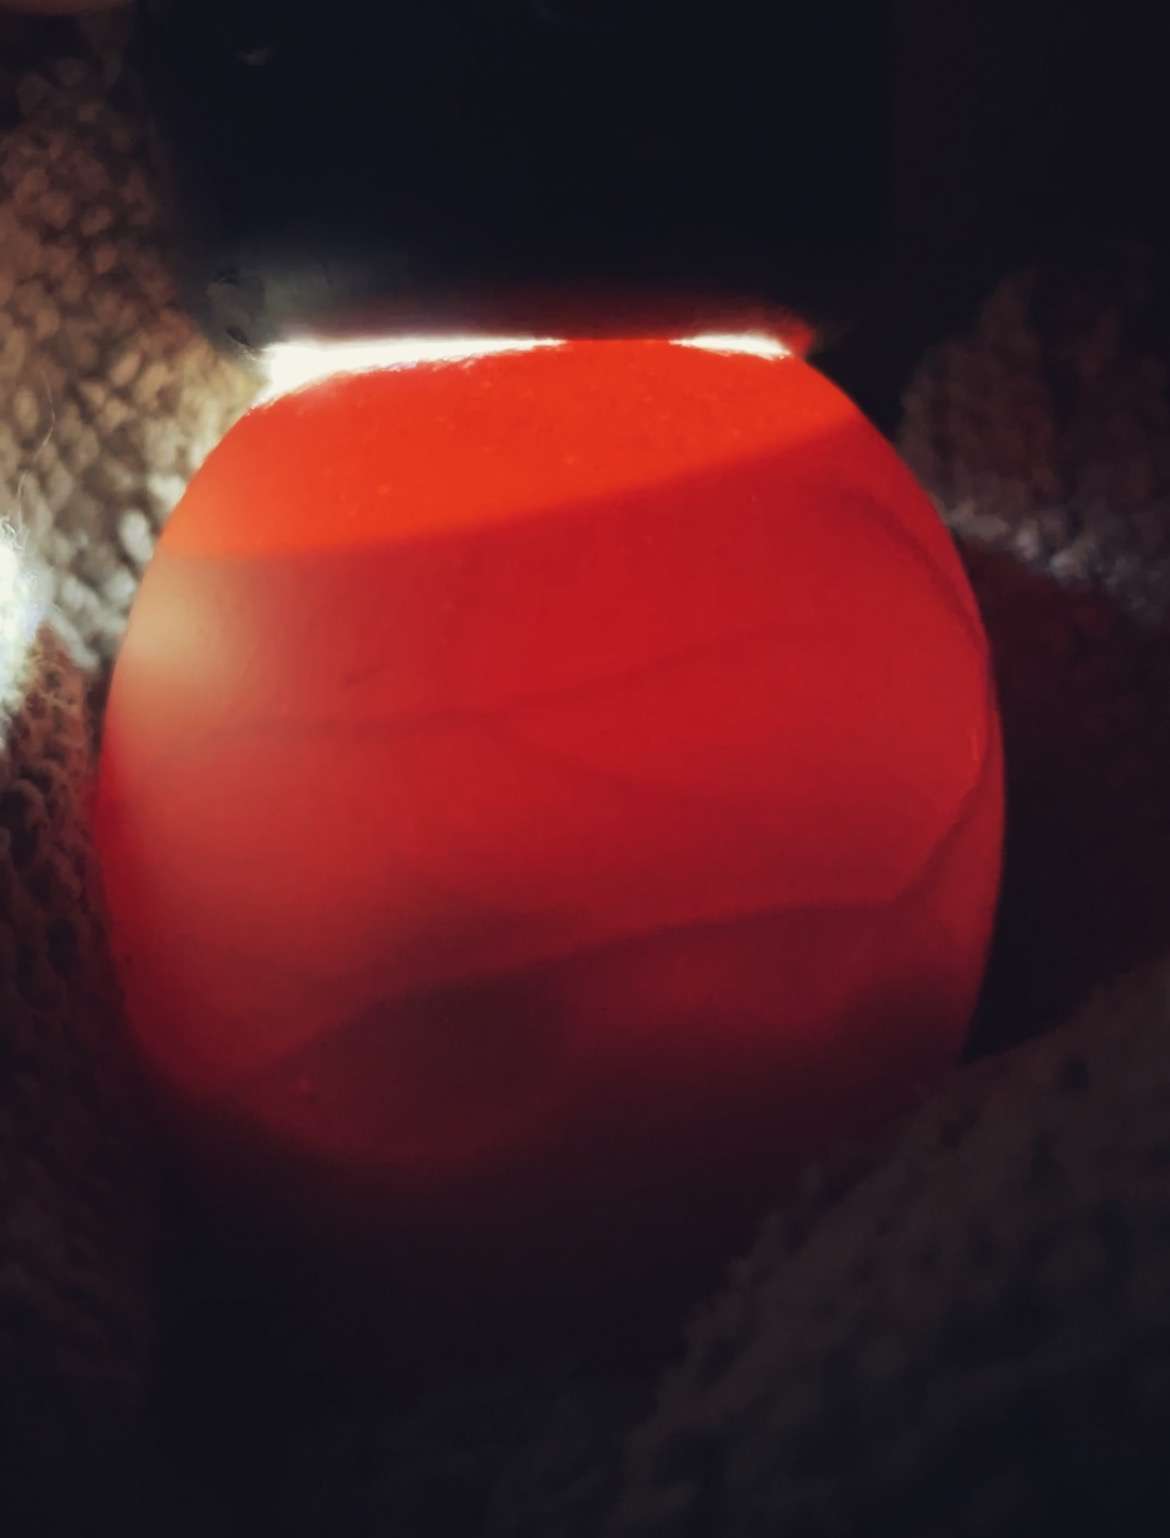
Egg Candling
Candling is the process of using a device to illuminate an egg to monitor chick and air cell development. Some people candle as frequently as days 7, 14, and 18. However, I’ve found that day 10 and 18 is the most useful and results in the best hatch.
When the embryos are developing in the early stages (days 0-7), they are incredibly delicate. Any jostling can result in a loss, plus it can be hard to see development in darker eggs this early anyway. So skip day 7!
For an in-depth look, check out my article: Candling Chicken Eggs: Day-By-Day Development!
What to look for when candling:
- Clear eggs (ones with zero development) – remove these
- Blood rings (dead embryo) – remove these
- Murkey contents that jiggle or slosh about (dead embryo) – remove these
- A dark spot that is significantly smaller than the rest of the developing eggs (dead embryo) – remove these
- Blood veins (alive!) – put back in the incubator
- Movement (alive) – put back in the incubator
- Solid mass that doesn’t slosh (alive) – put back in the incubator
- Size of the air cell relative to how many days along the eggs are – adjust humidity levels based on this information. You might notice some variability between the eggs, just make note of the average.
*TIP: If I’m not completely sure if the embryo has died or not, I’ll make note of which number egg it was on my Incubation Tracker and go back in a couple of days to double-check.
Hatching Day Rules
I know you’re excited, but it’s so important not to break these rules!
Rule #1: Don’t open the incubator!
I know it’s tempting to sit on your hands and not jump in there! If you lift the incubator lid, that precious 65-70% humidity air will rapidly escape and be replaced with dry air. When this happens, you risk shrink-wrapping your chicks inside their eggs.
Yes, the hatched chicks will be running around and knocking over the eggs that are trying to hatch. Let them be! The chicks absorb the last of the yolk just before they hatch and they can live off of that nutrition for 48 hours. There’s no rush!
I leave them for a full 24 hours, and then I quickly swoop out any chicks that are fully dried. Then, I go back in 8-hour intervals until the hatch is complete.
Rule #2: Think twice before assisting!
Sometimes hatches go smoothly, and sometimes it does not. Inevitably, you’ll experience a chick in distress at some point. It might have pipped, but failed to zip. It may have half-zipped, and then stopped.
The rest of the chicks have hatched, but this one is still struggling. You’re faced with a dilemma. Do I help? It depends. Some chicks don’t successfully hatch because they are shrink-wrapped, not positioned correctly, or it could be a hereditary issue.
Most people don’t intervene, but I know it can be hard to just watch them slowly fade away, too.
The risk of intervening is:
- The chick might have poor development and helping them out might prolong their suffering
- They might just be a slow hatcher and rushing them out might cause more harm than good.
If you’re faced with this dilemma, please please read this Step-By-Step Guide to Assisted Hatching before you do anything! It has helped me out many times.
Rule #3: Have your brooder ready!
You’ll want a warm, dry place for your chicks to go as soon as they are ready to come out of the incubator. Read my article Brooding in Poultry – Everything You Need to Know! to learn all of my best tips!

Rule #4: Know what to expect
Hatch day is filled with built-up excitement and expectations. Many beginners head into hatch day expecting that all of the eggs will hatch and it’s easy to get disappointed. If this is your first time hatching, I would plan on a 55-65% hatch rate (less if you’re using a foam incubator). With some experience, you can expect to achieve a 75-85% hatch rate.
Other Chicken Articles You’ll Love:
- Candling Chicken Eggs: Day-By-Day Development
- The 8 Best Egg Incubators
- Brooding in Poultry – Everything You Need to Know!
- How to Care for Chickens: A Beginners Guide
Final Thoughts On Hatching Chicken Eggs
Hatching chicken eggs is a super fun experience, especially if you’re into raising your own backyard chickens. It’s so special to have chickens that you hatched yourself!
It might take some patience and attention to detail, but the whole process of incubating and hatching eggs is a really satisfying journey. Now that you’ve done your research, grab your supplies and let’s do this!
*Information in this article was referenced from personal experience and/or from my favorite chicken book: Storey’s Guide to Raising Chickens, unless otherwise noted.
The Homesteading RD's Product Picks: | |
| This is THE chicken book to have! I've had my copy since the beginning and it's the one that I keep going back to time after time. It provides everything you need to know from coop design, hatching chicks, layer nutrition, and much more! |


Why would a foam incubator be less?? The foam retains some heat.
Wow it’s really amazing what great step by step instructions on how to hatchi a chicken eggs. It really reminds me of growing up back home. Thank you so much for sharing!
You’re so welcome! 🙂