
It can be hard to decide which type of microgreens to grow – the options are overwhelming! There are hundreds of options out there, each with its own flavor profile, nutritional value, and skill level to grow. Which one is right for YOU?
In this article, we’ll break down each type of microgreen out there (and how to grow it!) so that you can easily identify the best fit for your needs and skill level. We’ll also chat about flavor, too! There’s no sense in growing a microgreen that you’re not excited about eating.
If you have specific health concerns or goals, picking the right microgreen for you is important as well. As a dietitian, I am always looking at nutritional value and can’t wait to nerd out with you about this in the article below.
Let’s jump in!
*Disclosure: This post may contain affiliate links to products (including Amazon). I’ll earn a small commission if you purchase through my link, at no additional cost to you! Regardless, I only link to products that I personally use on our homestead or believe in.
What are Microgreens?
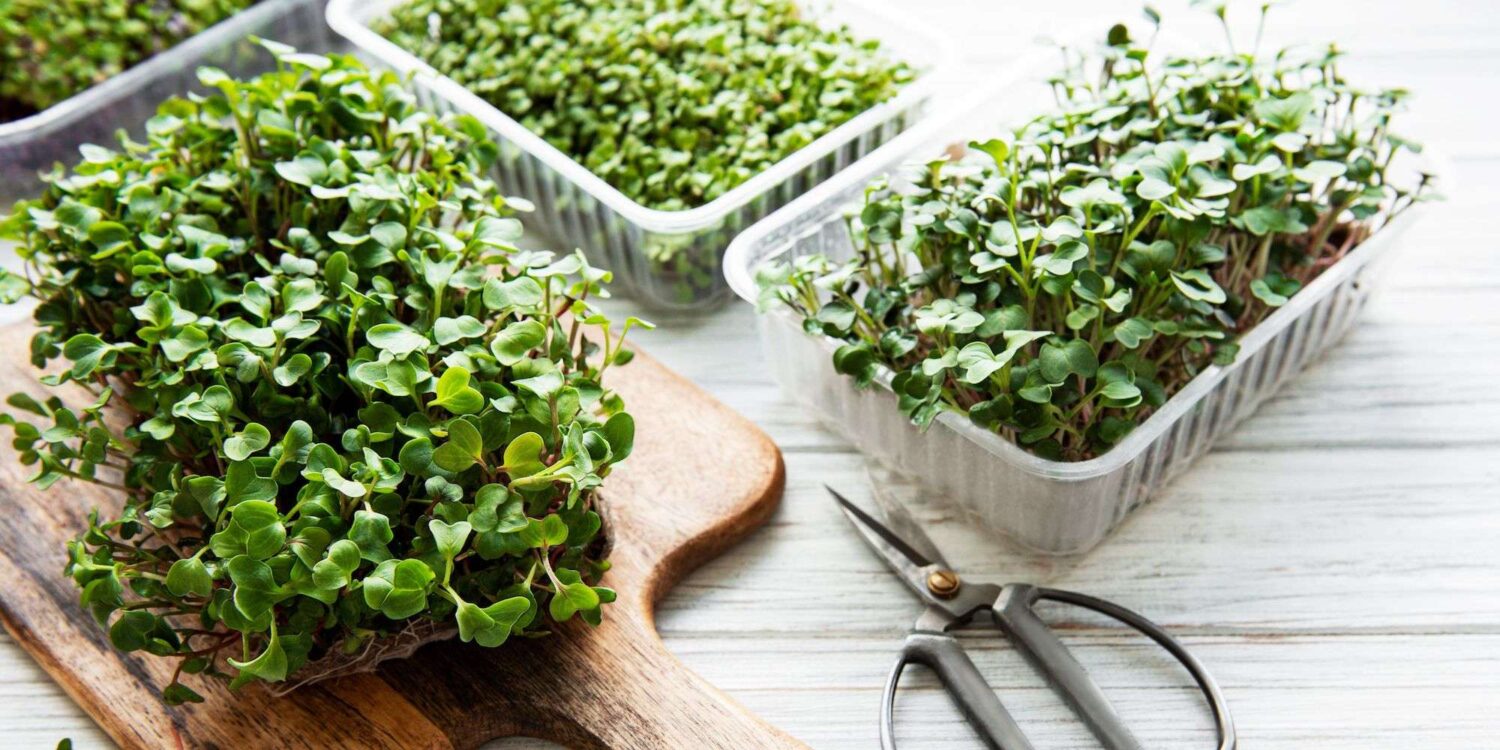
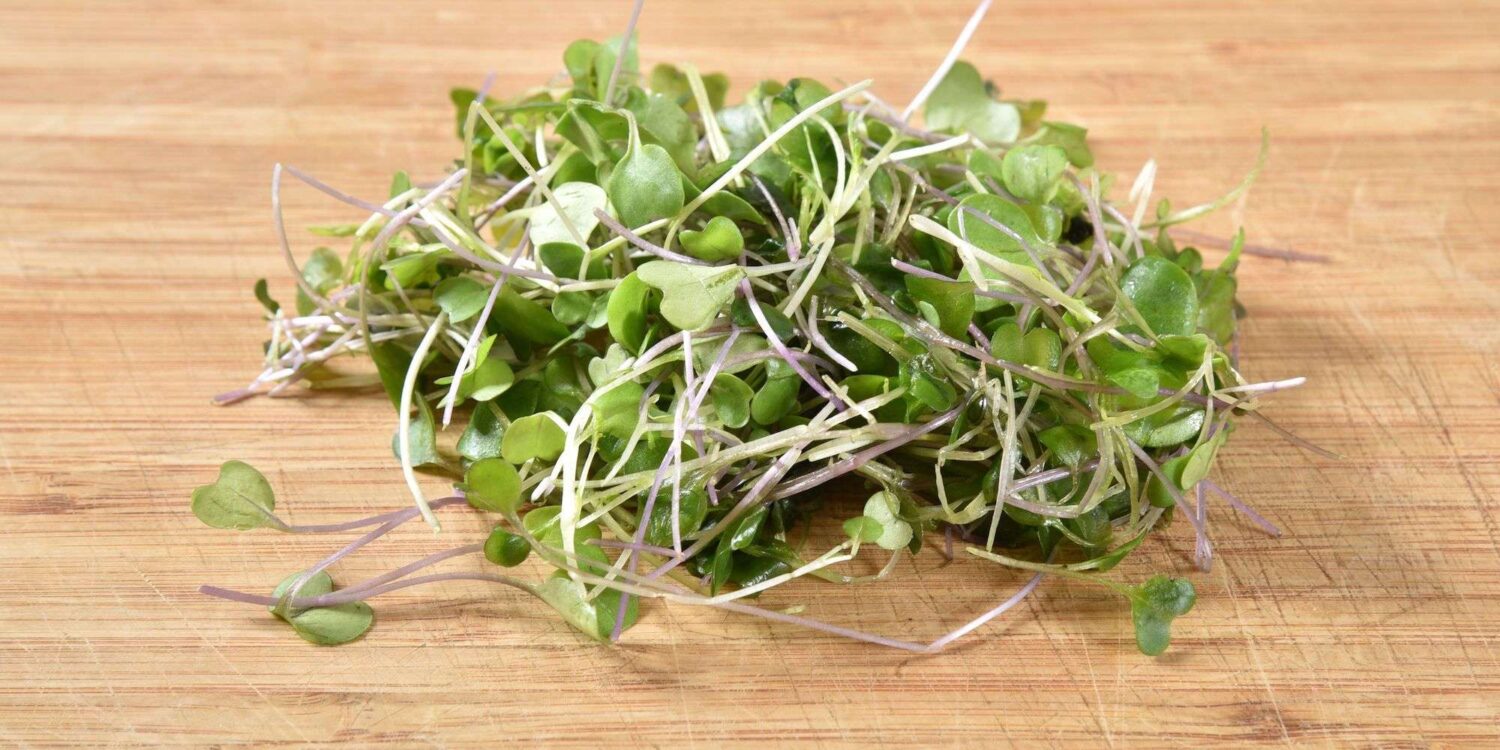
Microgreens are tender, young versions of your standard vegetables, herbs, and greens! They are grown clustered together and harvested when they are just 1-3 weeks old; rather than letting them continue to grow to full size. They were first introduced in 1980s and have been growing in popularity ever since!
Microgreens are nutrition-packed! They boast 2-3.5 times more nutrients than mature spinach leaves, and spinach is considered a superfood.
Not ready to start a big garden yet? Microgreens are a great introduction to gardening, require minimal equipment, and can easily be grown in small spaces. This makes microgreens a great option if you live in an apartment or a small home!!
What are the benefits of Microgreens?
Nutrient-dense
The type of microgreens that you choose to grow will determine what spectrum of nutrients you’ll get out of it. While they do vary from variety to variety, they are all generally higher in antioxidants, vitamins and minerals than their mature counterparts. That means a handful of broccoli microgreens may provide similar nutrients to eating an entire head of broccoli.
Microgreens also contain less oxalates (anti-nutrients) than mature vegetables, which means better absorption of nutrients for you! Some microgreens such as green pea, soybean and radish have even been shown to have cancer-fighting properties. Cool huh?
While soil-based and hydroponic growing methods are both popular, it’s important to note that soil-based growing provides significantly more vitamins and minerals than hydroponic growing. I’ve had low yields with hydroponic anyway, so soil-based really is the way to go, in my opinion.
Boosts your microbiome
Having a healthy gut microbiome (colony of microbes) can help prevent the development of food sensitivities, support the immune system, reduce inflammation, and much more! What we eat and expose ourselves to is a huge influence on our microbiome.
Did you know that plants and the soil each have their own diverse microbiome and we benefit from exposure to them? Research has found that those who garden have a more diverse microbiome than those who do not. Let’s get our hands dirty!

Mental health
If you’ve been suffering under the load of the past few years (it’s rough out there!), growing some microgreens may give you the little boost that you need!
A recent study revealed that gardening is associated with reductions in depression, anxiety, BMI, as well as increases in life satisfaction, quality of life, and sense of community. Sign me up, right?
Self-sufficiency
If you’ve been following me for a while, you know self-sufficiency is the ultimate driver in what I do along with maximizing nutrition intake. Anytime you can take control and grow something yourself it’s a BIG win, especially in the unstable world we live in today.
Microgreens are becoming a booming small-business opportunity for people like you and me. You can sell them for $50 per pound! Once you get the hang of it, start by offering to grow microgreens for your neighbors and watch it take off! You can learn more about growing microgreens for profit by GroCyle.
Types of Microgreens
We’ve made it to the fun part! Let’s chat about the main families of microgreens so you can decide which one is the best fit for you.
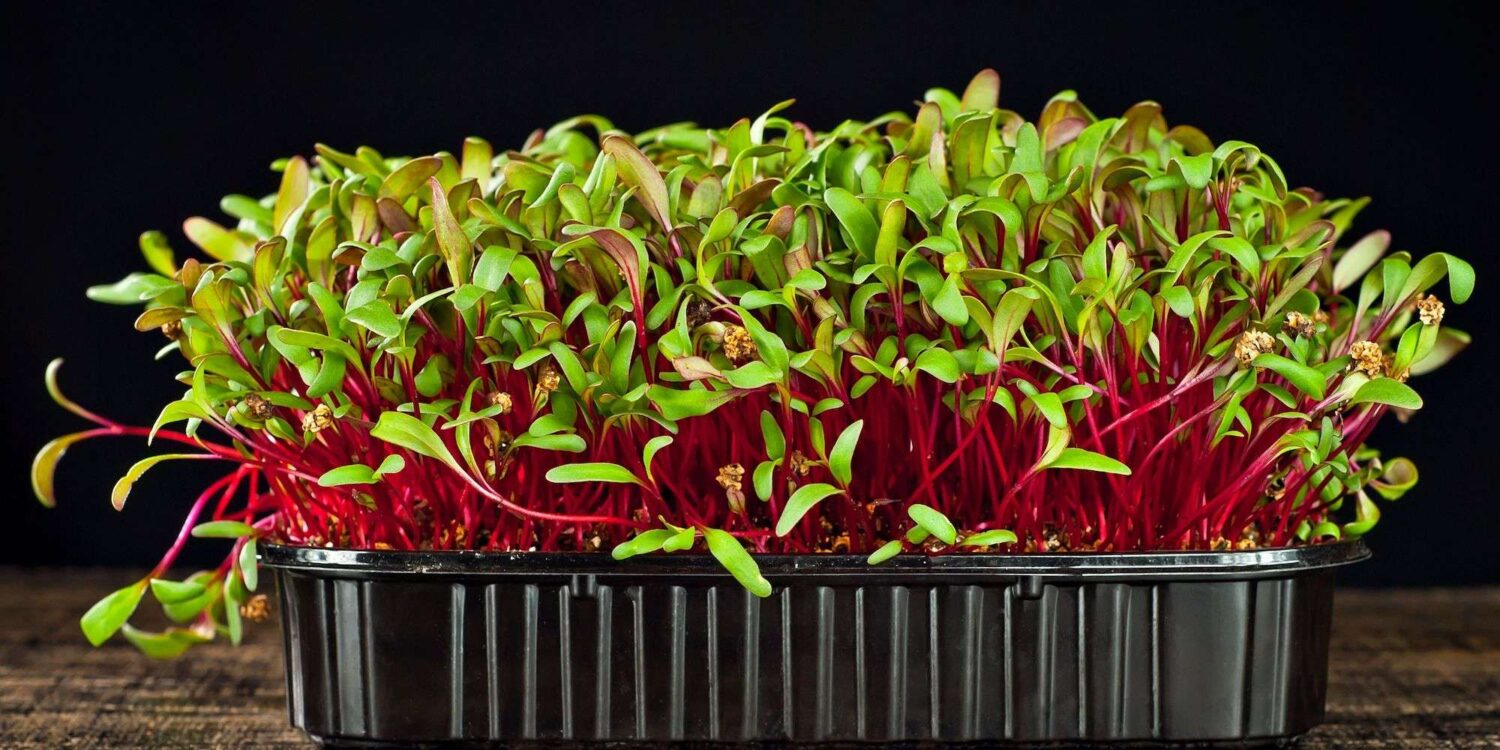
Amaranthaceae | Amaranth, beets, chard, quinoa, spinach.
About:
The family Amaranthaceae is commonly known as the “Amaranth family.” These microgreens will offer you vibrant colors and lots of nutrition. However, they take longer to germinate and can be sensitive to heat and light so they are not a great choice for beginners.
Difficulty:
Advanced
Nutritional Benefits:
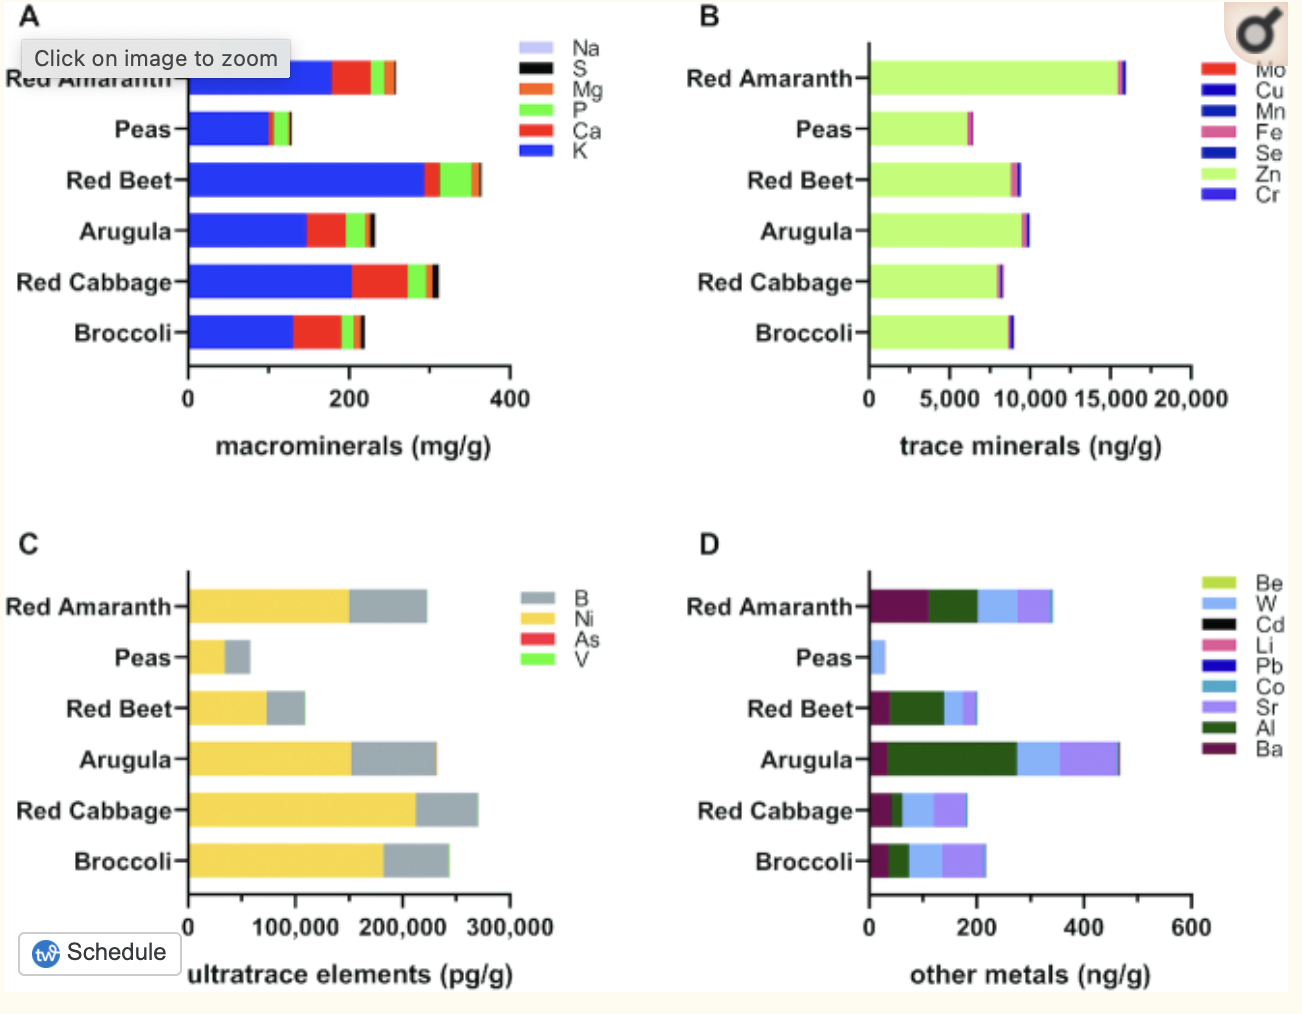
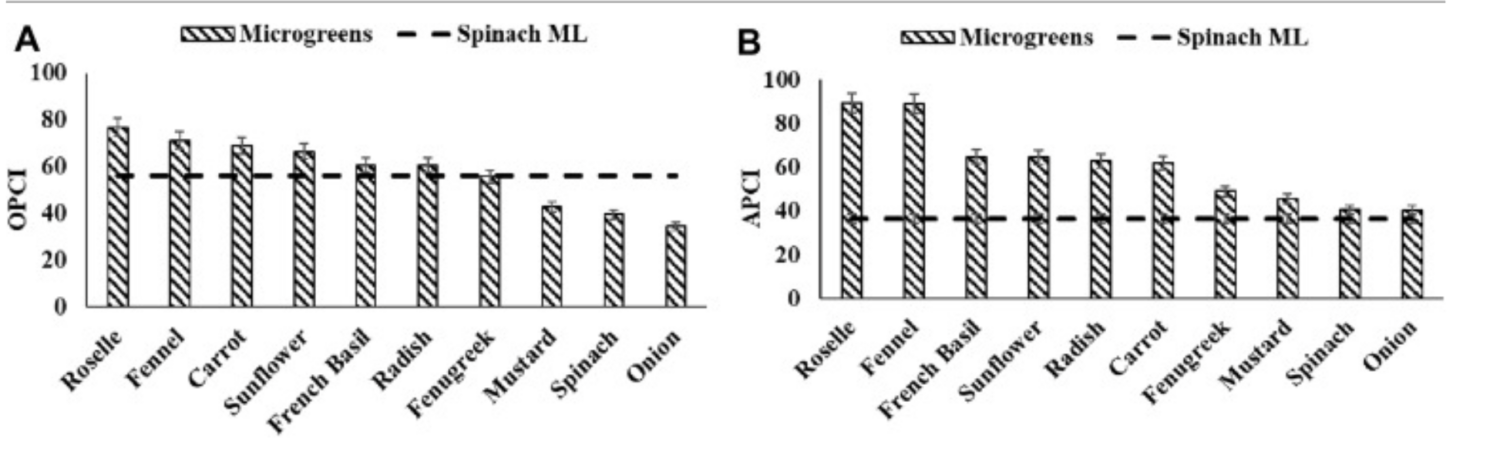
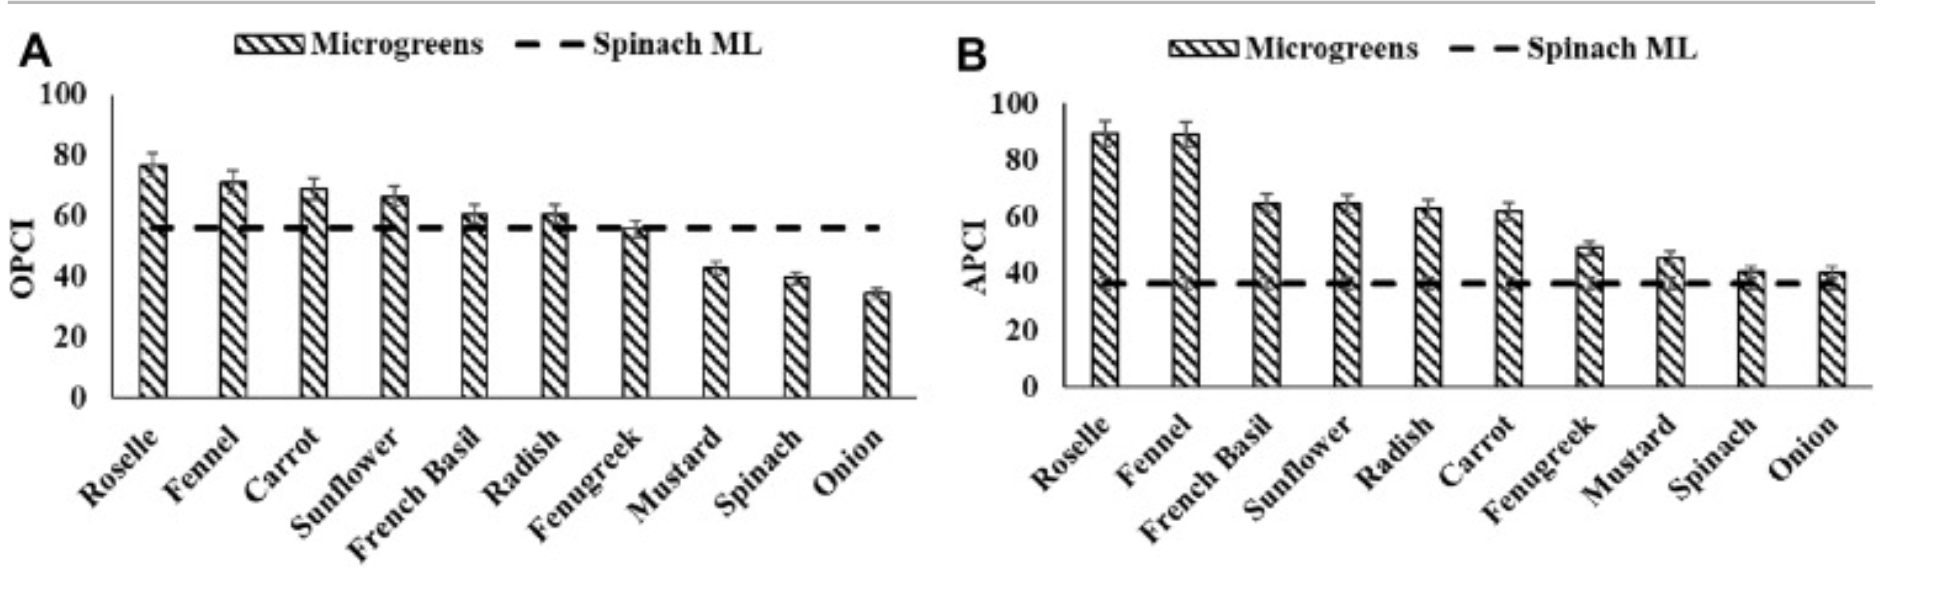
Amaranth is a hidden gem in the nutritional world. Amaranth microgreens are rich in vitamins, minerals and other health-promoting compounds such as betanins, polyphenols and oligosaccharides. Check out the results from this 2021 study evaluating the nutritional content of 6 different microgreens. You can see that Red Amaranth is a clear winner!
If you’re looking for a powerful detoxifying and antioxidant microgreen, try beets! They have extraordinary amounts of vitamin C, which is a potent antioxidant.
How to Grow:
- Pre-soaking: 8 hours
- Seed density: Use 1-1.5 oz of seed per 10” x 20” tray
- Cover with a thin layer of soil for beets & chard
- Blackout time: 5-7 days
- Only 3 days for quinoa and spinach
- Estimated time to harvest: 8-14 days
Amaryllidaceae | Chives, garlic, leeks, onions
About:
If you’re looking for a burst of flavor to add to your dish, look no further than the amaryllidaceae family. A little definitely goes a long way here. They pair wonderfully with a burger, salad, or soup!
Difficulty:
Beginner-Intermediate
Nutritional Benefits:
The amaryllidaceae family is known for having high amounts of vitamins A & C, calcium, iron, and phosphorus. They have many benefits such as potent anti-cancer and anti-asthmatic effects, reduce blood clotting, and even fight bacterial, fungal, and viral overgrowths.
However, in a 2020 study comparing 10 different microgreen varieties, onions came in last as far as phytochemical content and antioxidant activity goes. It doesn’t mean that they are bad, just not quite as potent as other varieties you can grow.
How to grow:
- Pre-soaking: None
- Seed density: Use 1oz of seed per 10” x 20” tray
- Blackout time: 4-6 days
- Estimated time to harvest: 10-12 days
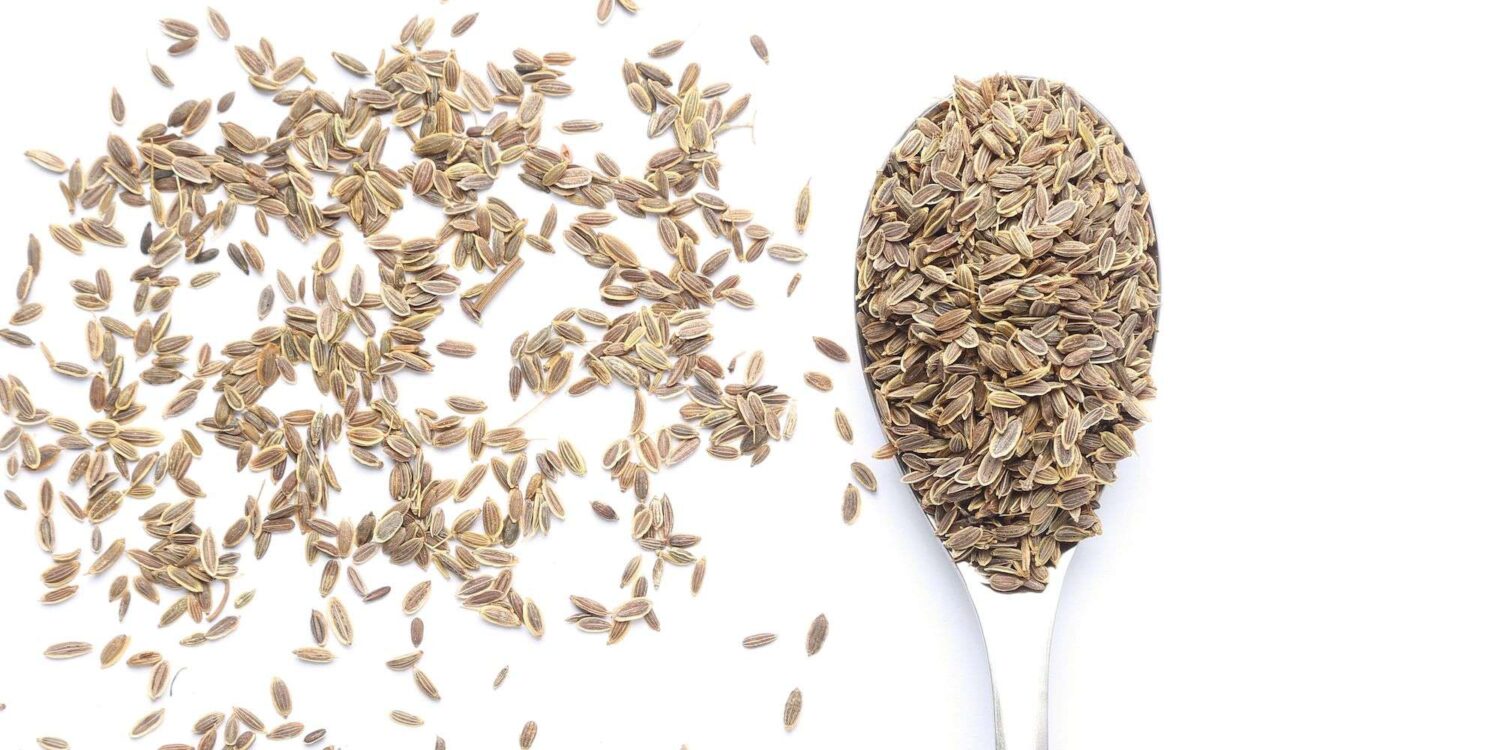
Apiaceae | Carrot, celery, dill, fennel
About:
The Apiaceae family has a delightful flavor profile! Their taste is similar to their mature counterparts, but more mild and sweet. An excellent garnish!
Keep in mind that this family is slow at germinating and takes a bit longer to finish out than other microgreens, but the wait is worth it!
Difficulty:
Advanced
Nutritional benefits:
This group is a nutritional powerhouse! Loaded with calcium, potassium, magnesium, phosphorus, zinc, vitamins A, B, E & K. Fennel really takes the cake (with carrot close behind) as far as phytochemical and antioxidant activity goes compared to other types of microgreens.
How to grow:
- Pre-soaking: None
- Seed density: Use 1 oz of seed per 10” x 20” tray
- Blackout time: 7-14 days
- Estimated time to harvest: 14-21 days
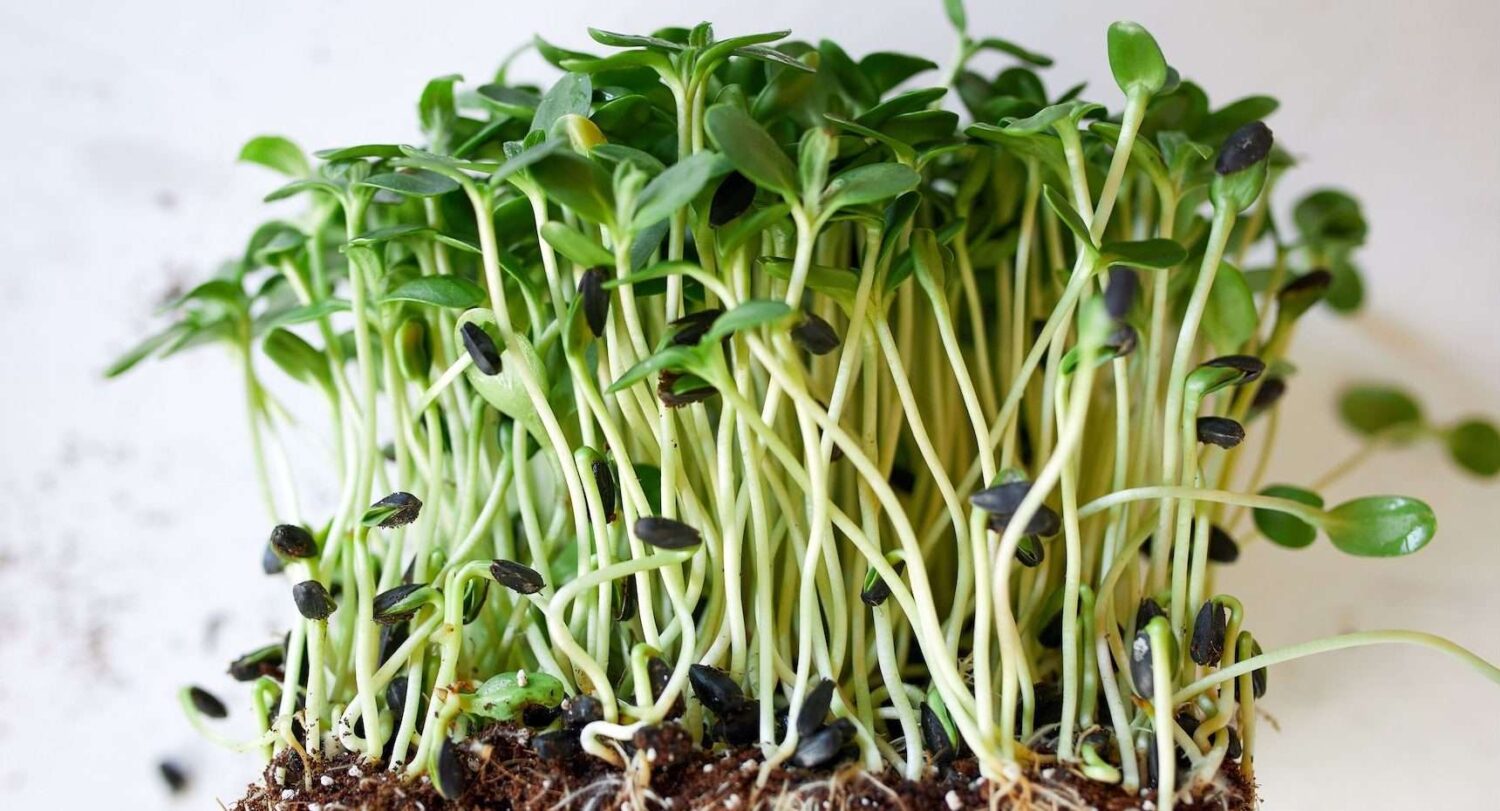
Asteraceae | Chicory, endive, lettuce, sunflower, radicchio
About:
The Asteraceae family is fast growing and easy peasy to grow. They provide some nice crunch and a pleasant flavor. Endive microgreens are mildly bitter whereas sunflower microgreens are nutty and sweet. Experiment and find which ones you like best!
Difficulty:
Beginner
Nutritional benefits:
Lettuce microgreens are particularly high in minerals such as manganese, iron, copper and zinc. One study showed that lettuce microgreens have nearly 5x the amount of zinc as fully mature lettuce. Zinc is a common deficiency in today’s population, so definitely give this one a try!
Sunflower microgreens are a rich source of phytochemicals and antioxidants as you can see in the table below, meaning they are going to be excellent allies in fighting inflammation and chronic disease. Lastly, they are also an excellent source of iron – providing 181% of the daily value!
How to grow:
- Pre-soaking: None except for sunflowers (soak them for 8-12 hours)
- Seed Density: 1 oz of seed per 10” x 20” tray
- Sunflowers: use 6 oz of seed per 10” x 20” tray
- Blackout time: 2-3 days
- Estimated time to harvest: 8-15 days
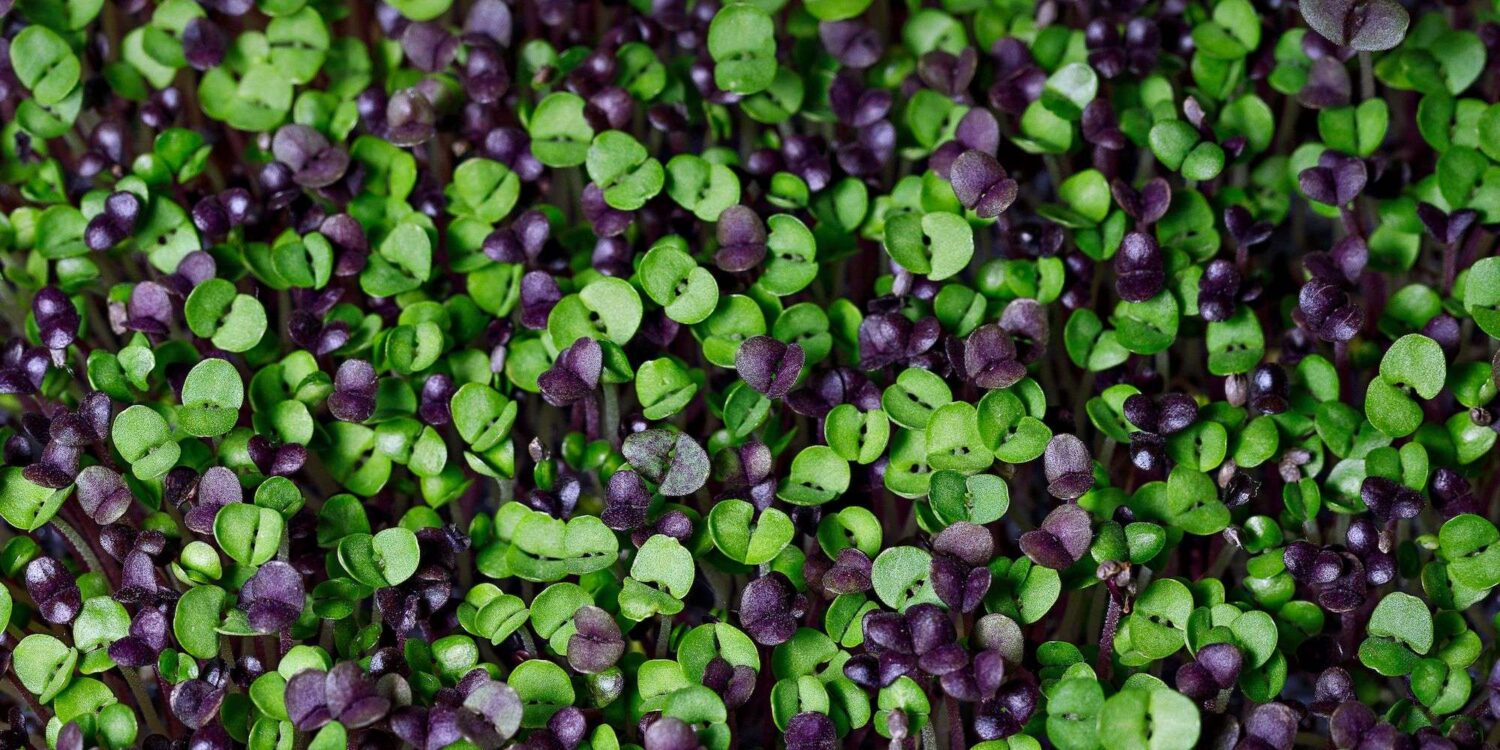
Brassicaceae | Arugula, broccoli, cabbage, cauliflower, radish, watercress
About:
The Brassicaceae family is my favorite! Not only are they super fast and easy to grow, but they are very nutritious as well. Great for beginners! You can read more details about them in my article: How to Grow Broccoli Microgreens – A Complete Guide.
Difficulty:
Beginner
Nutritional Benefits:
Brassica microgreens are loaded with phosphorus, calcium, iron and zinc, and arugula in particular is low in oxalates, which means improved calcium absorption for you!
They are also excellent sources of a compound called sulforaphane, which has antioxidant, anti-inflammatory, and colon-cancer-fighting properties as well as beneficially impacting our genes! Just 1 oz of broccoli microgreens has ~73mg of sulforaphane whereas ¾ cup of steamed broccoli only has ~40mg!
Cabbage and radish microgreens have been shown to have superior levels of carotenoids (a phytonutrient) and vitamins C, E and K compared to other microgreen varieties, which can protect against cardiovascular disease and some types of cancers. A recent 2021 study further confirmed that radish microgreens have anti-tumor effects.
Want to learn something super interesting?? A 2016 experimental study using mice found that red cabbage microgreens intake resulted in significantly lower triglycerides, LDL cholesterol and inflammatory cytokines in addition to preventing weight gain when given a high-fat diet. They are rich in a compound called sinapine, which has cardioprotective effects.
Are you convinced yet? Give them a try!
How to grow:
- Pre-soaking: None
- Seed density: Use 1 oz of seed per 10” x 20” tray
- Blackout time: 2-3 days
- Estimated time to harvest: 8-12 days
Cucurbitaceae | Cucumbers, melons, squashes
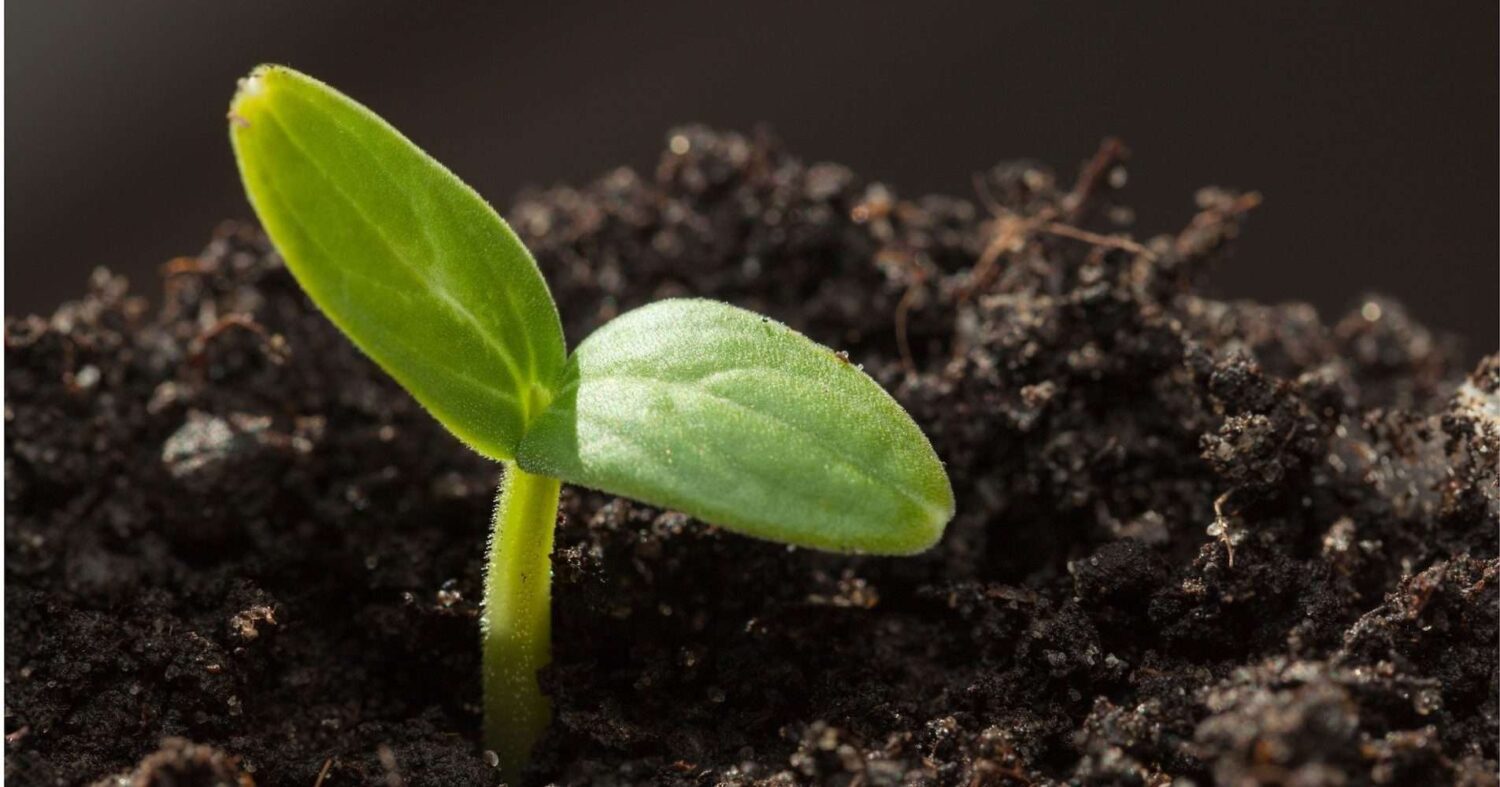
About:
The cucurbitaceae family is fun to grow because they germinate and finish out fast! Cucumbers have a refreshing, fresh flavor and pumpkins have a nutty, rich flavor that I know you’ll love.
Difficulty:
Beginner
Nutritional benefits:
Unfortunately, I was unable to find any studies related to microgreens in the cucurbitaceae family. However, this group has been shown to improve UTIs, and treat intestinal disorders and diabetes, so I’d expect these benefits to extend to their microgreen state as well.
How to grow:
- Pre-soaking: Soak for 2-4 hours
- Seed density: Use 1 oz of seed per 10” x 20” tray
- Blackout time: 4-5 days
- Estimated time to harvest: 7-16 days
Lamiaceae | Mint, basil, sage, oregano
About:
While many herbs in the Lamiaceae family are woody when mature, they are tender and packed full of flavor when grown as a microgreen. Basil microgreen pesto, anyone?? What about sage microgreens sprinkled on a hearty winter soup? YUMMMMM.
Keep in mind that basil in particular is a mucilagenous seed. This means it develops a jelly-like coating when moistened and thus, needs more frequent misting to keep it strong.
Difficulty:
Intermediate
Nutritional benefits:
Basil microgreens are an excellent source of vitamin C with a 100g portion providing over 1.3 times the daily value! Vitamin C is a potent antioxidant, which reduces circulating free radicals that can cause oxidative damage, premature aging and cancer if left unchecked.
While I couldn’t find much research on the other varieties, I think it’s safe to say that oregano microgreens carry the same powerful anti-viral, anti-bacterial and anti-fungal properties that mature oregano has. If you feel like you’re fighting something, definitely add some oregano microgreens!
How to grow:
- Pre-soaking: None
- Seed density: Use 0.5-1 oz of seed per 10” x 20” tray
- Blackout time: 3-5 days
- Estimated time to harvest: 10-14 days (18-25 days for sage & oregano)
Poaceae | Barley, corn, rice, oats, wheatgrass
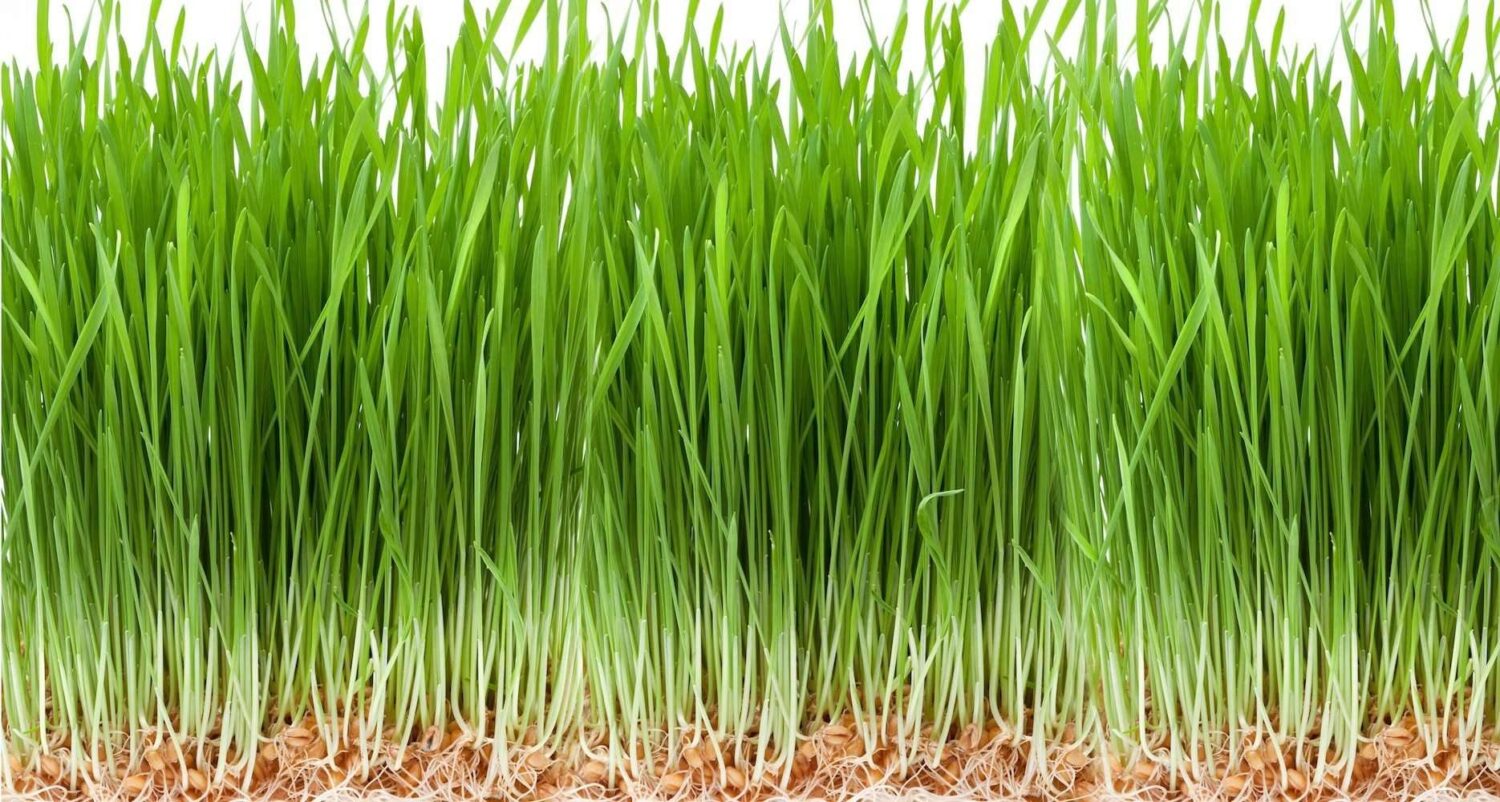
About:
Microgreens from the Poaceae family have a grass-like appearance and is often grown as fodder for livestock, but humans enjoy them as well! Its flavor varies from grassy (barley) to sweet (corn). You can juice them or enjoy them sprinkled on a salad or sandwich.
Difficulty:
Beginner
Nutritional benefits:
Wheatgrass is the most heavily researched variety from this family. It is loaded with health benefits from its wide range of antioxidant, anti-aging, immune-boosting, anti-hyperglycemic and anti-inflammatory effects (study 1, study 2, study 3). Wheatgrass has even been shown to reduce the severity of inflammatory conditions such as ulcerative colitis and increase hemoglobin levels in those with anemia.
You may be wondering if you can try barley or wheat grass if you have a gluten intolerance. The answer is YES! The microgreen portions (the greens) are completely gluten-free. Just make sure to be careful when harvesting so that the greens don’t get contaminated by the gluten-containing grains below.
How to grow:
- Pre-soaking: Soak for 12 hours
- Seed density: Use 1-2 oz of seed per 10” x 20” tray
- Blackout time: Not necessary
- Estimated time to harvest: 7-10 days
What Microgreen Supplies Do I Need?
General Supplies
- 1 x Growing tray with drainage holes
- 2 x Growing trays without drainage holes
- Organic seed starting mix – this one is great because it has a fine-texture
- Microgreen seeds – I like the 1 lb packages! (read on to the next section for more details)
- Clean water (well, distilled, filtered, etc.)
- Spray misting bottle
- Digital scale
- A window (or a grow light if no window is available)
The Homesteading RD's Product Picks: | |
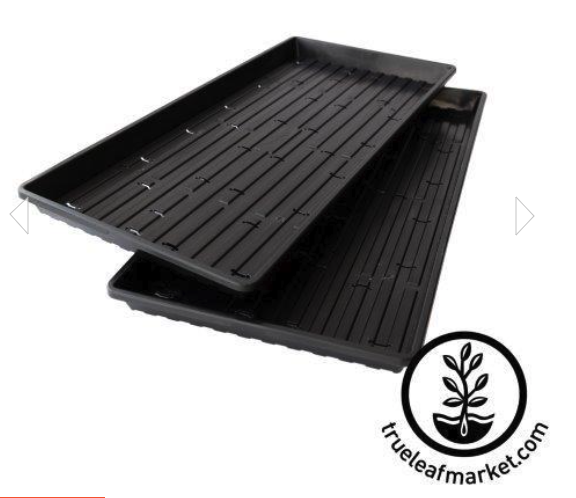
| I LOVE these trays! They are super strong, BPA free and even dishwasher safe. They are also shallower than your typical 1020 trays, making them perfect for microgreens! These are trays WITH holes - so place your soil and seeds into this one. |

| These are the same trays as above, except they feature NO holes. Use these trays for your blackout dome, and your bottom tray for holding water. |
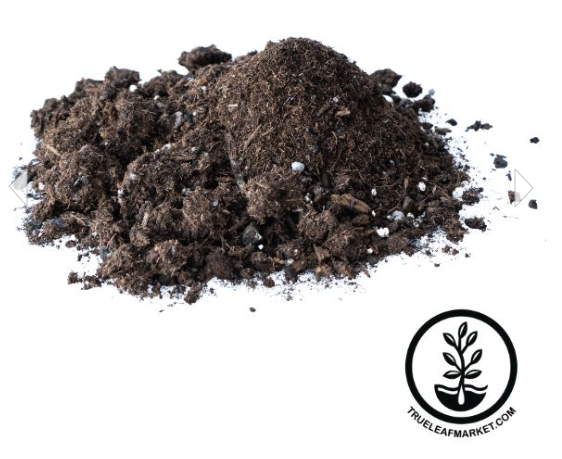
| This seed starting mix is light, smooth and fluffy - a perfect medium for growing microgreens! Plus, it's organic 🙂 |
| These are the same exact broccoli microgreens seeds that I love and have had great success with. Just check out those reviews! I like to purchase them by the 1 lb package. |
Microgreen Seeds
Buying in bulk is the way to go! I like to start with 4oz packages to test out the variety and then 1 lb packages after that.
- True Leaf Market is my favorite place to buy microgreen supplies (trays, soil, etc.) since they have so many options and offer bulk-purchasing!
- High Mowing Seeds is my second favorite for microgreen supplies!
Still not sure which one to try? True Leaf Market offers a sample pack of 12 different varieties so you can figure out which ones are your favorites before you commit to a bulk package.
How Do I Grow Microgreens?
- Pre-soak your seeds, if necessary (see details on the type of microgreens above to figure out if this is needed or not)
- Fill the tray with holes with soil, gently compress it (to get the air pockets out) and mist until evenly moist
- Sprinkle the seeds evenly over the soil and lightly mist with water
- Add 2 cups of water to one of the trays without holes and place the tray filled with soil inside of it
- Add the second tray without holes on top (AKA the blackoutdome). Nest it inward so that the bottom presses gently on the seeds to aid in germination and produce heartier sprouts.
- Add some weight (I use a book) when growing a hearty type of microgreens like sunflowers or peas.
- Mist daily and monitor the water level in the bottom tray, refilling with 1-2 cups of water as needed.
- Once the blackout time is done and your seeds have germinated, remove the blackout dome and place the tray near a light source (large window or a grow light).
- Stop misting and continue with bottom watering as needed until they are ready to harvest!
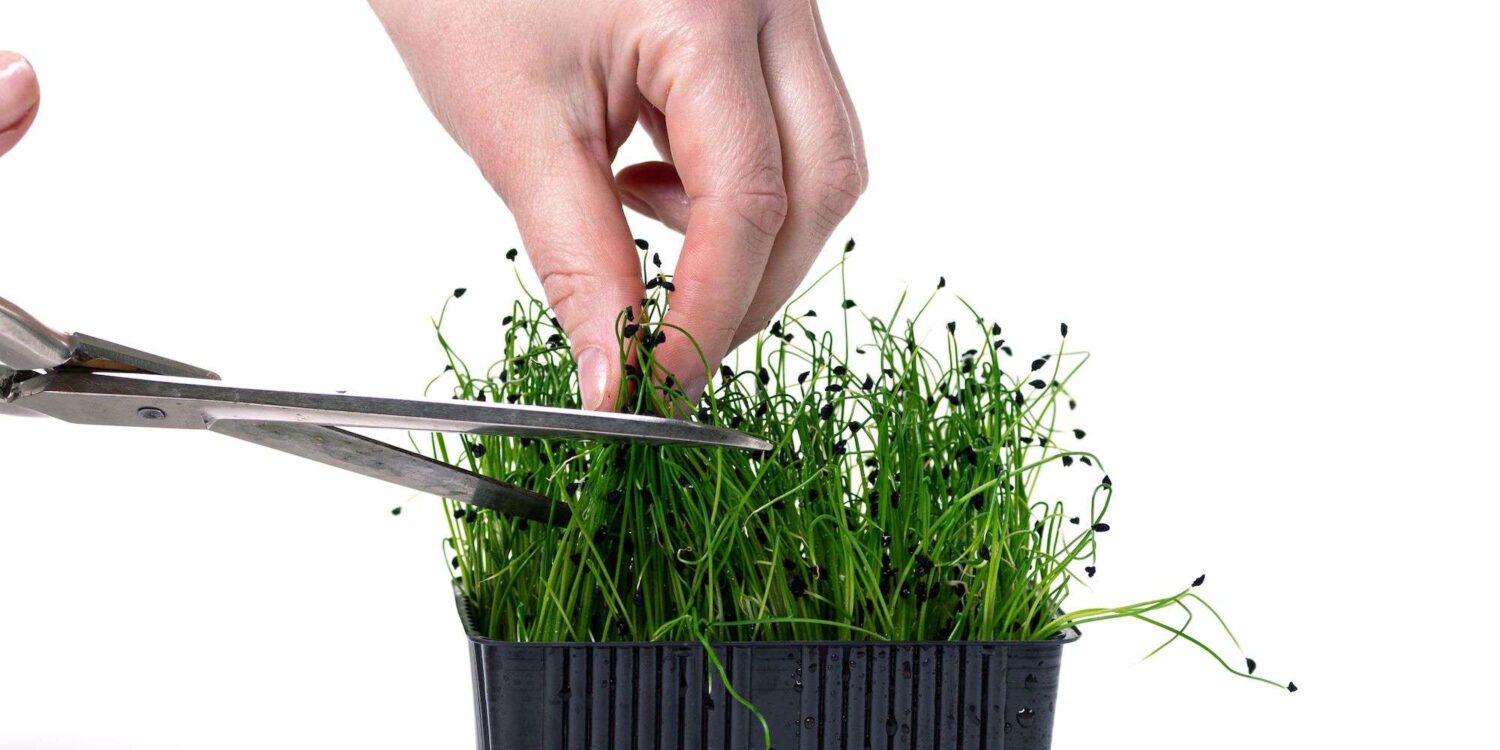
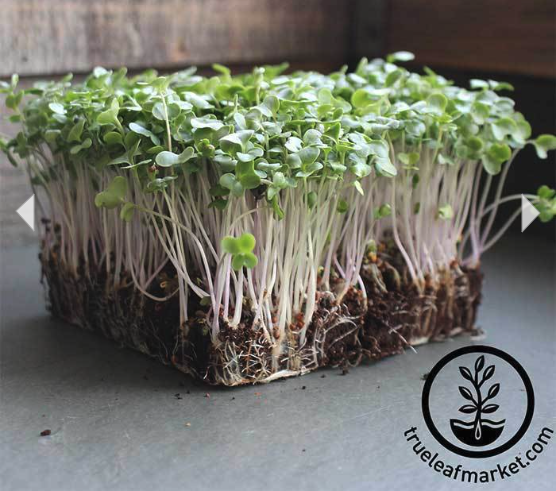
- Once harvested, place in a storage container or ziplock bag with a paper towel in the fridge. Use within 7-10 days.
Prefer to watch the steps in action? No problem! I have several how-to videos that you can check out below:
Are You Ready to Select Your Type of Microgreens?
In summary, you really can’t go wrong with choosing a type of microgreens as far as nutritional value goes. They are all excellent sources of a variety of nutrients and would be a great addition to boost your daily intake. I love them sprinkled on fried eggs, soups, sandwiches, and my favorite gluten-free quiche recipe!
Some types take more attention than others, so keep in mind the difficulty level indicated in the type of microgreens categories above. Start with the ones that are great for beginners such as lettuce, endive, sunflowers, broccoli or cabbage and then work up from there!
The thing I love most about microgreens is how feasible they are for anyone. They don’t take up much space, are typically grown indoors, have a low start-up cost and have HUGE potential! Many people go on to start their own backyard microgreens business.
Other Articles You’ll Love:
- How to Grow Broccoli Microgreens – A Complete Guide
- The 6 Best Vertical Garden Kits
- Growing Tomatoes in Grow Bags – A Comprehensive Guide
- 10 Tips for Starting Pepper Seeds Indoors


Katie- thank you for a great article. I have wanted to do this since your brassica micro green article earlier. As soon as the Christmas decor gets put away, I am going to do this!
You’re so welcome! Best of luck to you! You’ll do great 🙂
Great article and ready to try growing microgreens! I have an outdoor vertical garden with a drip irrigation system and wondered if this will work for microgreens once we get into spring and summer. Any tips for outdoor growing?
You could definitely give them a try outdoors, especially if you have a drip irrigation system – otherwise, I’d worry about them drying out. Let me know how it goes!
This article is so well-written! It covers so much material, and is easy to understand. It has given me confidence to try growing micro-greens. Thanks so much for this!
Hooray! I’m so glad to hear this and best of luck to you! Feel free to reach out if you need anything.
wow! It is a very informative article. I always wanted to try to grow greens at home. I think my son will love it, plus, maybe he will start to eat greens too. Thank you for the tips!
Give it a try! They are super easy and fun to grow, plus, very nutritious! 🙂
This was a great and very informative read! We recently got into gardening and growing our own food. We haven’t yet tried growing microgreens but we’re very interested to start!
How fun! Microgreens are a great way to extend your growing season. I’m sure that you will love it!
this sounds interesting I might have to pass this along to my mom
Awesome 🙂
Oh my goodness this is so cool! I didn’t know it was so easy to do and I could grow these right at home. I have to try out the beginner friendly ones!
Yay! It really is such a fun thing to grow, especially during the winter! Have fun 🙂
Your article is so helpful. I learnt many new things about microgreens. Didn’t realize that consuming some types of younger plants are more nutritional than mature ones.
I’m so glad you found it helpful and hopefully you can try growing them sometime in the near future! 🙂
Wow I had no idea that microgreens existed. This was a very informative blog and well written. I like that you included the benefits of gardening as well.
I didn’t either until 1-2 years ago and now I don’t know how I could live without them. I put them on everythinggggggg. They are so rewarding to grow, too!
Pinning this for future use! We’re going to be growing microgreens soon. This list is an amazing resource that we’ll definitely revisit when the time comes! Thank you so much!
Awesome!!! You’re going to love it! Now I’m kicking myself for not growing them earlier 🙂 Have fun!
I have been doing indoor gardening in my NYC apartment for years; mainly herbs, tomatoes, peppers. But have never thought about growing microgreens. Thanks for sharing; very informative .
I love hearing creative solutions to small space living – great work! Sounds like microgreens might be a great addition for you 🙂