
Making a batch of fermented honey garlic is one of the best things you can do to get ready for the upcoming cold and flu season. A little bit goes a long way in boosting your immune system!
Raw honey and garlic are well known for their immune-boosting properties and the best part is that you likely already have both on hand making this super easy to whip up.
Worried about botulism? I’ve got you covered! I thoroughly researched the topic and provide key tips to keep this risk at bay.
Since this is a fermented product that takes 1 month to be fully potent, it’s important to make it now rather than when you’re feeling sick. Let’s do this!
*Disclosure: This post may contain affiliate links to products (including Amazon). I’ll earn a small commission if you make a purchase through my link, at no additional cost to you! Regardless, I only link to products that I personally use on our homestead or believe in.
Benefits of Fermented Honey Garlic
Both garlic and raw honey have been used in medicinal preparations for thousands of years. Garlic has been found in Egyptian pyramids and honey has been traced as far back as Stone Age paintings.
Garlic was even given to Olympic athletes in Greece to improve their performance – neat, huh? Both garlic and raw honey have a multitude of health benefits as you’ll see below.
Once you combine them into my fermented honey garlic concoction, you’ll be able to kick any illness!
- Garlic – Garlic has powerful antioxidant and anti-inflammatory properties while preventing cancer, cardiovascular disease, hypertension, lipid abnormalities, metabolic disorders, skin, bone, and other common diseases (Ansary, 2020).
- Raw honey – Contains potent flavonoids and phenolic acids that have anti-oxidant, anti-inflammatory, anti-microbial, anti-cancer, and anti-diabetic effects. It also serves to protect the cardiovascular, respiratory, and digestive systems (Cianciosi, 2018).
Fermented Honey Garlic Recipe
You’re going to love how easy it is to make this fermented honey garlic recipe. The longest time is spent peeling all that garlic and waiting for that lovely fermentation to happen.
Ingredients
- Raw honey: Yes, it absolutely has to be raw! Processed honey has been treated with heat, which kills off the essential bacteria and wild yeasts that we need for the fermentation process. Most grocery stores carry raw honey, but if you can’t locate it, Bee Harmony produces one that is lovely and it is from orange blossom nectar, which has a low pH (less risk for botulism!).
- Whole garlic cloves: Any garlic will do as long as it is fresh, but homegrown is great if you have it!
The Homesteading RD's Product Picks | |
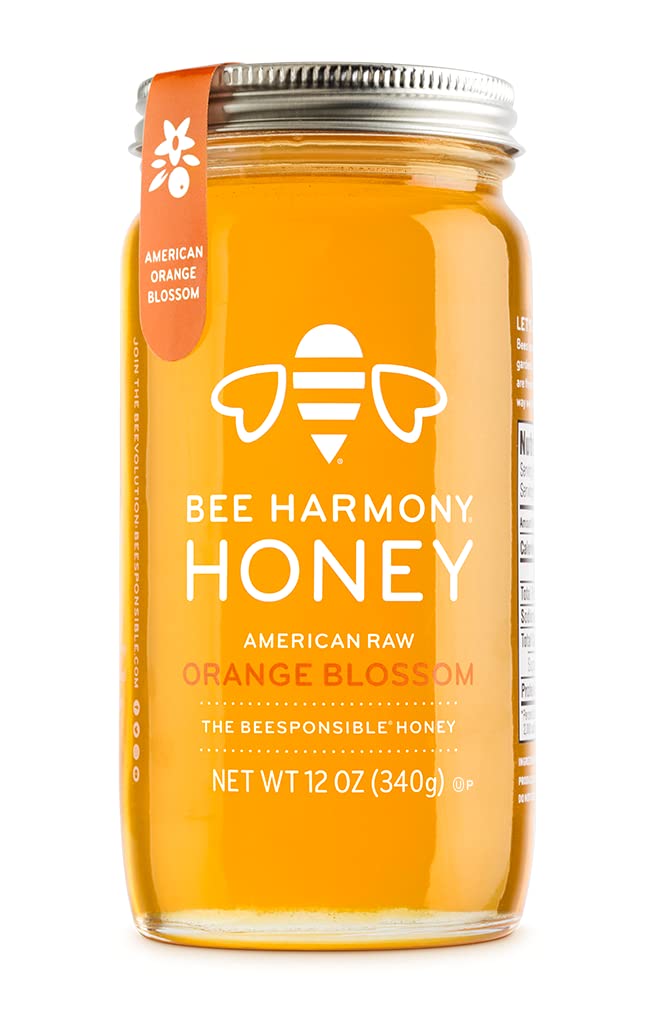
| This RAW honey has been carefully selected from only the highest-quality American sources. Enjoy a classic, medium-colored honey with a subtly robust, full-bodied sweetness. Orange blossom honey has one of the lowest pH levels, making this the safest bet for fermenting. |
How to Make Fermented Honey Garlic
Step 1: Peel the garlic
The easiest way to peel garlic is to lay a chef’s knife over it (flat side down) and give it a firm wack with your hand. This will lightly break the tension in the garlic and let the skins slide off.
Crushing also releases some of garlic’s natural juices, which will aid in fermentation. Lastly, it converts alliin into allicin, which provides many of the health benefits of garlic. Cool, huh?
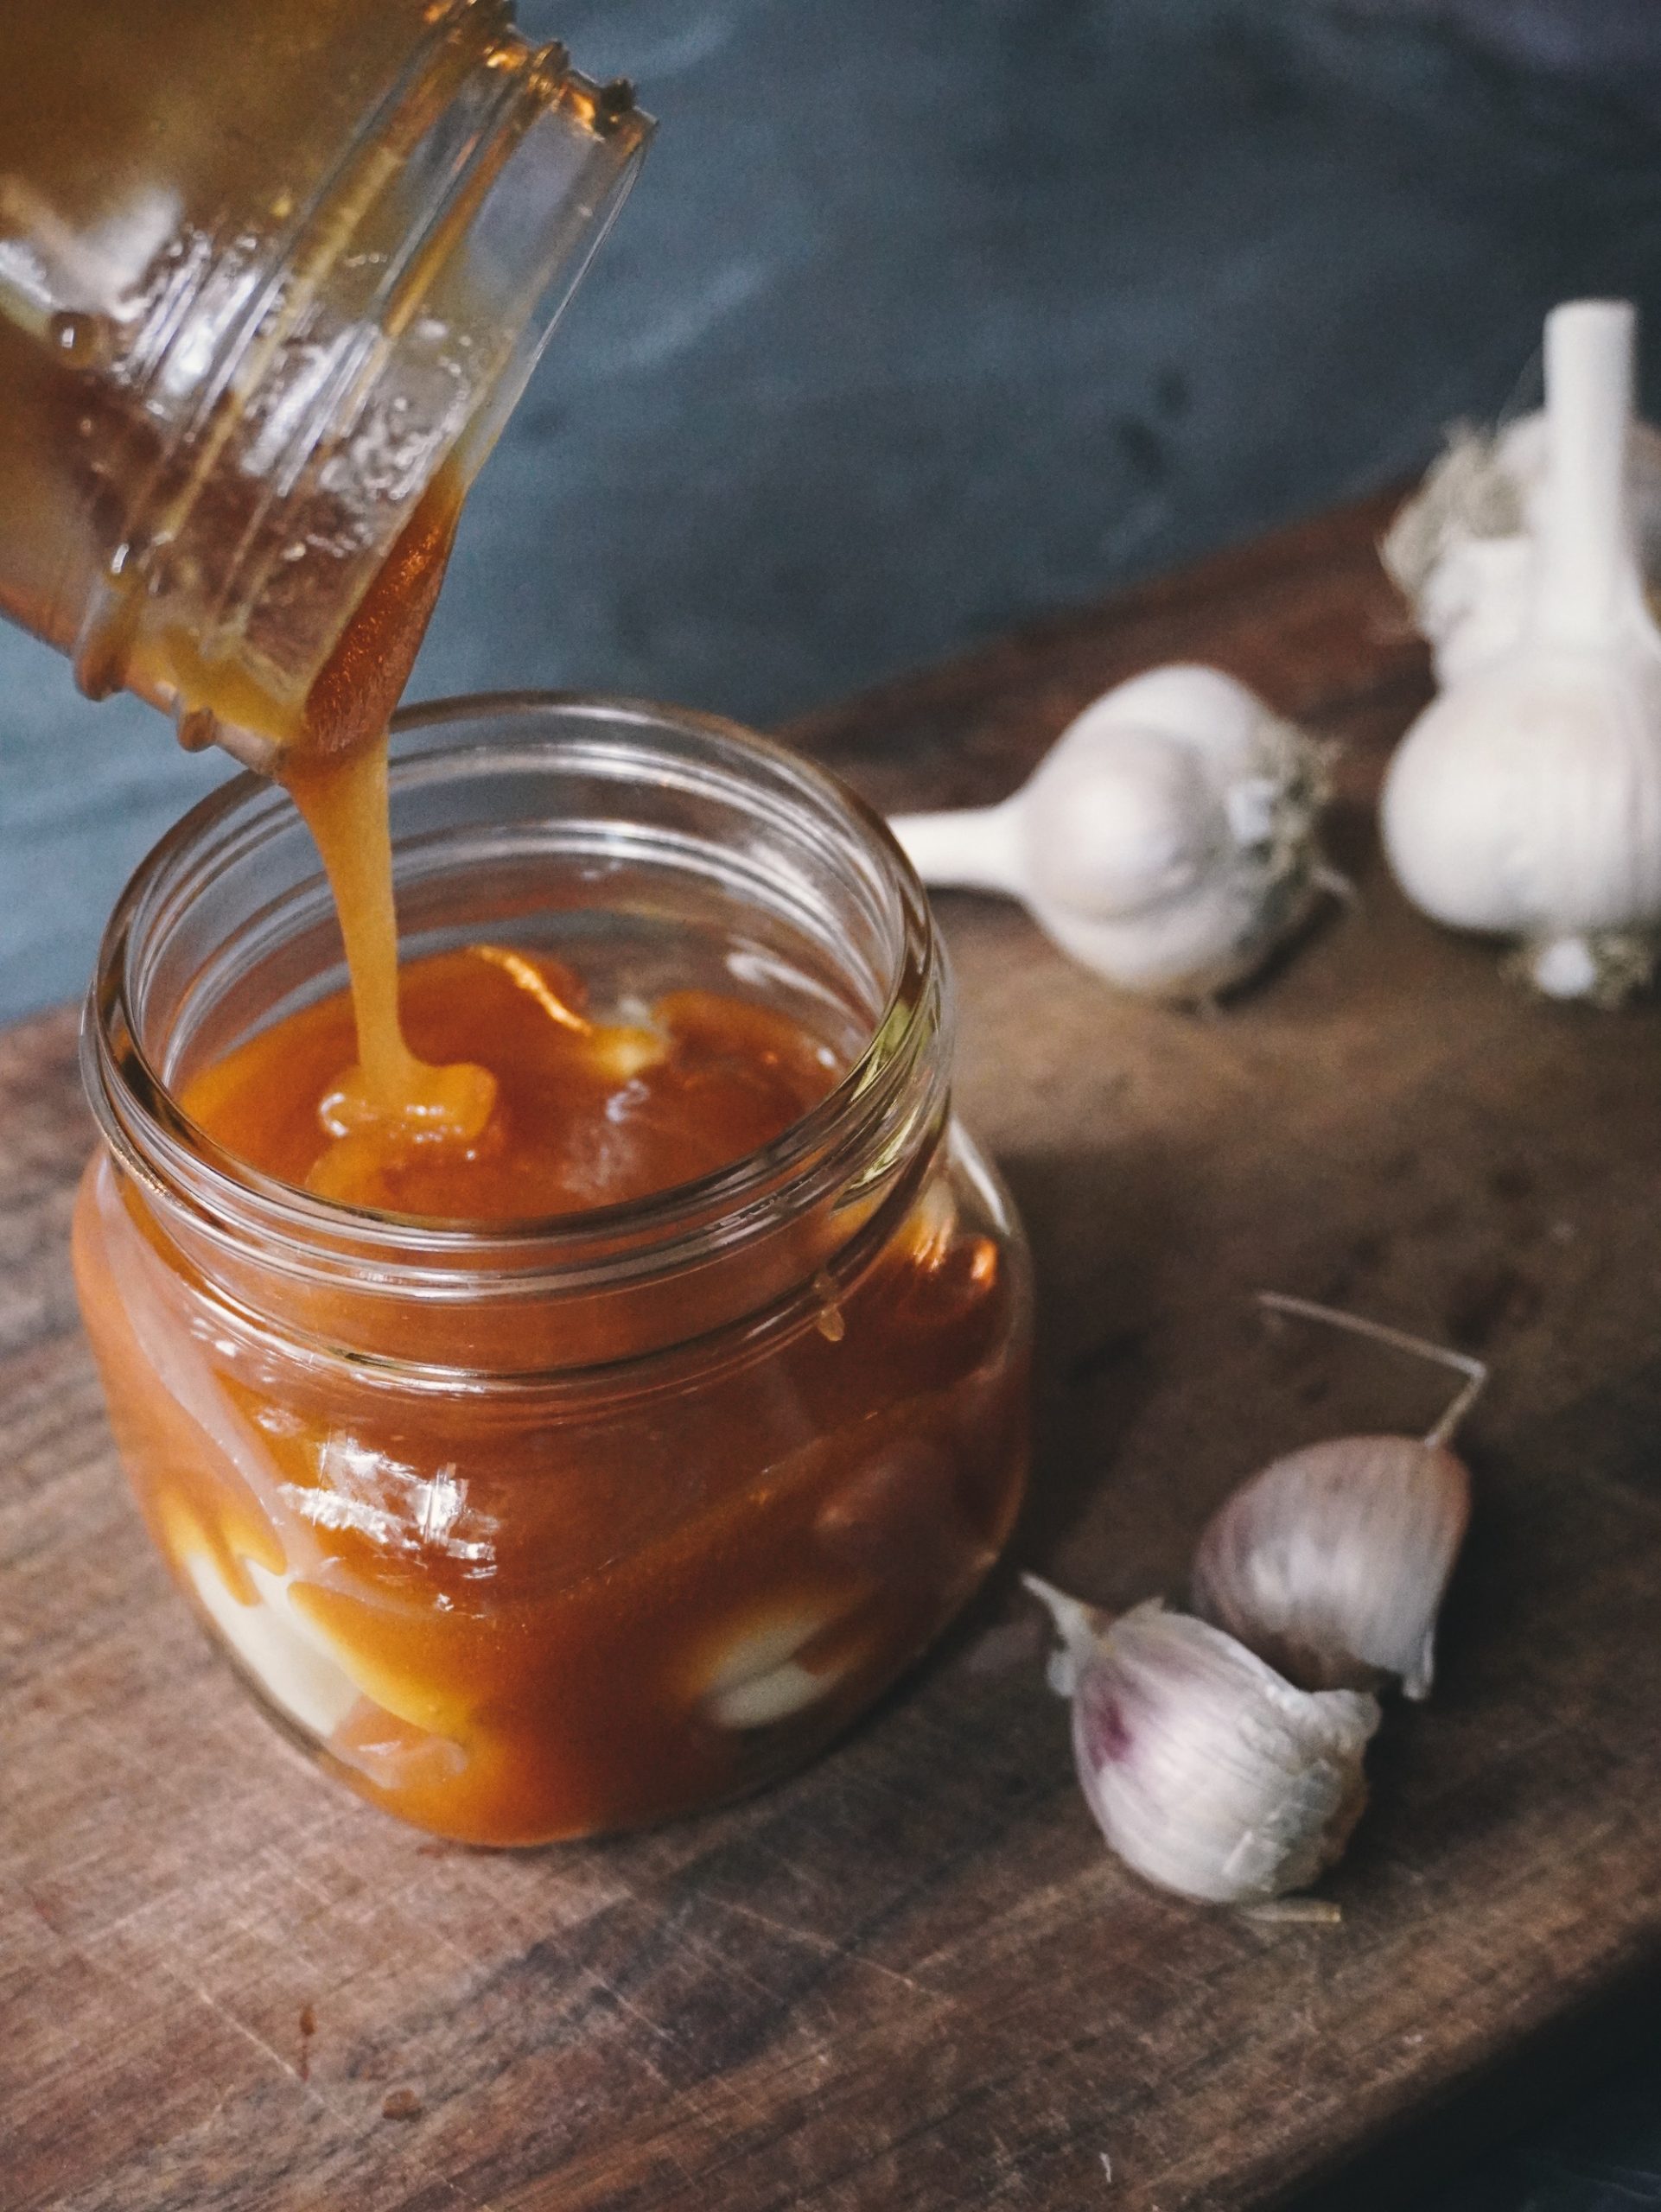
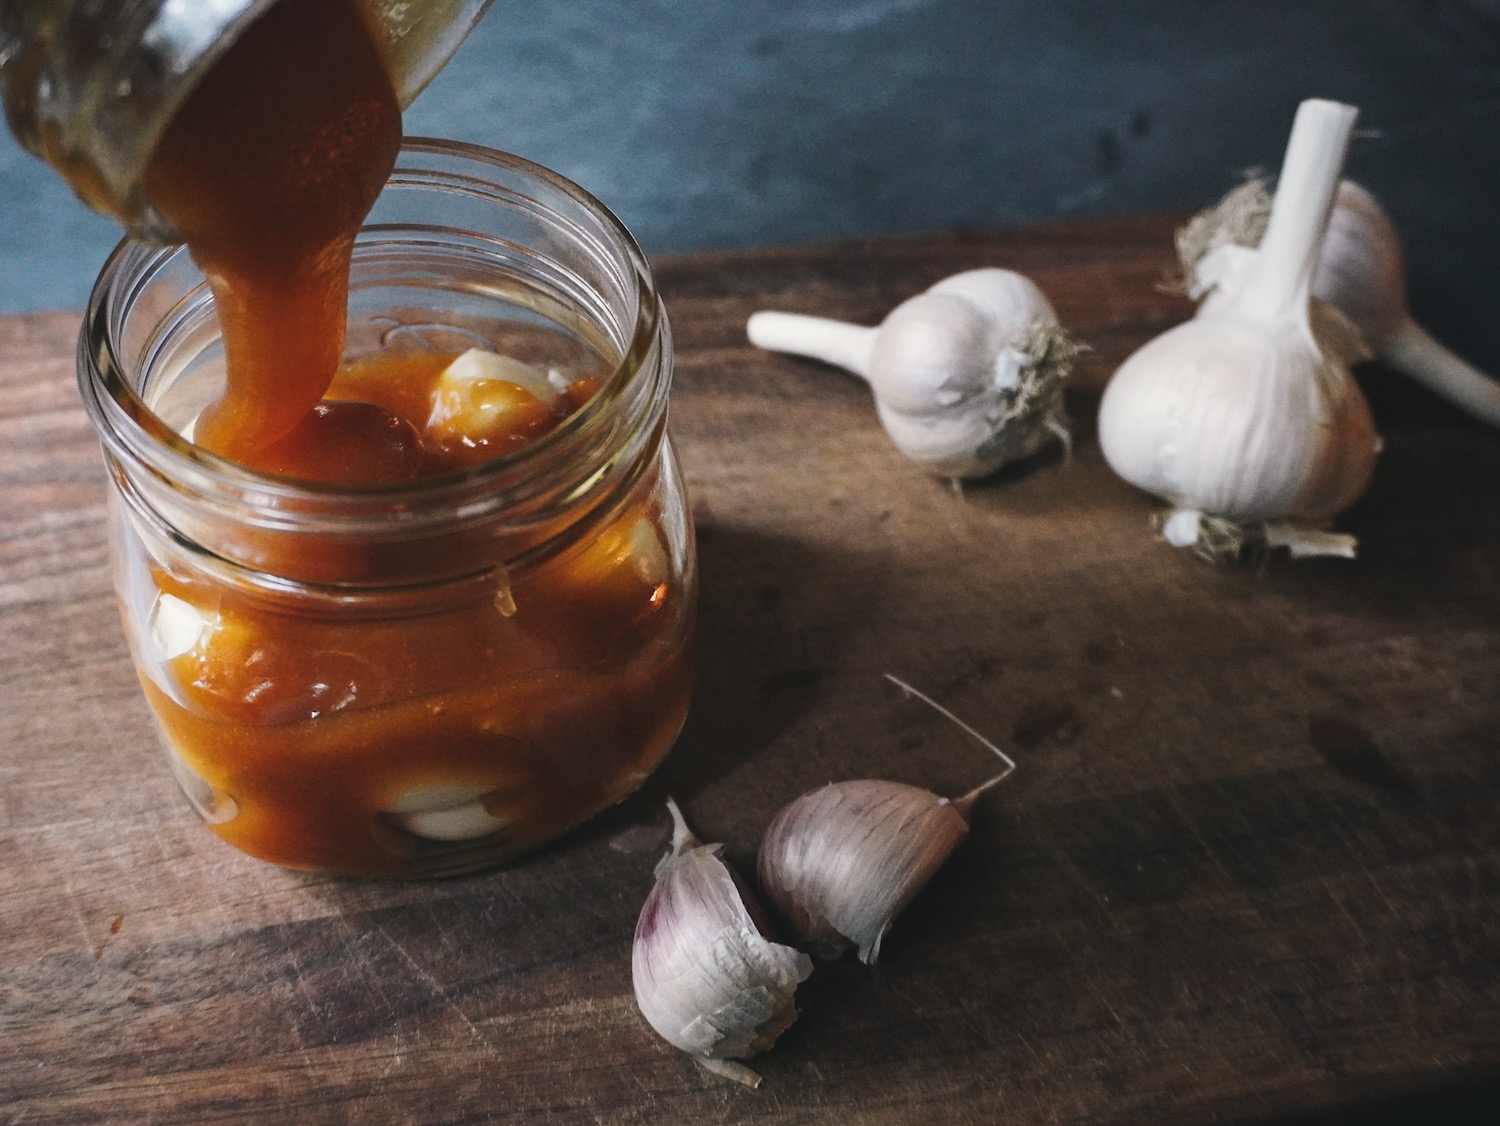
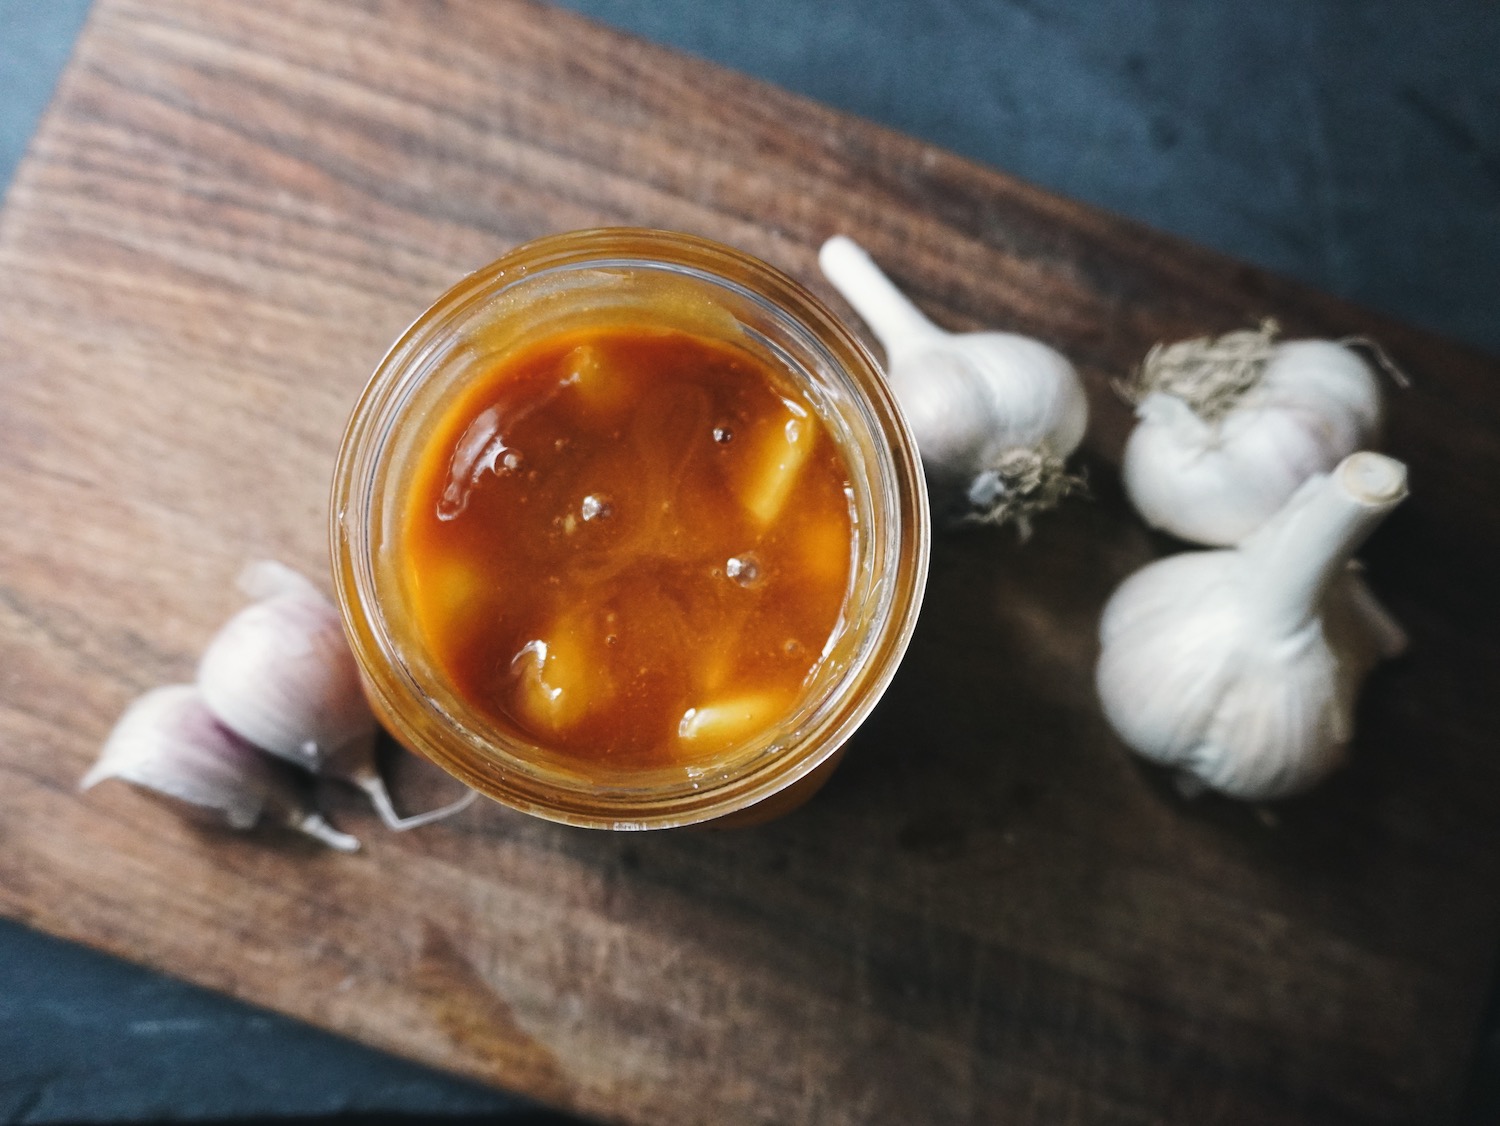
Don’t do it too hard, though! You don’t want to bust the garlic up into pieces. You want the cloves to remain whole, but slightly smashed and weeping. Peel enough to fill your desired jar ⅔ of the way up.

Step 2: Add the honey
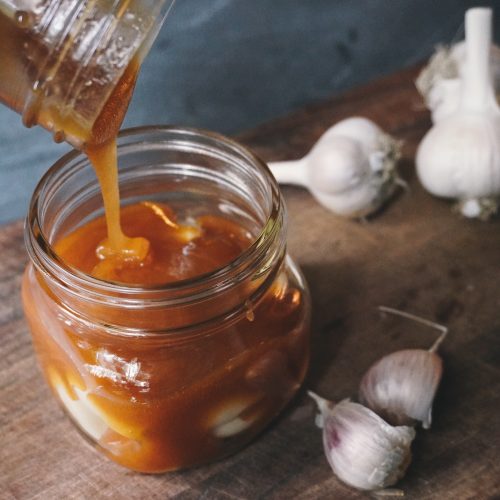
This is the easy part! Pour in raw honey to cover all of the cloves and stir. As mentioned above, using raw honey is absolutely essential as it contains the bacteria and wild yeasts needed for fermentation to happen.
Honey itself is anti-microbial and the low moisture content keeps bacteria from growing, so how will this work? That’s where the garlic comes in. With our smashed cloves, it will weep out just enough liquid to kickstart that fermentation.
Step 3: Start fermenting!
Tuck the jar in a dark location (like your cupboard), but not too far out of sight that you forget about it. I like to keep it in my coffee or spice cupboard since I go in there daily.
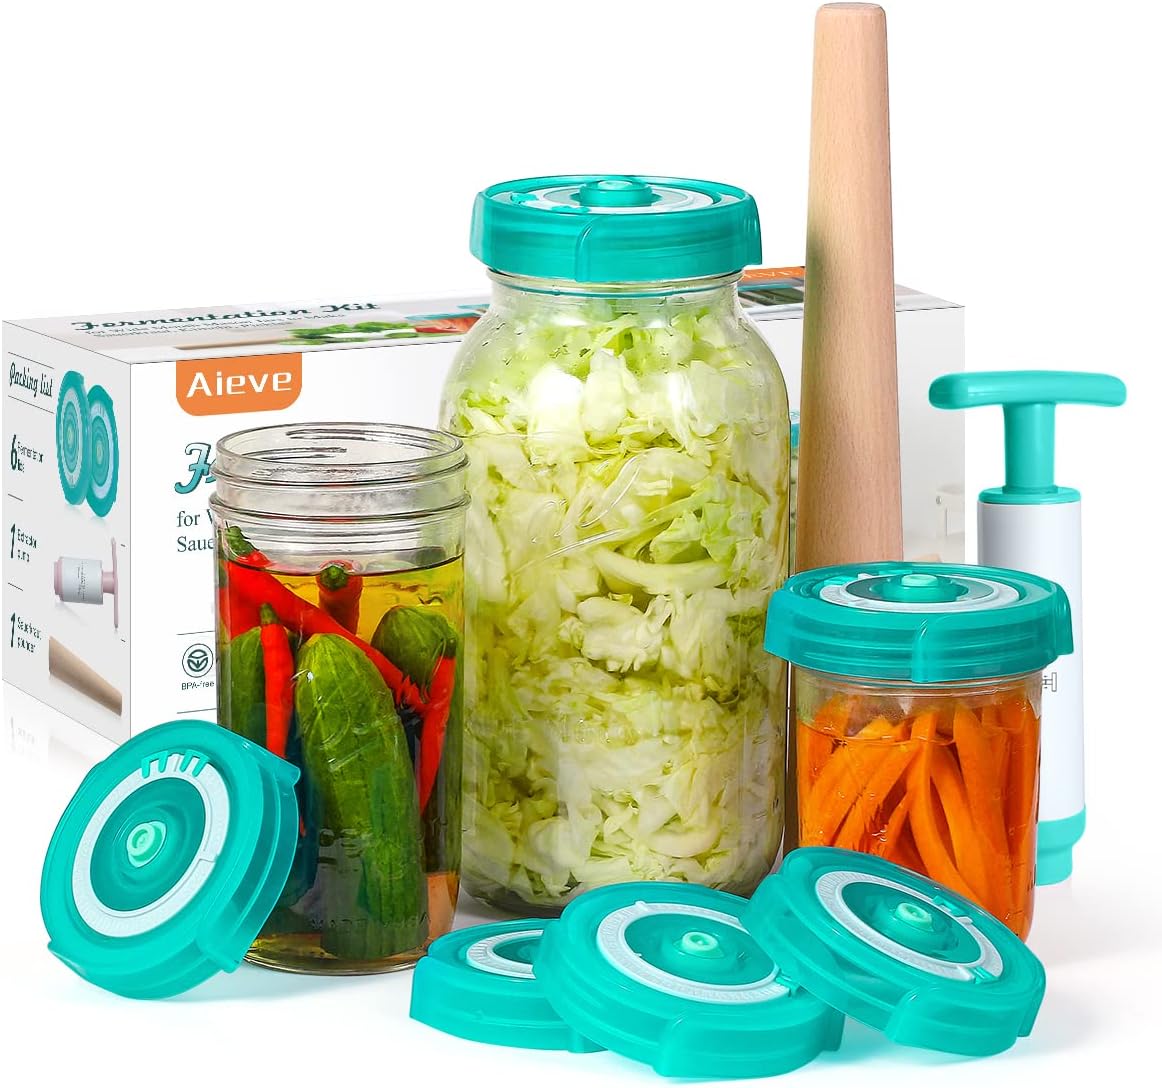
This is one of the few ferments that we make without a fermentation weight! A fermentation weight would just get all sticky and gooey. Instead, give the mixture a stir (or flip the jar) every day or two to make sure that the cloves stay covered.
You’ll notice that the honey starts out thick (and hard to stir), but after just 24-48 hours it will thin out from the weeping garlic juices. It gets easier and easier to mix as time goes on.
Step 4: Give it a stir
Since this is a fermented product, it will release some gas as it ferments. It will need to be expelled, otherwise, your jar can explode. No thanks! There are a few options:
- Standard canning lid: Screw it on tight, but “burp” it every few days.
- Standard canning lid: Set it on loosely and leave it slightly ajar
- Fermentation lid: Screw it on and don’t worry about the gasses (however, don’t “flip” the jar to mix the contents if using this lid. The honey might clog the gas vent)
The Homesteading RD's Product Picks | |
| This is a great starter pack! I love that it has a date dial on top so you can keep track of when your ferments should be complete. The included pounder is perfect for sauerkraut! |
I personally do option #3 – use a fermenting lid and just stir it every day or two with a new, clean spoon. You can lick it off afterward and enjoy a tasty treat! Yum!
Keep an eye on your fermented honey garlic and after a week or so, you should notice some little bubbles forming. Hooray! After 1 month, it should be complete.
While it won’t be fully potent until after 1 month of fermentation, you can certainly use it before then if the need arises. If I don’t have fermented honey garlic on hand, I’ll just chop up some raw garlic and honey together and take it as is, and I still notice some benefits!
Step 5: Storage
Fermented honey garlic is one of the few ferments out there that shouldn’t be stored in the refrigerator. Yes, that means that it will continue to ferment a slight bit some as the months go on, but that’s okay! Most of it will finish out within the first month.
Tuck it away in your cabinet or cupboard and it will be just fine in there. Coolish temps are great (55-65 degrees), but don’t be tempted to keep it in the fridge. Otherwise, it’ll crystalize and turn hard as a rock.
So, how long will it last at room temperature? I’ve found that 6 months is pretty average. Therefore, if you make it in the fall then you’ll be set through the spring when sunshine and warmer temperatures take over. Perfect!
How to Use Fermented Honey Garlic
The most common way to use fermented honey garlic is to pop a clove and a bit of honey in your mouth anytime you feel under the weather. You can chop up the clove into smaller pieces, too, if you prefer less at one time.
To really up your game for immune-boosting natural remedies, make a batch of Homemade Fire Cider, too! I like to alternate between these two anytime I’m feeling a cold coming on.
Fermented honey garlic can also be used as a wonderful culinary addition!
- Drizzle some of the honey on pizza
- Add some of the honey to homemade salad dressing
- Chop up the garlic and add it to sauces and marinades
- Add some of the honey to tea
- The options are endless!
Is Fermented Honey Garlic Safe?
The main concern circulating around the topic of fermented honey garlic is the potential for botulism. Honey can contain a bacteria called Clostridium botulinum, which is why it should not be given to infants less than 12 months old.
According to the CDC, garlic in oil is a high-risk food when it comes to botulism. So, is fermented honey garlic safe? If made properly, absolutely.
All about pH
For the spores to grow, the pH of the solution needs to be above 4.6 and the pH of honey is typically between 3.2-5.4. The pH of the honey depends on where the bees are collecting their nectar from:
- Lowest pH (3.5-3.9): acacia, orange blossom, rosemary, sunflower, thyme
- Highest pH (4.3-5.4): chestnut, dandelion, eucalyptus, honeydew, manuka
Therefore, I recommend using the right kind of raw honey to be safe. Garlic, on the other hand, has a pH between 5.3-6.3, which is still technically acidic, but it will raise the pH of the whole solution a bit compared to raw honey alone.
If you want to be absolutely sure that the pH stays below 4.6, you can test the pH of your fermented honey garlic solution using a litmus test. I like this specific test because the testing range is narrow (3.0-5.5), so you’ll get a more accurate reading than generic tests that detect anything from 0-12.
The Homesteading RD's Product Picks | |
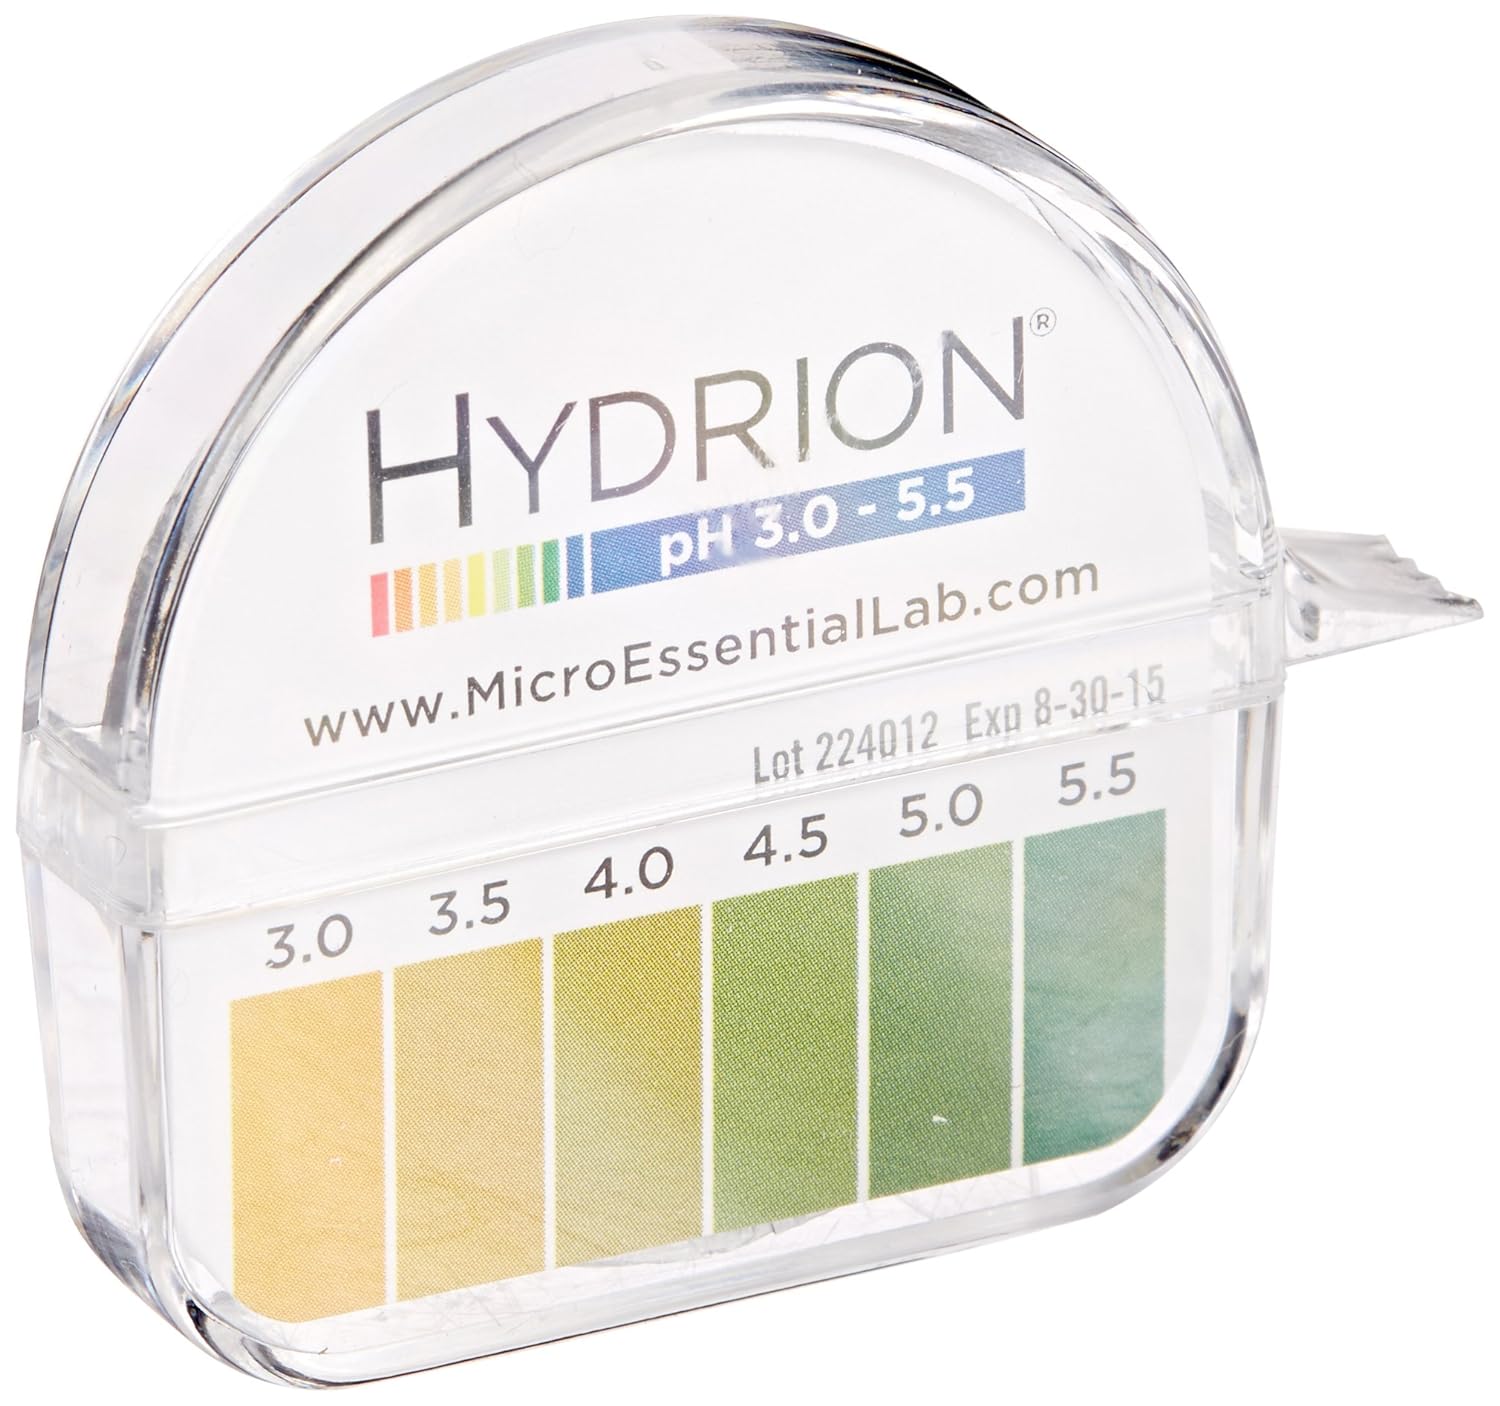
| This is the perfect set of pH strips for making fermented goods! Since it measures a smaller range, it's easier to get a more accurate reading. |
If you notice the pH approaching (or surpassing) 4.6, you can add a little splash of apple cider vinegar (I like raw, with the mother) to bring the pH back down.
The fermentation action here also provides an extra layer of protection, so using RAW honey is key! Lastly, I dug around and couldn’t find a single documented case of botulism from this home remedy. Whew!
The takeaway: Use raw honey from low pH nectar sources and you should be fine! You can also test the pH to be certain 🙂
Other Recipes You’ll Love:
- Homemade Fire Cider Recipe
- The BEST Kombucha Ratio for a Tasty Brew
- Fermented Eggs Recipe (EASY!)
- Fermented Turnips Recipe (Sauerruben)
Final Thoughts
I love having fermented honey garlic on hand as we enter this next round of cold and flu season. It’s amazing how powerful natural remedies can be if we learn how to lean into them and use them correctly. Enjoy!

Fermented Honey Garlic
Equipment
- 1 Cutting Board
- 1 Knife
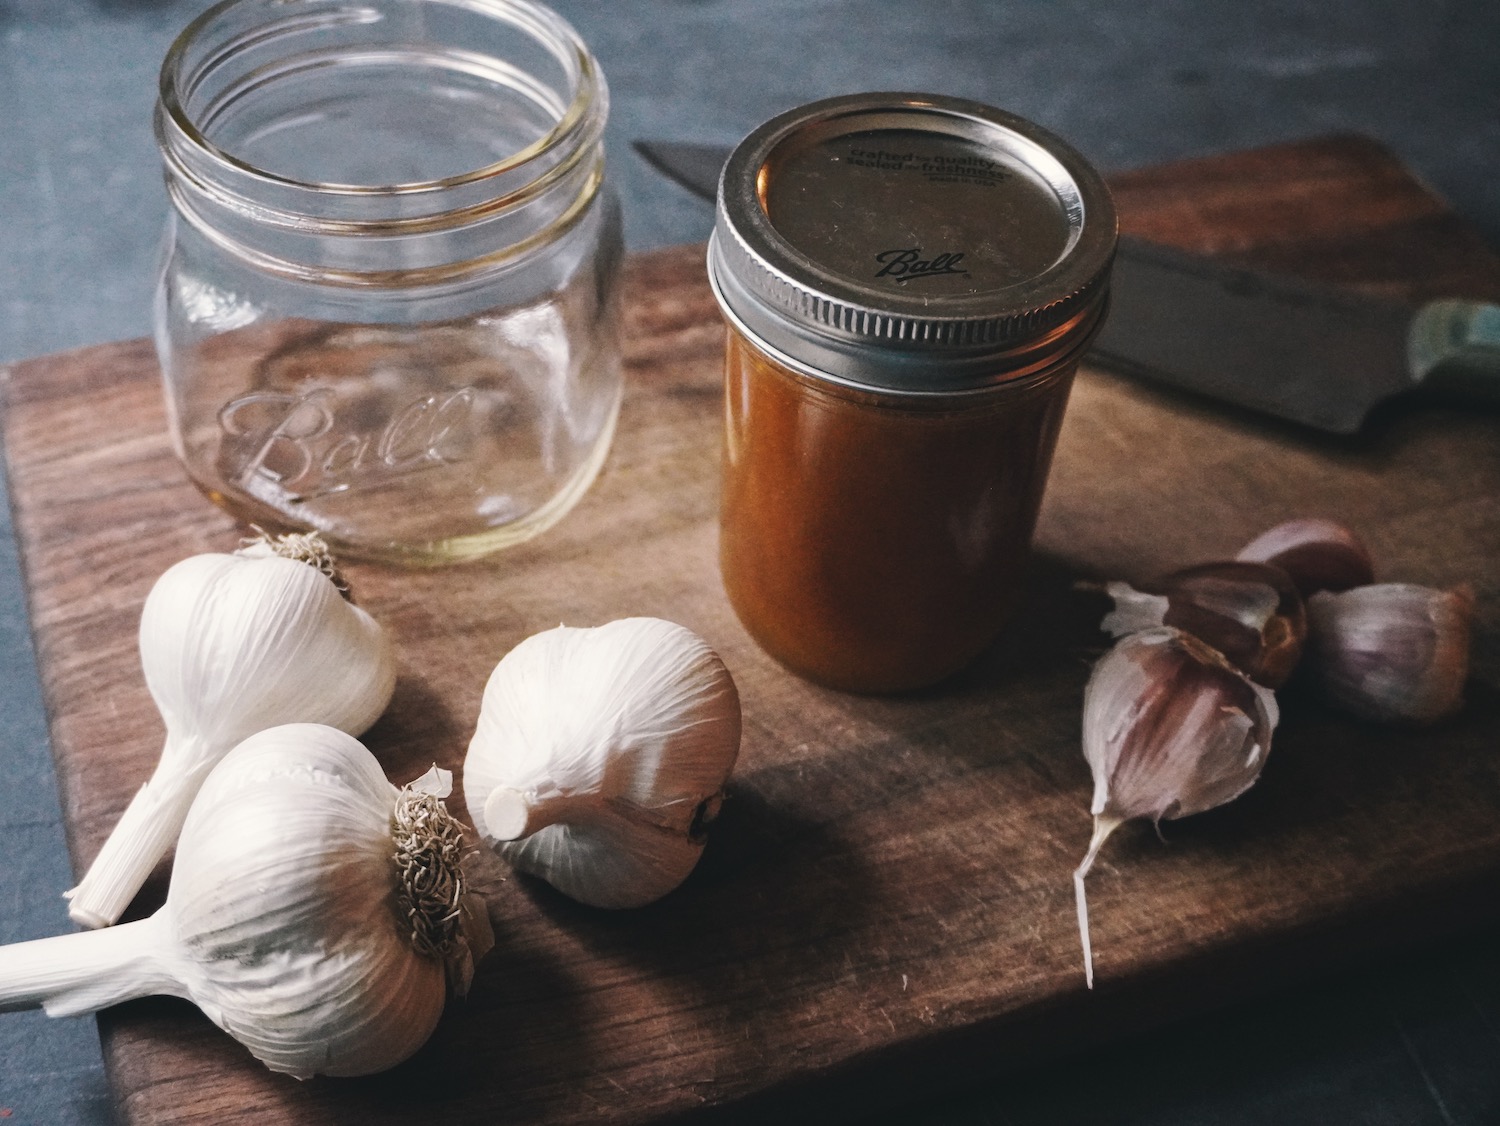
- 1 glass jar
- 1 Lid
Ingredients
- Garlic cloves whole, raw
- Raw honey
Instructions
- Peel the garlic by laying a chef's knife over each clove (flat side down) and give it a firm wack with your hand. This will lightly soften the garlic and let the skins slide off. It will also release some of its natural juices, which will aid in fermentation. Don’t do it too hard, though! You don’t want to bust the garlic up into pieces.
- Peel enough to fill your desired jar ⅔ of the way up.
- Pour in raw honey to cover all of the cloves, give it a stir and cover with a lid.
- Tuck the jar away in a dark location (like your cupboard), but not too far out of sight that you forget about it. I like to keep it in my coffee or spice cupboard since I go in there daily.
- Give the mixture a stir (or flip the jar) every day or two to make sure that the cloves stay covered. If you decide to just flip the jar, make sure to briefly open (or "burp") the lid to let the gasses from fermentation release.
- Keep an eye on your fermented honey garlic and after a week or so, you should notice some little bubbles forming. Hooray! After 1 month, it should be complete.
- Fermented honey garlic is one of the few ferments out there that shouldn’t be stored in the refrigerator. Store in your cabinet or cupboard instead. Coolish temps are great (55-65 degrees). This should last 6 months!
Notes
- Drizzle some of the honey on pizza
- Add some of the honey to homemade salad dressing
- Chop up the garlic and add it to sauces and marinades
- Add some of the honey to tea

Hi Amy, I have several jars of garlic fermenting, but I have one that has so much foam on it, never saw that before. It’s like what a beer looks like when you first pour it. Well, it gets that high when I flip it to coat the ones that are floating. I have never done all the testing. Just been really careful when I make it. I get the garlic and the honey from the same supplier at a farmers’ market. Think the jar is bad?
Hello,
Just made my first jar and it’s happily sitting in my pantry. I have a question. I stirred it as directed. Licked the spoon and then realized it wasn’t completely covered so I added more honey and without thinking I put the spoon into jar again! I am so upset with myself for contaminating the jar. Should I throw it out and start over?
It’s probably okay! I personally wouldn’t throw it out unless it starts to get funky, but it’s up to you.
I just did a tiny taste and it seems fine but now I’m so freaked out about botulism. Is it something to be worried about. It looks great and no signs of spoilage. Have you ever known any cases of botulism from garlic honey? Is it highly unlikely?
Hello, I am a beekeeper and have unfortunately found out that some of my honey is fermenting. Can I add garlic to it to make fermented garlic honey?
Hmmmmm…. I didn’t know honey would ferment on its own. Is there something else present that triggered the fermentation process?
Hi, I made my garlic a few weeks ago. I didn’t test the ph when I made tge batch but I ph tested it yesterday. The inside of the clove itself was 5.3 and the honey was 4.3. Is that okay? I did add a smidgen of acv just to be safe. Should have i ph tested it sooner?
Garlic cloves naturally have a pH between 5.3-6.3, so that’s normal. I think you’re doing okay if the honey is at 4.3, but I’m glad you added some ACV to be safe!
Hi, I ph tested my fermented honey/garlic (ready to consume in 2 day’s) and there garlic cloves were 5.3-5.5 whike the honey was 4.3. Do I need to be concerned? I did put some acv at this time just to be safe!
Garlic cloves naturally have a pH between 5.3-6.3, so that’s normal. I think you’re doing okay if the honey is at 4.3, but I’m glad you added some ACV to be safe!
Thank you! And sorry for the duplicate! I didn’t know ow the first one went through!
Hi,
I made the fermented honey garlic recipe about a month ago, all of the garlic has floated to the top also should the garlic still be crunchy.
Thank you
Hi Pam, yes the garlic cloves like to float, so try to remember to stir it from time to time to keep them somewhat covered by the honey once fermentation process is complete
Him I’m wondering where is the best place to keep this when you live in the tropics. There is no such thing as a cold dark cupboard here. I don’t use ac. You say not the fridge, but that’s the only cold dark place in my kitchen. Kefir ferments in less then 12 hours here on the counter, in the summer, 18 hours or so in the winter.. just wondering what I should do, I definitely need this in my arsenal.
That’s a hard one! I would just do the best you can. If you have a basement, that might work well
I live in Florida and have been making and eating fermented garlic/honey for over a year and have have had no problems. I actually, stick my honey/garlic in the garage to ferment. It’s worked well for me.
Hey there! Does this ever go bad? I made some probably over a year ago and have a lot left over. Is it still good to use?
I recommend making a fresh batch every year.
Thank you for this clear recipe and the instructions! Do you think the mixture is safe to mail after 30 days, when the garlic is mainly done fermenting? If so, would you recommend overnighting it so that it spends as little time as possible un-burped?
I just purchased a large bag of organic peeled cloves from a store. Are these OK to use after I clean them in a vinegar soak (rinsed after, of course)? Thank you!
I personally wouldn’t. You want the natural yeasts and bacteria present on the cloves to aid in the fermentation. The vinegar could potentially kill that off.
So after your honey has fermented can you emulsify the mixture for easier consumption?
I don’t see why not!
Thanks for covering that! I did a bunch of honey garlic this year, fresh garlic (homegrown) and good (local, raw) honey. I burped it for about a month, it was stinky and good. Now (several months later) it is past fermentation, only the outside of the cloves seemed to ferment, the inside is crunchy and potent garlic. Not too much to my liking. Seems like I should have cut up the garlic. but now I have a half gallon.. Not knowing if I should be worried if they are safe. I want to use them in recipes. But concerned for the real untouched inner garlic. I am sure I am not the first for this to happen to. Any thoughts?
This is a great question and it’s really hard to say without doing some laboratory testing. My gut feeling is that they are okay, but if you want to be safe maybe you could at least use them for cooking where heat is involved?
Hi
Thank you for The excellent potion.
You’re welcome!
Hi
Thank you for the excellent recipe.
You’re welcome!
Can I use Pickled Garlic?
This article was so helpful! I just used up most of the honey in my jar (it’s been fermenting for about six months. I have a ton of garlic left. Can I add more honey to it? If not, how do I store the remaining cloves? Only about 2/3 of them are submerged. TIA
The garlic should remain submerged/heavily coated at all times. I would toss it if there’s a lot of exposed garlic left.
This all sounds too risky, I made a jar yesterday now I am afraid to eat it. I don’t have any ph paper. I will leave this up to a chemist. tossing mine.
This all sound too risky, I made a jar yesterday now I am afraid to eat it. I don’t have any ph paper. I will leave this up to a chemist. tossing mine.
How often do I stir it once a day? Up until the one month mark? Even when it starts getting bubbly?
Yes, stir it once a day for a month until the fermentation is complete.
Would adding some lemon be a good way to keep the ph low?
That would probably help, too!
i am curious how to store it once its been sitting a while do you stick a regular lid on it? i made some a few months ago and its just chilling still with my fermentation lid on it id like to just store it with a regular lid if i can or if itll continue to need burped i wont…
It should be largely done fermenting after 1 month, so you can technically use a standard lid (I would just burp it at least monthly to be safe). I personally just leave my fermentation lid on to be safe.
Thankyou, this has been unclear to me. I’m in need of the ph test strips. Do you know how to order them? I have not had my jars sealed tightly (but loosely for 2 weeks having opened, turned and shaken them daily). I started closing the lids tightly yesterday when I saw limited bubbles rising to the top. I’m confused about loose or tight lids, and at what day/week!!! Thanks
Hi Amy, I’m glad to hear that you plan to test the pH of your honey! I have my favorite pH test strips linked in this article, plus step by step instructions on how to do all of the steps 🙂
Pets store also carry ph strips for fish tanks.
Great article and info. After I’ve mixed the garlic and the honey, and let it ferment, and then eat all the garlic, can I then re-use the honey and add more garlic to it? Any reason NOT to do that?
I would personally use fresh honey for a new batch, but don’t toss out the old honey! You can still use it for adding to tea, making cough drops, cooking, salad dressings, etc.
Should I be concerned if the honey went as high 5.3 PH I am added Apple cider vinegar?
Yes, I wouldn’t risk it. According to this article, the botulinum toxin can replicate in as short as 24 hours. (https://www.ncbi.nlm.nih.gov/pmc/articles/PMC1214666/)
Can I use frozen garlic cloves
Can I add more garlic over time or should I start a new jar with fresh honey ? Thanks!!
I would start a new jar with fresh honey
I hope you will see this! I did a jar of this a year ago and left it in a dark cupboard until now. I opened it and don’t get any negative body response when I smell it. The garlic isn’t totally submerged is my only concern but no mold or any looks of icky. Would you eat it?
I’d say it’s questionable, so it’s up to you! Sounds potentially fine based on what you’re saying?
Can I use a coffee filter and jar ring as a lid?
You can as long as you are just stirring the mixture (not shaking it).
Can you add ACV to the jar a couple days after assembling the garlic and honey together? Will the ACV kill any botulism bacteria that might have already begun to grow? Basically, is there ever a time that’s too late to add ACV? I’m a couple days in to my first try at this and just heard about the risk of botulism. Thank you in advance!
Adding the ACV won’t kill any botulinum toxin that may potentially be present, it simply creates an environment that the toxin can no longer replicate in. According to this study, it appears that the toxin can replicate in as short as 24 hours: https://www.ncbi.nlm.nih.gov/pmc/articles/PMC1214666/
I haven’t used this recipe but I have fermented garlic in honey before & we love it. My question is can you ferment garlic that was frozen?
Possibly, but fresh is best! I’d worry that the freezing might hinder some of the natural bacteria/yeasts
Hi! What if the garlic keeps staying a little bit above the honey?? The tops aren’t covered and I added more honey but it all sinks to the bottom. Do I just make sure to flip it upside down every day? My garlics keeping floating to the top no matter which way I flip it. :/
Yes, the garlic tends to float. Just make sure to stir the mixture or flip the jar daily and it should be okay!
When I opened my jar it foams up. Is this ok?
It should be a little bubbly, but I’m not sure about foaming up. Have you been testing the pH?
Is to much oxygen bad , how can I tell if botulism is present? I did in pickle jars and burp every other day, but I can tell the lids do gasp a little bit of air when I haven’t cracked by third day
How long do I have to keep flipping the jar and burping it for?
30 days
In what way is a honey/garlic fermentation better than just adding garlic to your food and having a spoonful of raw honey if you have a sore throat?
How are we supposed to test the ph if the paper is orange and honey itself is orange? I tried testing my ph and the paper didn’t change colors at all?
If the color didn’t change, it probably means that it is either already acidic (pH of 3.0), or the honey is too thick (not enough water) to interact with the pH strip. If the latter is true, I would recommend letting the mixture ferment for a day or two and then test once the honey thins out.
Can the ph be too low?
To a point, yes. You definitely don’t want it nearing battery acid levels. You still want it to taste good and not be corrosive when you consume it.
Would 3 be considered too low? If so, how do I bring it up a little?
A pH of 3 is a little on the low side and might slow fermentation. The best thing I can think of to bring it up safely would be to add more garlic, which has a higher pH. Do you have room for a few more cloves?
I have a batch I made last winter. Is it OK to use this year? Or should I toss it and start a new batch for this season and maybe not make as large of batches since we don’t take much?
I recommend only keeping it for 6 months, so I’d make a new (smaller) batch. Great question!