
Fermented eggs are delicious, nutritious, and SUPER simple to make! Move over boring hard-boiled eggs, fermented eggs are so much more fun. You’re going to LOVE them!
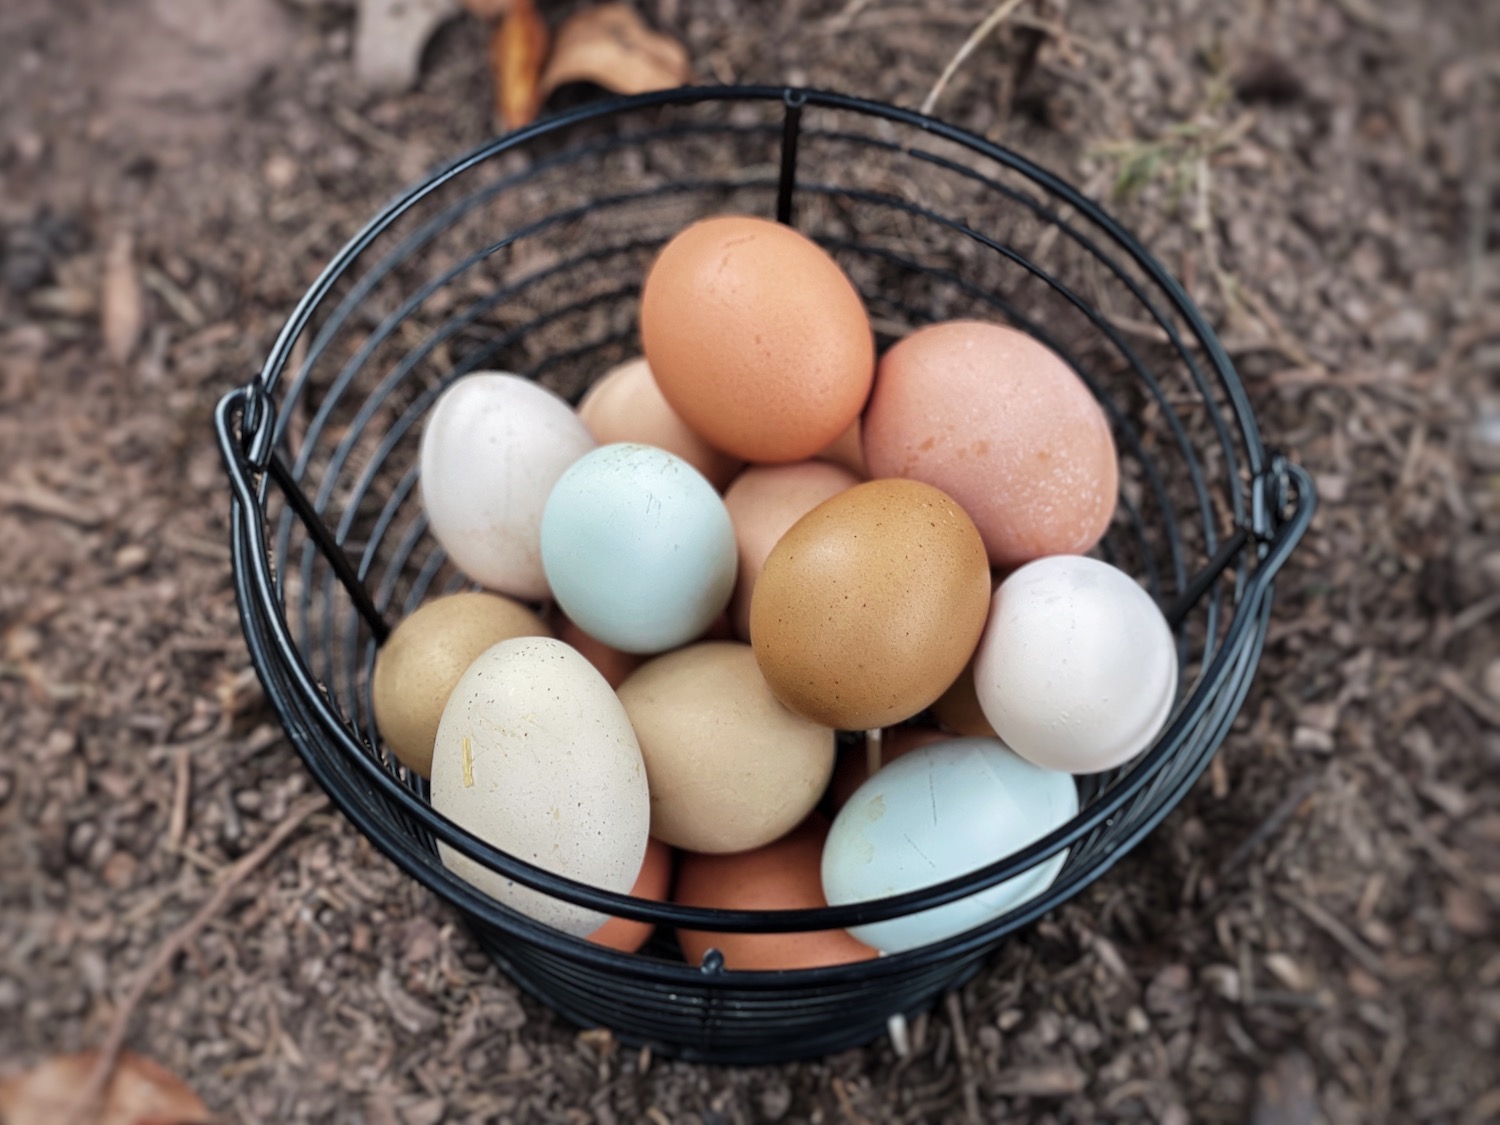
When eggs are coming in from the coop by the basketful in the spring and summer, it can be hard to know what to do with them all. Definitely give this fermented eggs recipe a try!
In this recipe, I’ll share with you my personal favorite way to make them, but I’ll also fill you in on some other flavoring add-ins that you can experiment with. The options (and colors!) are endless.
Let’s jump in!
*Disclosure: This post may contain affiliate links to products (including Amazon). I’ll earn a small commission if you make a purchase through my link, at no additional cost to you! Regardless, I only link to products that I personally use on our homestead or believe in.
What Are Fermented Eggs?
Fermented eggs are exactly what they sound like – eggs that are fermented! Fermentation is a form of food preservation where a salt-water brine is used to encourage naturally-occurring lactobacillus to grow in an anaerobic (no oxygen) environment. The lactobacillus feeds on the starches in the food to create lactic acid, which is a natural preservative.
This is the only type of food preservation that actually increases the nutritional value of the food! Lactic acid bacteria actually can synthesize b-vitamins. Plus, there’s all those lovely probiotics.
How do they taste?
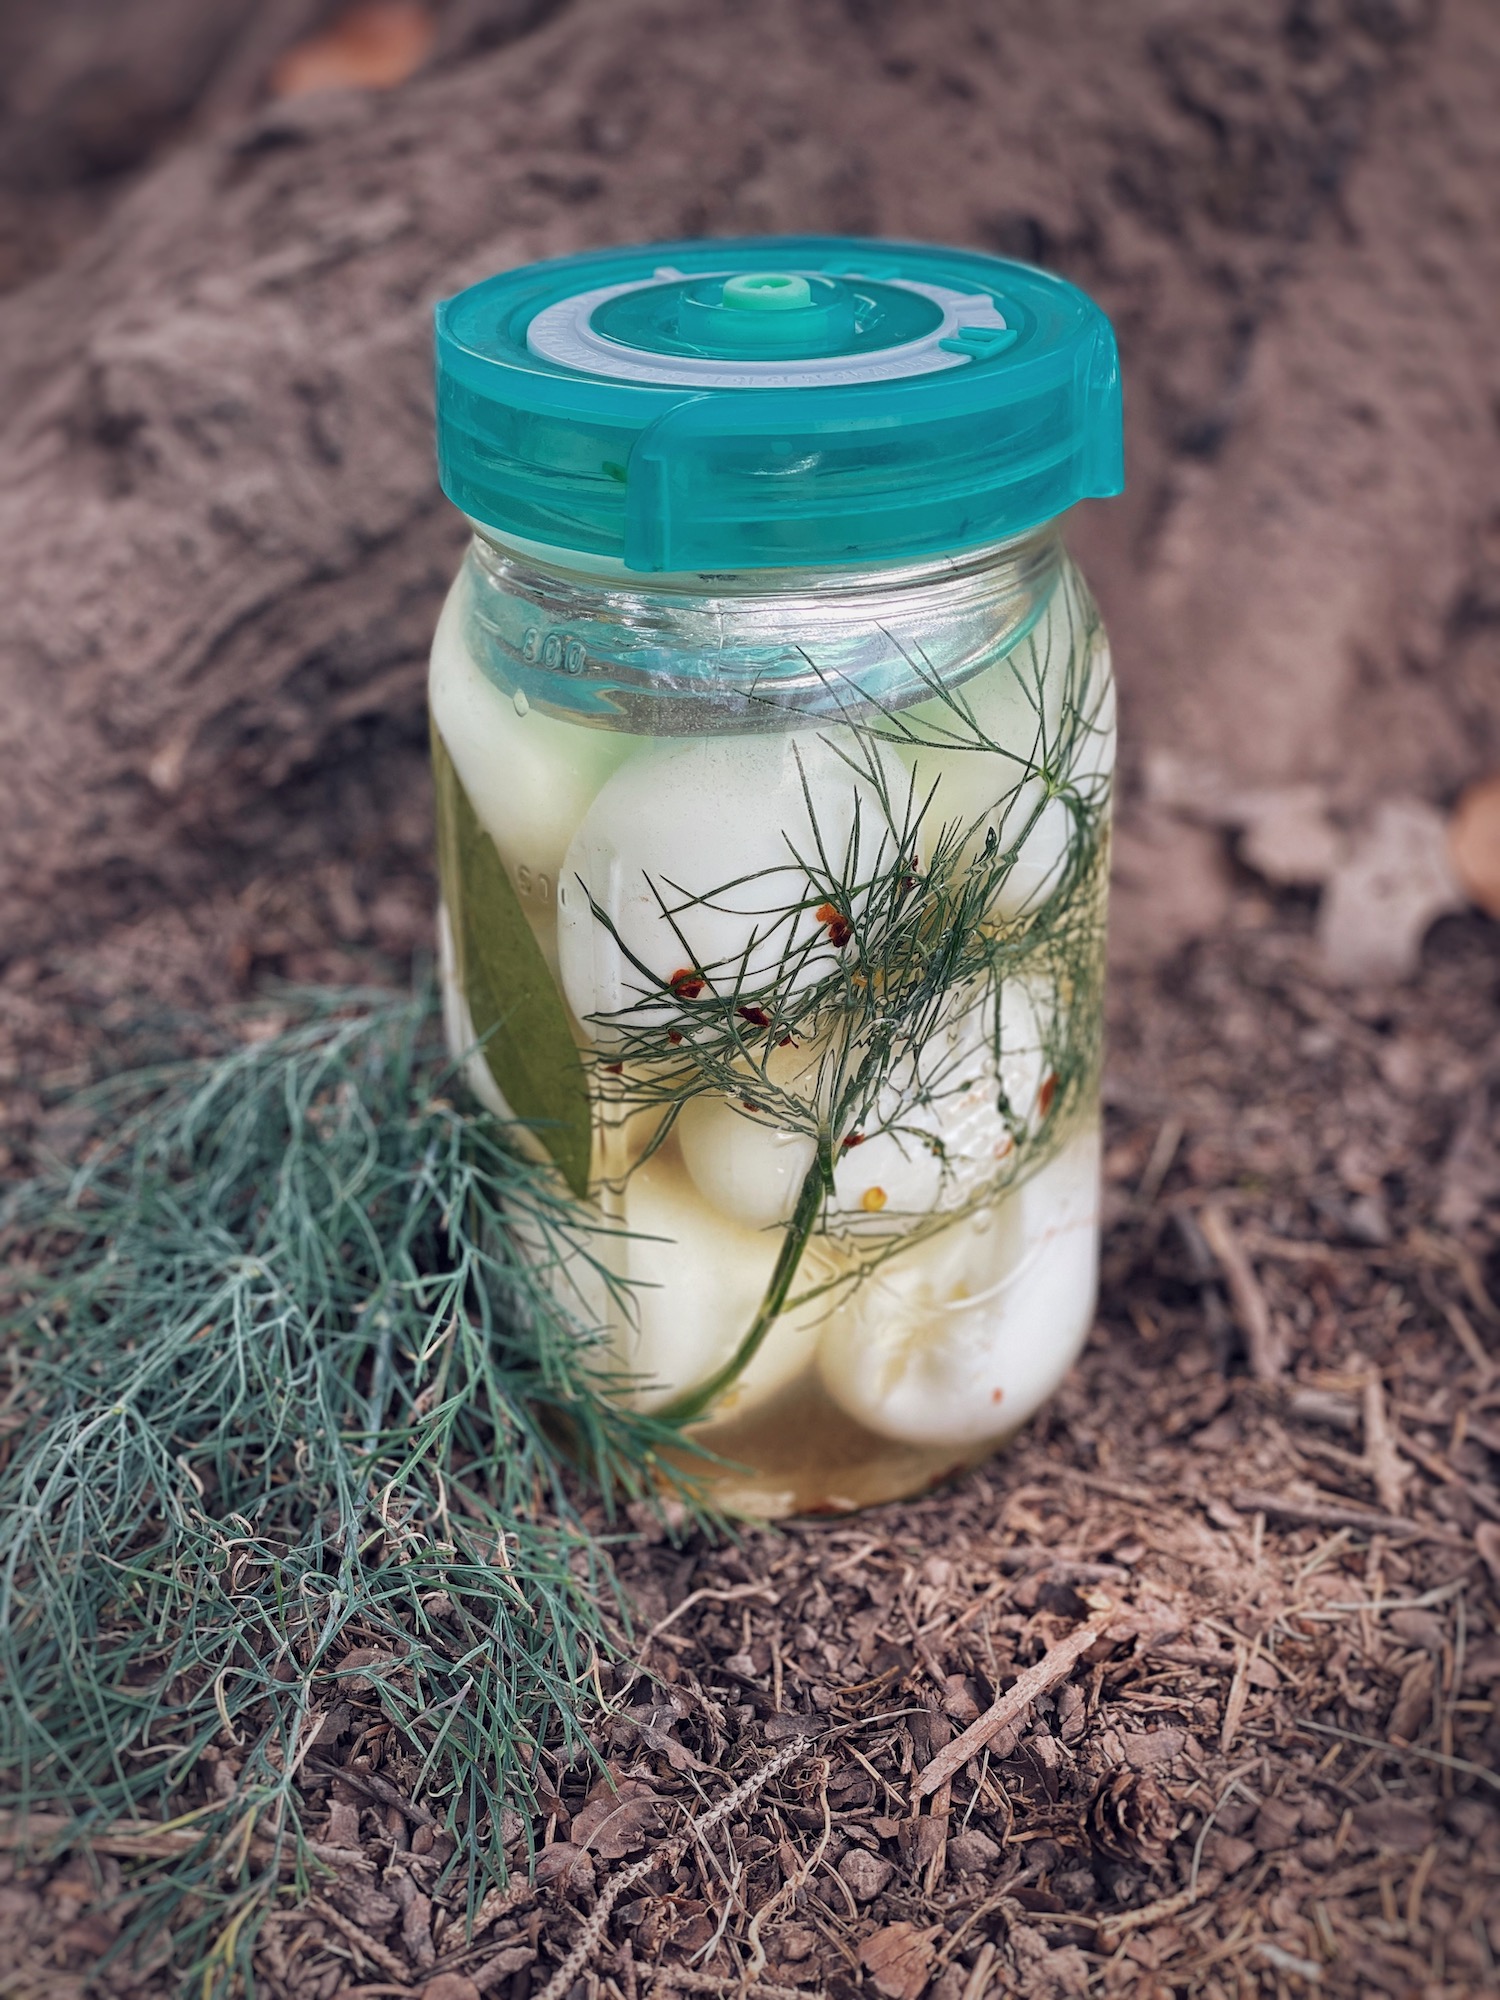
It totally depends on the flavorings that you decide to add! If you decide to add garlic, bay leaves, dill, and red pepper flakes (like in my recipe), then they will take on a pickle-like flavor – YUM! Highly recommend! Check out the other flavor combinations at the end of the article for more fun ideas.
Many people ferment their eggs with no add-ins at all, and they are delicious that way, too! Fermented eggs on their own taste a lot like hard-boiled eggs, but just with a bit more “zing” and “fizz.”
How are fermented eggs different from pickled eggs?
Great question! Pickled eggs are made by using a vinegar base to provide that “zing” flavor while preserving the eggs. Pickled eggs also last longer (4 months) than fermented eggs (2 weeks).
Fermentation is entirely different in that there is no vinegar involved. Instead, it utilizes bacteria and yeast from the added starter to preserve the eggs. The use of salt also kills off bad bacteria while encouraging the growth of healthy bacteria.
Allowing the eggs to sit at room temperature for 3 days in the brine encourages the bacteria and yeast to multiply. Fermentation also provides a bit of “fizz,” which is kind of fun!
Fermented Eggs Recipe
Tools
- Egg cooker (optional, but highly recommended!)
- Medium pot with lid (if not using an egg cooker)
- Quart mason jar
- Measuring cups
- Measuring spoons
- Fermentation weight
- Fermentation lid
The Homesteading RD's Product Picks | |
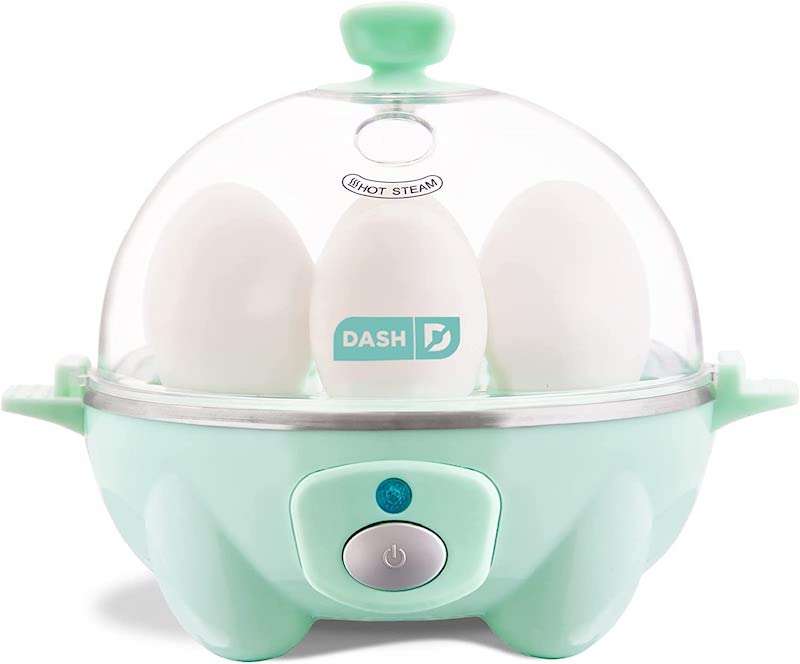
| Cook up to 6 eggs in soft, medium, or hard boiled firmness, while saving time and water. Eggs come out consistently perfect with shell easy to peel, and clean up is snap. Comes in 8 different colors! |
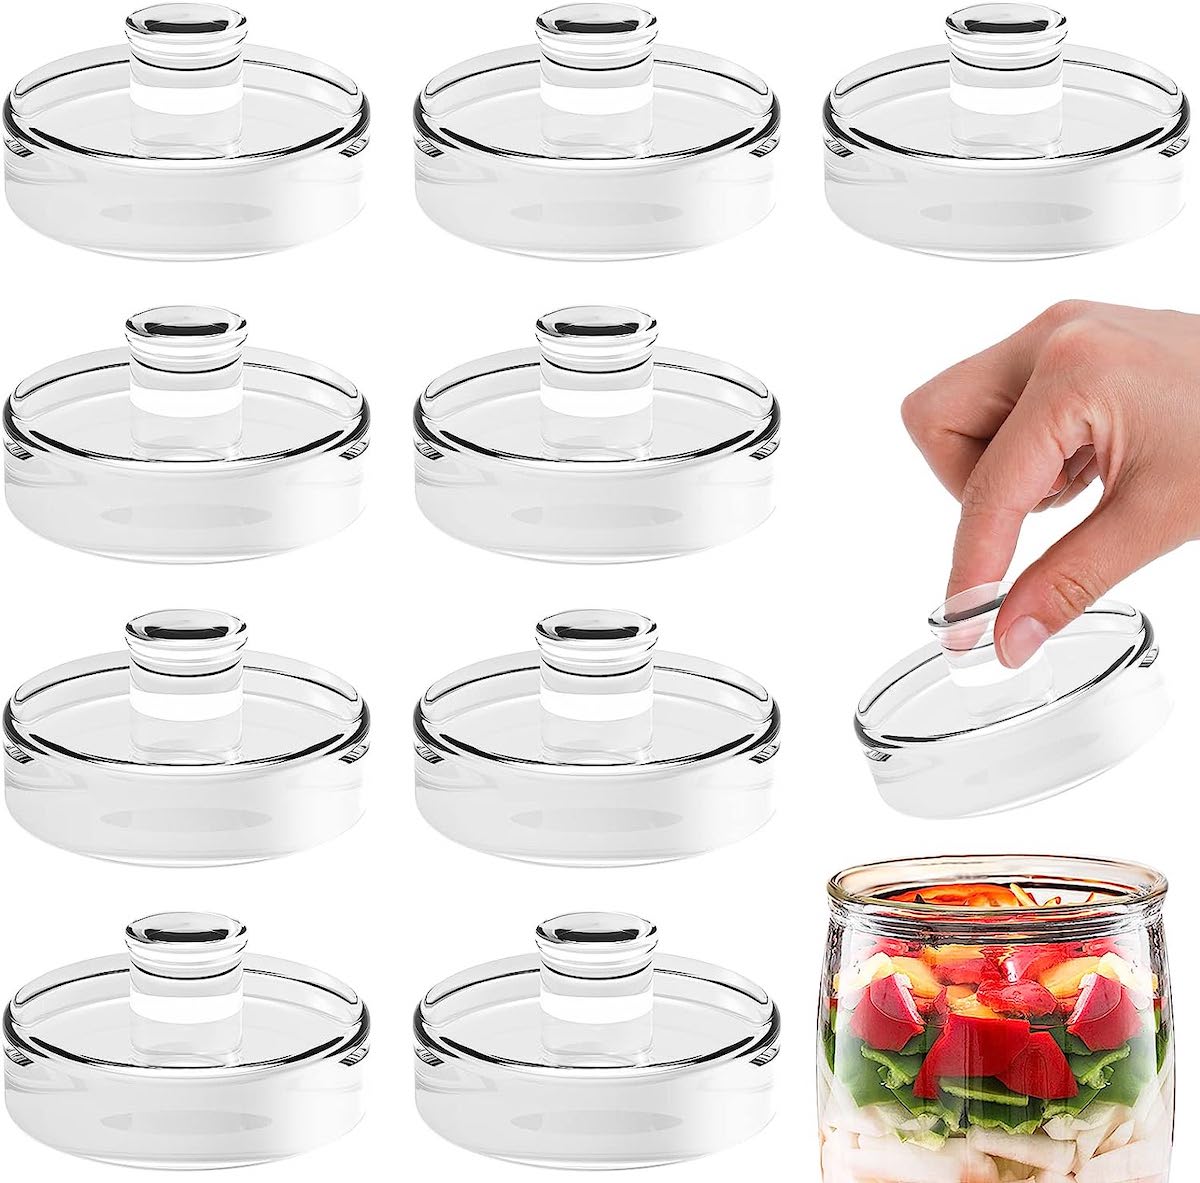
| Using fermentation weights is essential! When placed on top of your ferments, it keeps the tidbits from being exposed to air. If this occurs, mold will grow and the entire batch will be ruined. |
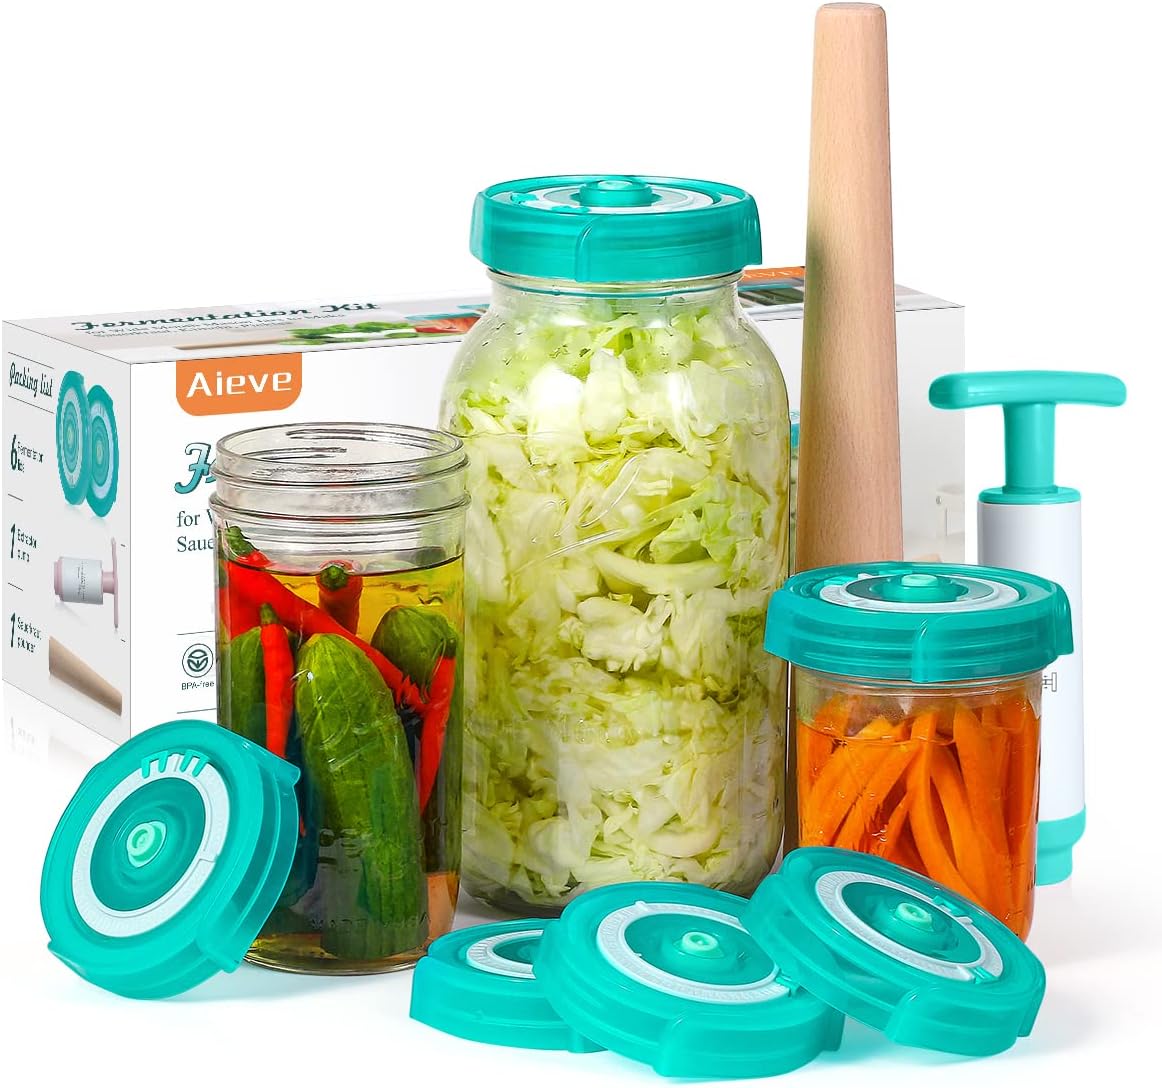
| This is a great starter pack! I love that it has a date dial on top so you can keep track of when your ferments should be complete. The included pounder is perfect for sauerkraut! |
Ingredients
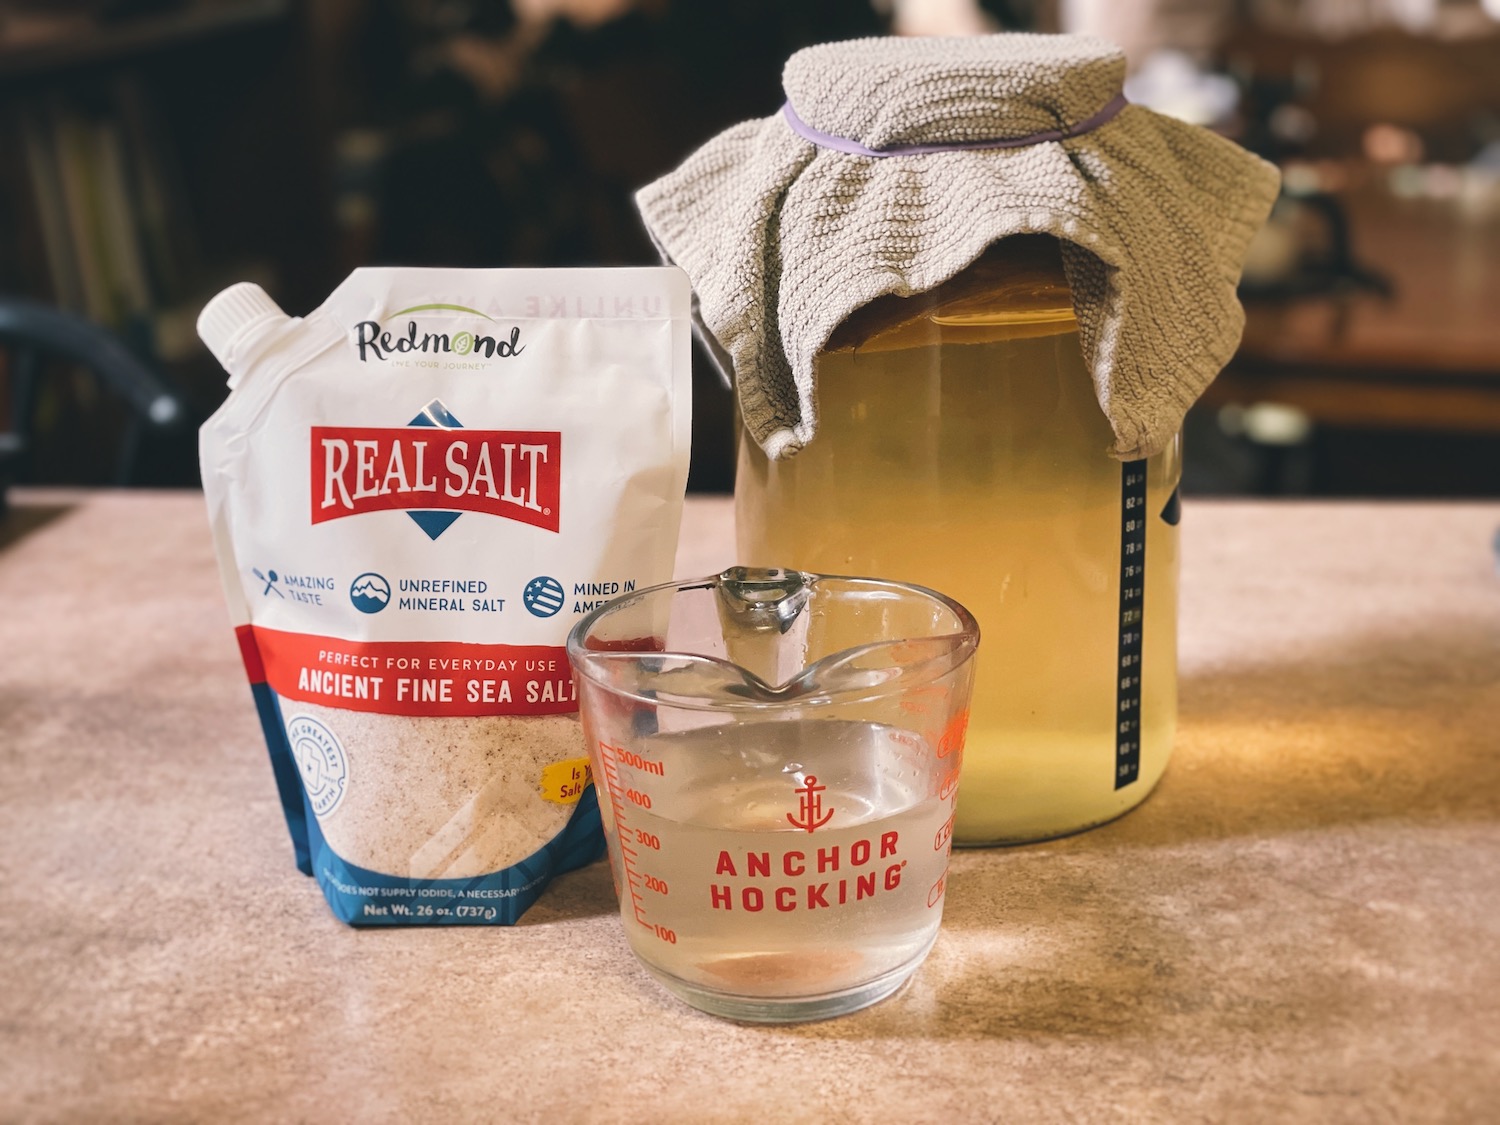
- 9 hard-boiled eggs (peeled) – organic and pasture-raised
- 1 Tbsp sea salt – I like Redmond Real Salt
- 1.5 cups of nonchlorinated water – well water or filtered water
- 1/4 cup of starter – kombucha, whey from milk kefir, or brine from previously fermented vegetables (1/2 packet of starter culture would work, too!)
- 1 clove of garlic – whole, peeled, lightly smashed
- 1 bay leaf
- 2 sprigs of fresh dill
- 1/8 tsp of red pepper flakes – optional for a kick!
How to Make Fermented Eggs
Step 1: Hard-boil & peel the eggs
There are two ways to make hard-boiled eggs: using a modern egg cooker (my favorite), or the old-fashioned way using a pot of boiling water.
The modern egg cooker
Using a handy egg cooker is my favorite way to make hard-boiled eggs. I’ve been using mine for close to 10 years now and it hasn’t failed me yet. The eggs boil up perfectly every time with no mess, they are easy to peel, and it’s super fast!
Once they are done cooking, transfer the eggs to a bowl with cold water running over them to chill them rapidly. Once cooled, peel the eggs and set aside.
The Homesteading RD's Product Picks | |
| Cook up to 7 eggs in soft, medium, or hard boiled firmness, while saving time and water. Eggs come out consistently perfect with shell easy to peel, and clean up is snap. Comes in 8 different colors! |
The old-fashioned way
If you don’t have an egg cooker, that’s ok! We can still make hard-boiled eggs the old-fashioned way.
Add eggs to your medium saucepan. Then, fill with water until 1” above the eggs. Turn on the heat. Once boiling, cover the pot with a lid and turn the heat off. Wait 9-12 minutes, then transfer the eggs to a bowl with cold water running over them to chill rapidly. Once cool, peel the eggs and set aside.
*Tip: I use 9 minutes if using room temperature and/or small-sized eggs and 12 minutes if using refrigerated eggs and/or large-sized eggs.
Step 2: Mix up the brine
Add 1.5 cups of water (non-chlorinated!) to a large measuring cup. Stir in 1 Tbsp sea salt and 1/4 cup of starter until fully dissolved. Since I brew kombucha regularly, I like to use my kombucha starter. Set mixture aside.
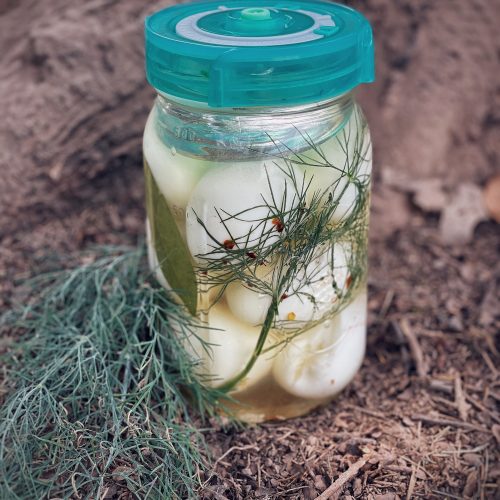
Step 3: Fill the jar
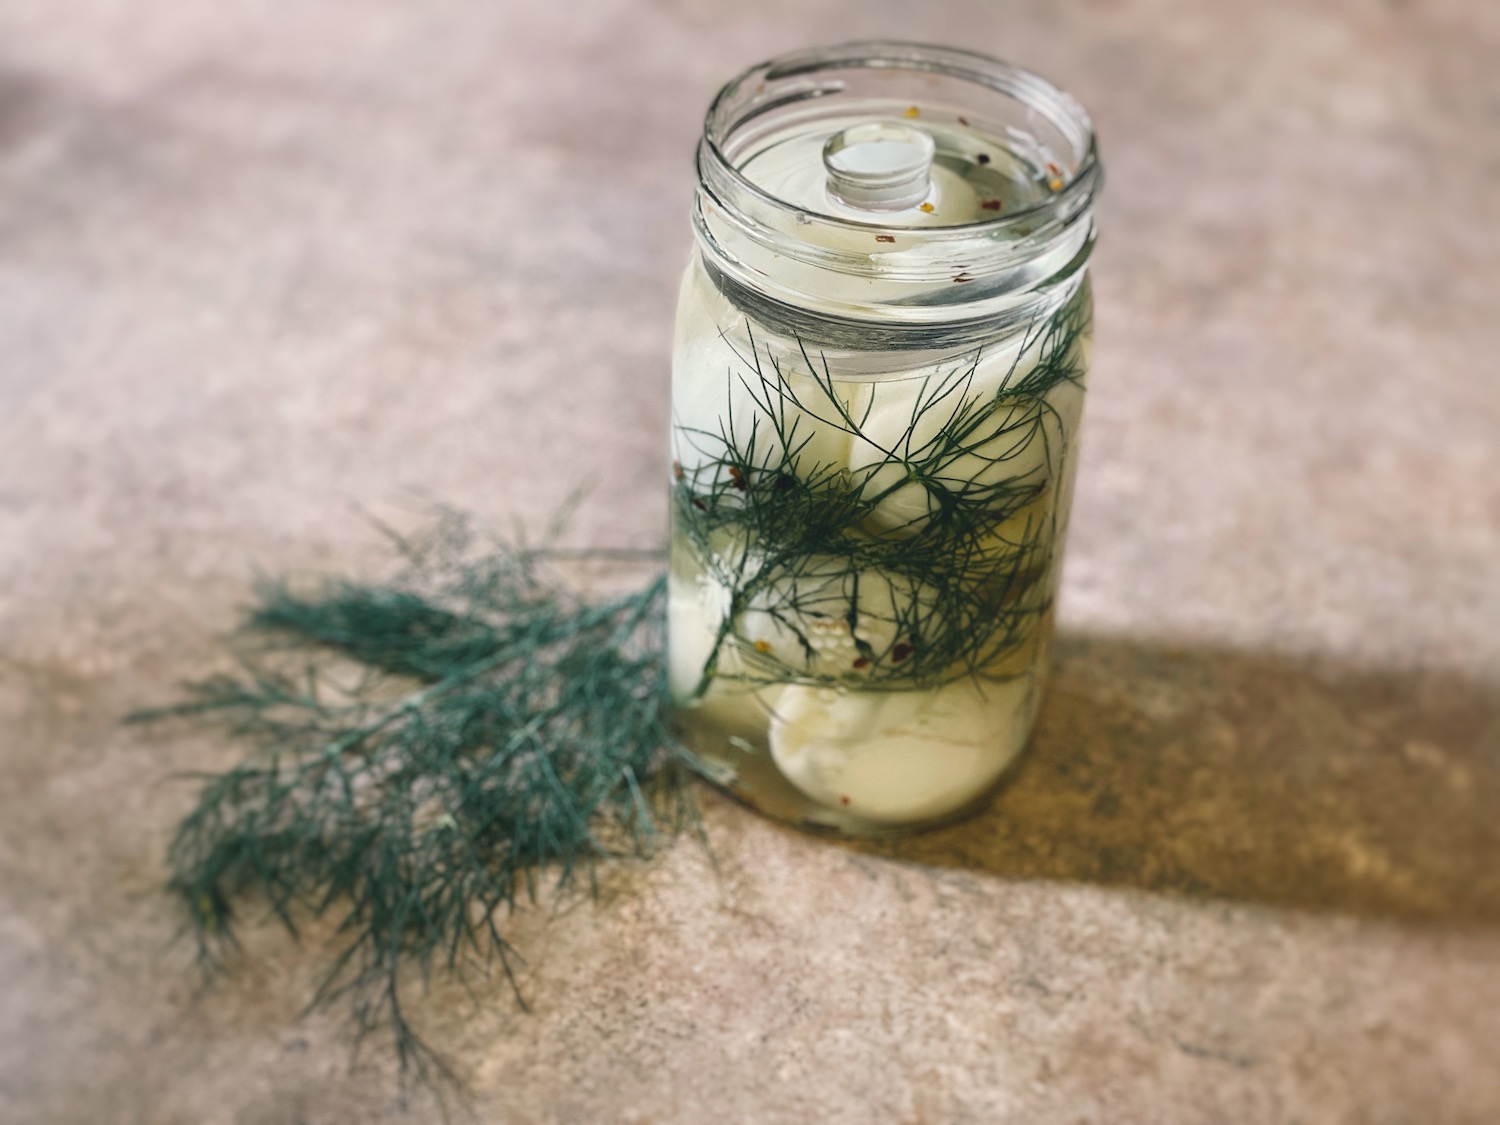
Add the smashed garlic clove, bay leaf, fresh dill, and red pepper flakes to the quart mason jar. Then, add the peeled and hard-boiled eggs. Finally, top it with the brine, leaving 1-2″ of headspace.
Add a fermentation weight to keep the eggs and add-ins from floating. If the contents are not completely covered, mix up a bit more brine (0.75 Tbsp salt to 1 cup of water) and add until completely submerged.
Step 4: Fermentation
Top with a fermentation lid, then place the jar in a cool, dark location (no warmer than 75F). A kitchen cupboard is great and where I keep my active ferments. Leave the jar to ferment at room temperature for 3 days.
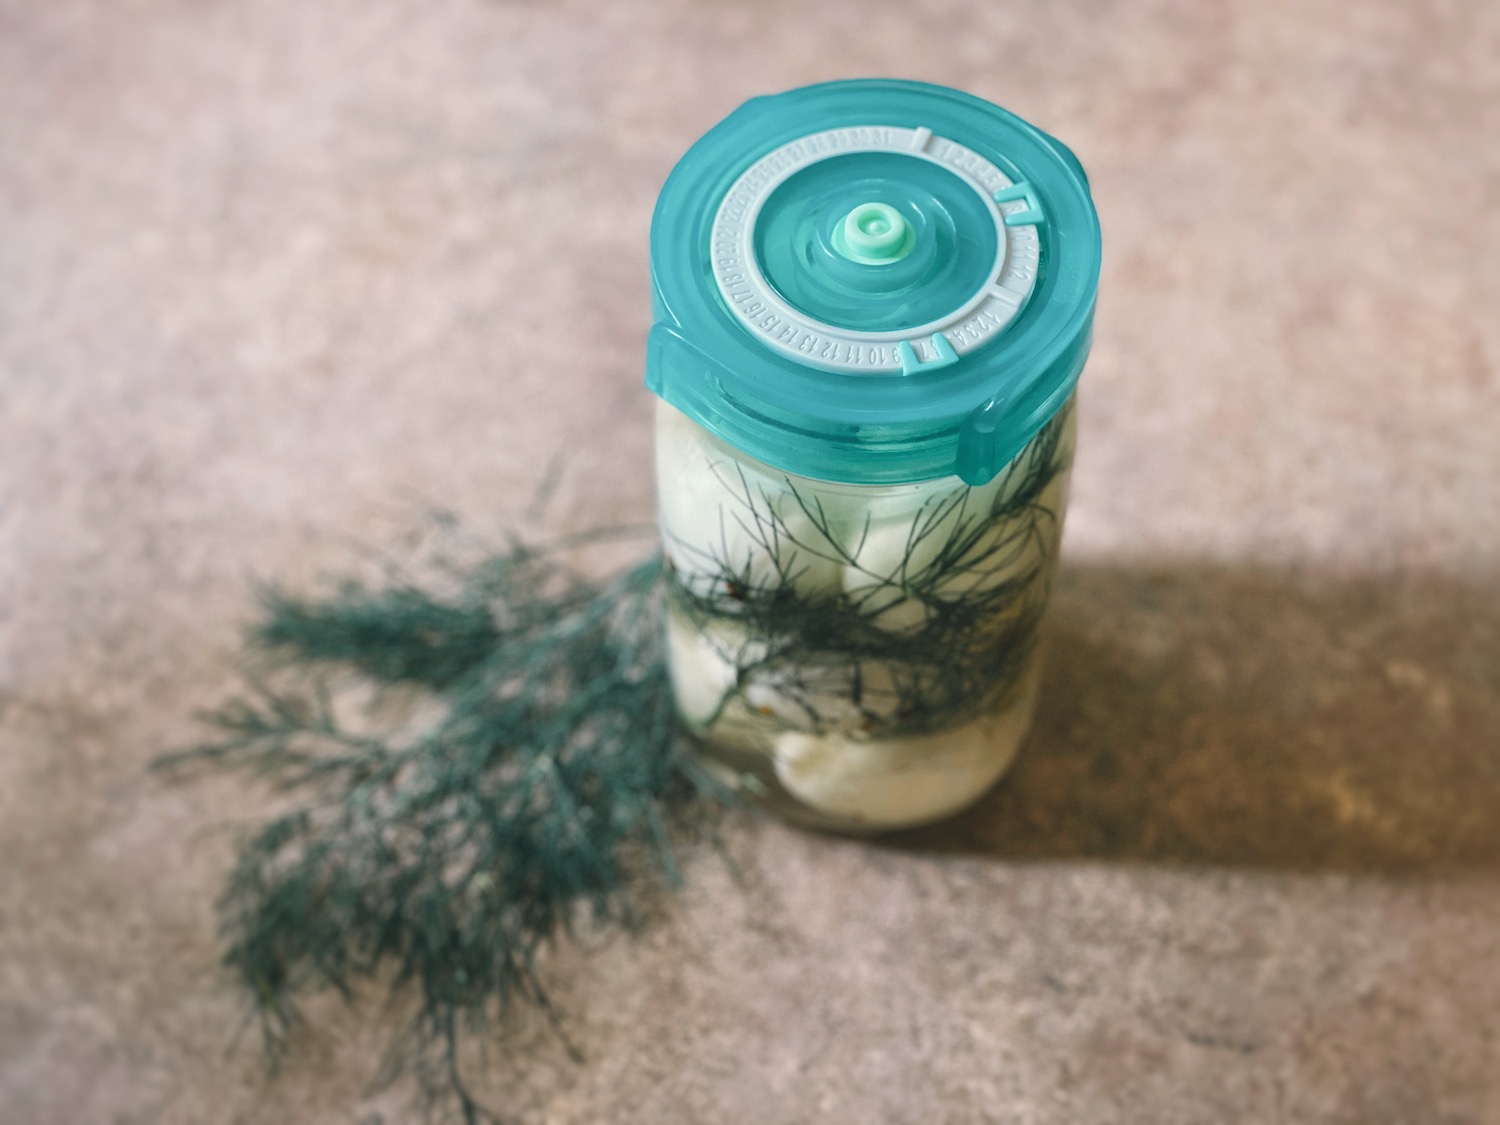
*You may be wondering, “Do I need a fermentation lid?” Technically, no, but they sure make things easier. They allow gasses to automatically escape so you don’t have to manually burp the jar to prevent an explosion. Fermentation lids are also rust-proof, unlike traditional canning lids.
The Homesteading RD's Product Picks | |
|
| This is a great starter pack! I love that it has a date dial on top so you can keep track of when your ferments should be complete. The included pounder is perfect for sauerkraut! |
Once finished, you should notice that your brine has turned a bit cloudy. Excellent! Now, move the jar to the fridge to slow the fermentation process down, and enjoy your fermented eggs for up to 2 weeks.
How to Use Fermented Eggs
You can use fermented eggs in any application that you would use hard-boiled or pickled eggs. They can be a snack, appetizer, or incorporated into your main course.
- Make into deviled eggs
- Slice on toast with avocado
- Chop in a lettuce salad
- Add to a charcuterie board
- Make into egg salad
- Add the pickled jalapenos to nachos
- Pop into your mouth anytime for a high-protein snack!
FAQ About Fermented Eggs
Is it safe to eat fermented eggs?
Absolutely! As long as you are starting with clean supplies and following the steps, fermented eggs are a very safe food to eat. The salt is key, so don’t leave it out! It’s always a good idea to give them the “sniff test” before consuming and be sure to toss out the batch if you notice any mold.
Are fermented eggs healthy?
Yep. Eggs ARE healthy for you…as long as they are organic and pasture-raised. We’re finally crawling our way out of the dark ages of thinking that all saturated fat and cholesterol are bad for us, however, it must come from a good source.
Not all eggs are created equal. The important thing is to consume eggs from hens that are living their lives as God intended: outdoors, eating greens and bugs, getting fresh air and vitamin D from the sun.
Hens that are forced to live in confinement and fed inflammatory grain products (caged hens, cage-free hens, and even “free range” hens!) are an entirely different product.
What other flavors can be added?
There are so many fun ways to add different flavors to fermented eggs. Thinly slicing them will allow for maximum flavor!
- Onions for a touch of sweetness
- Green onions and ginger for an Asian twist.
- Hot peppers, similar to my Jalapeno Pickled Eggs recipe – delicious!
- Black peppercorns, mustard seeds, and coriander seeds for a more complex flavor
Can colors be added to the eggs?
Heck yes! Colored eggs can be enjoyed year-round, not just at easter!
- Turmeric powder for yellow eggs
- Beets for purple eggs
- Red cabbage for blue eggs
Can raw eggs be fermented?
No, they must be fully cooked (hard-boiled). If you are wanting to preserve raw eggs, definitely check out my article Water Glassing Eggs for Storage. That is the perfect method for preserving raw eggs, even at room temperature!
Other Recipes You’ll Love:
- Jalapeno Pickled Eggs (No Canning Necessary!
- Water Glassing Eggs for Storage
- Fermented Turnips Recipe (Sauerruben)
- The BEST Kombucha Ratio for a Tasty Brew
- No Cook Refrigerator Pickles (Quick!)
Final Thoughts
Fermented eggs are a great way to use up those summer surplus eggs – I know you’re going to love them! Try out some different flavor combinations and let us know your favorites in the comments below 🙂 Have fun!
Fermented Eggs Recipe
Equipment
- 1 Egg cooker optional, but highly recommended!
- 1 Medium pot with lid if not using an egg cooker
- 1 Measuring cups
- 1 Measuring spoons
Ingredients
- 9 Eggs (hard-boiled) organic, pasture-raised
- 1 Tbsp Sea salt I like Redmond Real Salt
- 1½ cups Water (non-chlorinated) well water or filtered water
- ¼ cup starter kombucha, whey from milk kefir, or brine from previously fermented vegetables (1/2 packet of starter culture would work, too!)
- 1 clove garlic whole, peeled, and lightly smashed
- 1 bay leaf whole
- 2 sprigs fresh dill
- ⅛ tsp red pepper flakes optional for a kick!
Instructions
- Hard-boil the eggs, then transfer to a bowl with cold water running over them to chill rapidly.
- Once chilled, peel the eggs and set aside.
- Add 1.5 cups of water (non-chlorinated!) to a large measuring cup. Stir in 1 Tbsp sea salt and 1/4 cup of starter until fully dissolved. Since I brew kombucha regularly, I like to use my kombucha starter. Set mixture aside.
- Add the smashed garlic clove, bay leaf, fresh dill, and red pepper flakes to the quart mason jar. Then, add the peeled and hard-boiled eggs. Finally, top it with the brine, leaving 1-2" of headspace.
- Add a fermentation weight to keep the eggs and add-ins from floating. If the contents are not completely covered, mix up a bit more brine (0.75 Tbsp salt to 1 cup of water) and add until completely submerged.
- Top with a fermentation lid, then place the jar in a cool, dark location (no warmer than 75F). A kitchen cupboard is great and where I keep my active ferments. Leave the jar to ferment at room temperature for 3 days.
- Once finished, you should notice that your brine has turned a bit cloudy. Excellent! Now, move the jar to the fridge to slow the fermentation process down, and enjoy your fermented eggs for up to 2 weeks.
Notes
Nutrition


Would it be possible to use whey from yogurt making or just from kefir?
I’m not sure – when I make yogurt, no separated whey is created like with cheese making?
Could the black liquid (houch) from sourdough starter be used as the starter?
It is fermented.
Thanks.
Gosh, I’m not sure! I feel like sourdough is a different animal than other fermented foods.
Hello,
My eggs are done fermenting. The ground dill floated to the top even though I put a large roasted red pepper under the glass weight. I saw the dill and also some white scaley substance on the top of the water when I opened the lid. Is that mold or ???
Thank you,
Beth
Great question! That’s likely a scoby that’s forming on the top if it’s scaley vs fluffy. Its a normal product of fermentation, like with kombucha 🙂
Great taste! Except for they were way too salty. Maybe if you are using them for salads its great, but to eat them whole, they are SALTY.
Can I reuse the liquid to ferment more eggs?
I hear you – ferments can be quite salty, but it’s important for preservation. You can reuse some of it as “starter”
Hello and good day to you,
I have a question for you… I do not have a starter as you suggested like kombucha. I am wondering if I can use the apple cider vinegar I have sitting ready to drain. I do have a Scoby already on that.
I am only at the stage where I drain off the liquid from my apples and then let it sit for a month or two or whatever lol
With the Scoby be considered the same as some kombucha?
Thank you for reading this. Have a delightful day.
Hi Twila, great question! Yes, that would work to use your apple cider vinegar, especially if it has a scoby growing on top. It sounds like a vibrant ferment!
Would “all-natural”, unfiltered cider vinegar with mother be considered a starter?
Mayyyyyybe, but it might be too acidic and alter the result. I’d probably still with a traditional starter