
Growing your own food is an excellent start to self-sufficiency, however, once you master the main principles for food preservation while maximizing nutritional value… you’ll be unstoppable!
There’s nothing more fulfilling than enjoying your homegrown veggies on a -20 degree day in January. It’s also incredibly comforting in today’s world of food insecurity.
In this article we’ll talk about:
- The history of food preservation (the way our ancestors did it!)
- Why you want to preserve your harvest
- The main principles for food preservation
- Common methods of home preservation & supplies needed
As a dietitian, I am ultimately concerned about maintaining the nutritional value of my harvest, so this article will include my unique perspective on nutritional value while preserving!
*Disclosure: This post may contain affiliate links to products (including Amazon). I’ll earn a small commission if you make a purchase through my link, at no additional cost to you! Regardless, I only link to products that I personally use on our homestead or believe in.
What is Food Preservation?
Food preservation is the process of altering food in order to slow or eliminate bacterial growth while maintaining quality as much as possible. There are several principles for achieving food preservation, which we’ll cover shortly! The resulting food is then safe for long-term storage, allowing for abundance in the winter months.
3 Advantages of Food Preservation
I totally get it. Food preservation is a big, time-consuming task, but it’s so worth the extra effort! There are many advantages to food preservation – once you focus on these, it makes those long days it the kitchen easier.
Extend the storage time of your harvest
There’s nothing more empowering than seeing your harvest defeat the odds and continue to nourish your body longer than it was originally supposed to (with a little help!). This was an essential skill that humans have been perfecting since the beginning of time. It’s time that we get back to it!
Allow for year-round availability of locally produced food
I talk a lot about the importance of eating locally and this is the absolute best way to do it! Instead of buying produce in the winter that was grown and shipped thousands of miles, now you can enjoy something that was grown in your backyard.

Even if you don’t have a garden yet, or don’t grow enough to consider food preservation yet, there’s still an option for you! Buy produce in bulk at your local farmers market or CSA while it’s in season and preserve it yourself. I think this is such an underutilized option!
Decreases food waste
Maybe you’re like me and you grew wayyyy more produce than you could ever eat in one sitting. I’m looking at you, zucchini! Instead of letting the extra produce go to waste, preserve it so that you can eat it later!
History of Food Preservation
Food preservation has been an essential survival skill throughout history. This practice of basic food preservation principles allowed humans to develop roots in one place, rather than constantly moving in search of fresh food.
Dehydrating
Dehydrating (using the sun and wind) is the earliest known method. This was later modified to “still houses” (building fires inside a room) in the Middle Ages. Another similar process is smoking, which works by depositing phenols (particles in the smoke) directly into the meat. Later, curing was discovered by adding salt to dried meat, which helped to preserve its color.
Freezing
Freezing is another common one for those, especially for those who lived in cold climates. Many hunter and gatherer communities would bury their food under snow and ice to keep it from spoiling. Some cultures would even construct “ice houses” to store food long-term.
Fermentation
Lastly, fermentation is the third ancient method of food preservation and it was likely discovered, rather than invented! Someone probably left some veggies out, it rained, and voila! Fermented veggies a few days later that were delicious and resisted spoiling.
3 Principles for Food Preservation
Now that we have a good understanding of why food preservation is important and its history, let’s chat about what we are trying to achieve when going about the process. All 3 food preservation principles should be considered when deciding which method to use.
Reduce or remove microorganisms
This is one of the most important principles when it comes to food preservation. You certainly don’t want to end up with food poisoning! This principle involves creating an environment that bacteria cannot thrive in by removing air or moisture, increasing or decreasing temperature, or adding salt, sugar or acid.

Prevent food decomposition
All produce has enzymes present on its surface, which will accelerate the ripening process. If prolonged, this results in loss of color, flavor, nutrients, and texture. Inactivating these enzymes will ensure that your harvest maintains its peak quality.
Minimize nutrient loss
As a dietitian, this is something that I’m always paying attention to. There’s no point in preserving something if it ends up having poor nutritional value by the end. Nothing compares to fresh eats out of the garden, but we want a product that’s as close to fresh as possible!
Alright, now that we’ve mastered the basic principles for food preservation, let’s chat about the actual methods that you can do at home!
Home Preservation Methods and Their Nutritional Value
Many of these methods are the same ones that our ancestors used! However, we have a few modern ones to add to the list. Some of these methods are nearly free, while others require some equipment and cost upfront.
As a dietitian, I highly value the nutritional content of my preserved harvest. Therefore, I’ve dug into the research to figure out the truth behind each preservation method and created this table just for you!

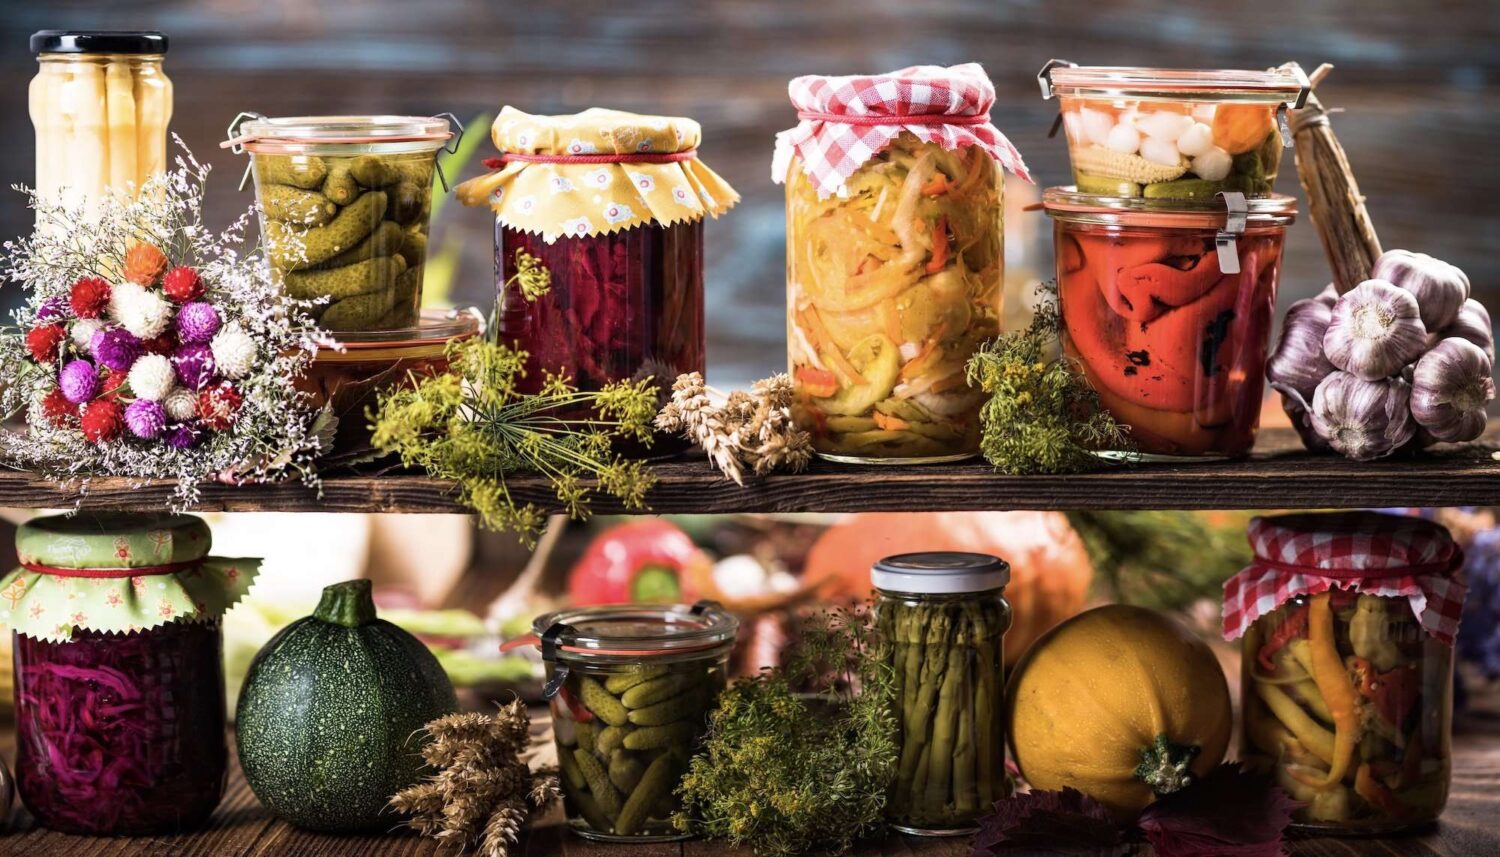
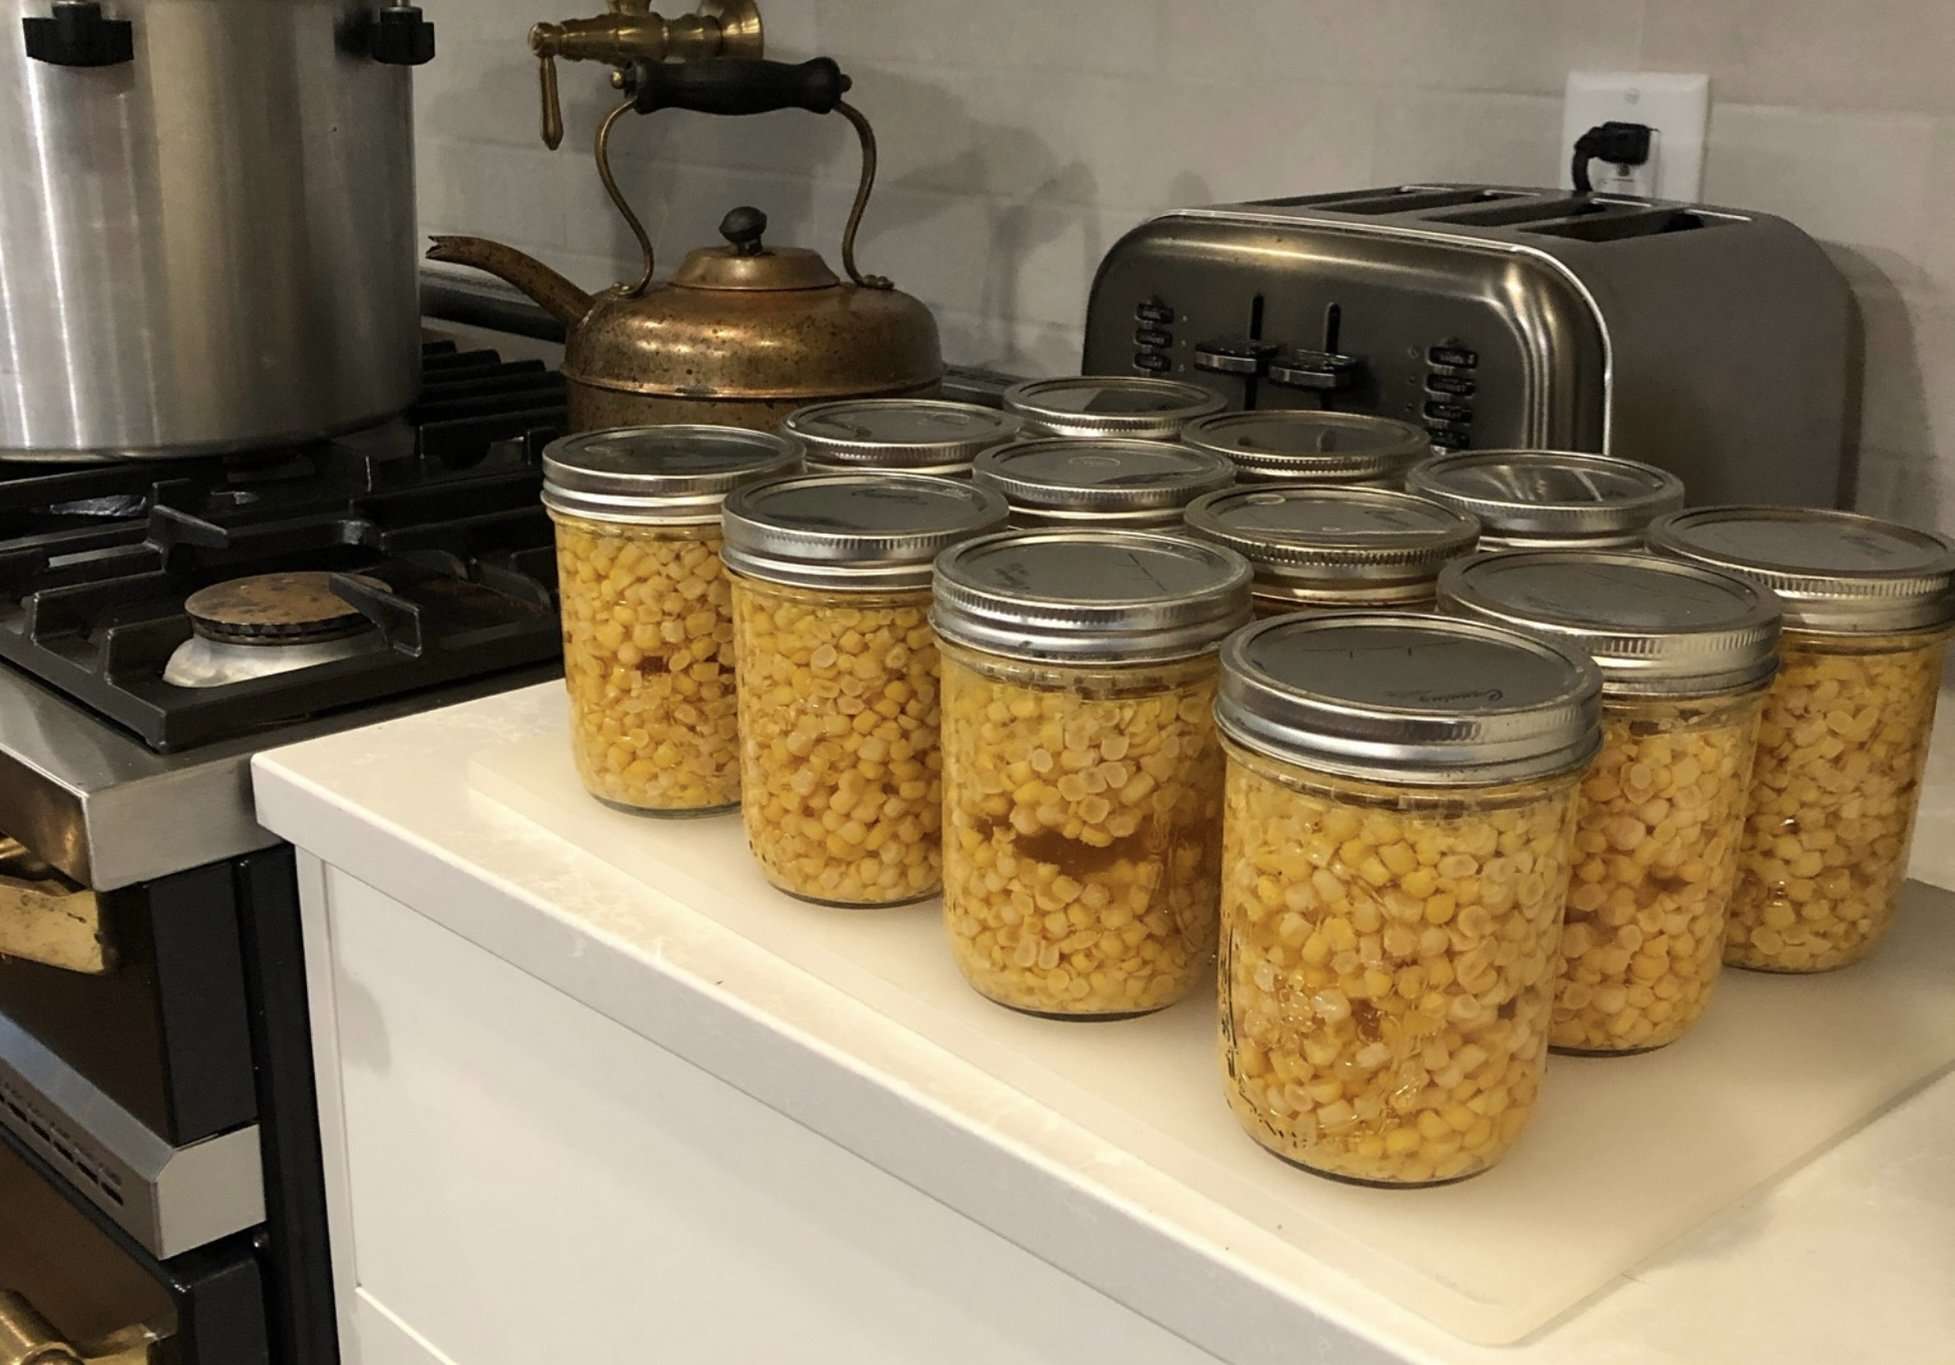
Canning
Canning is the most common form of food preservation today. It’s a fairly simple process that allows for food storage at room temperature; a major plus!
The main food preservation principle that it utilizes is heat to kill off any existing bacteria and enzymes. Plus, the vacuum seal lid keeps any bacteria or creepy crawlies from coming in.
This is a great option if you don’t have the space for a large deep freezer, live off-grid, or have frequent power outages. Not much can go wrong here! Plus, who doesn’t love to show off a pretty shelf loaded with colorful eats!
The downside of canning is that it utilizes high heat (212 degrees in water-bath canning & 240 degrees in pressure canning), which not only kills off bacteria, but many vitamins are lost as well. The vitamins with the largest losses are niacin, riboflavin, thiamine, and vitamin C.
However, once canned, the following nutrient loss while in storage is minimal (unlike other forms of storage like freezing or root cellar storage). Another thing that I LOVE about canned food is that it’s old-fashioned “fast food!” You just open a can and you’re ready to go. It makes eating healthy a breeze on busy days.
Nutrition Tips:
Tip#1: Don’t drain out the liquid when you open the can. During cooking, the vitamins and minerals leach out into the water, so if you toss out the water, you toss them out, too. Nutrient losses increase an additional 10-25% when you throw this out.
Tip #2: Utilize water-bath canning whenever possible as it utilizes lower heat, and thus, less nutrient loss. Low acid foods like carrots or green beans need to be processed via pressure, unless there is acid added to it. Pickled carrots and dilly beans are some of our favorites – YUM!
Tip #3: I know you want to show off your beautiful canned goods, however, many vitamins are sensitive to UV light. Make sure to store your jars in a dark, cool location.
If you decide to try canning, I highly recommend these resources to guide you:
- Ball Complete Book of Home Preserving on Amazon
- Pressure Canning: A Step-By-Step Guide
- Check out My Amazon Store for links to my favorite canning and homesteading supplies
- The 8-piece Water Bath Canning Kit is an excellent place to start!
- I love For Jars canning lids and get them for 10% off with my discount code THRD10 !
- The All American Pressure Canner is the one I use and love. It’s built to last a lifetime.
Freezing
Freezing is often associated with preserved nutritional value, however, blanching before freezing does result in some loss. It also doesn’t account for cooking the vegetables after they are thawed, either.
Blanching is the process of gently boiling or steaming vegetables for a set amount of time to inactivate the enzymes present, but this also destroys some vitamins (just like in canning). If blanching is skipped, then the remaining enzymes can create loss of flavor, color, nutrients, and texture over time.
Below is a research study done to evaluate the rapid loss of vitamin C during blanching. You can see how fast it happens! Most vegetables call for blanching times of several minutes, which is even longer than the times shown below.
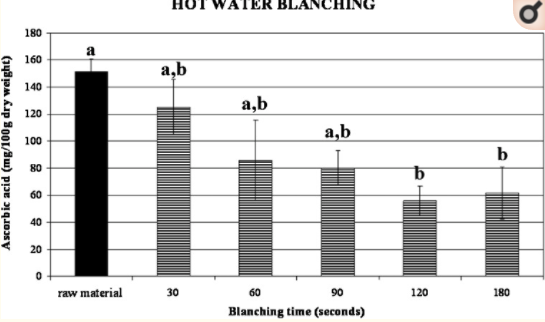
Based on the above information, it feels like you lose either way, right? While this is partially true, using this knowledge as a tool can help you maximize the nutritional value of your frozen produce as much as possible based on how you plan to use it (see tips below).
Nutrition Tip:
- Tip #1: To maximize nutritional value while freezing, I’d skip blanching as long as it is used within 3-6 months. If unblanched produce is stored longer than that then nutrient losses will occur, eliminating the benefit of skipping blanching in the first place.
- Tip #2: If you want to keep the produce longer than 3-6 months, please blanch it first!
- Tip #3: If you decide to freeze in mason jars, make sure that you aren’t making these 7 Common Mistakes When Freezing in Mason Jars!
Supplies:
- Book: Freeze Fresh – The Ultimate Guide to Preserving Fruits and Vegetables
- Deep Freeze – maintains a cooler temperature than a fridge-freezer combo
- Blanching supplies – if you choose to blanch
- Large pot (I use my water-bath canner from my canning kit): 8-piece Water Bath Canning Kit
- Strainer
- Ice bath (sink full of ice)
- Vacuum sealer (see my favorites below) or freezer ziplock bags
The Homesteading RD's Product Picks | |
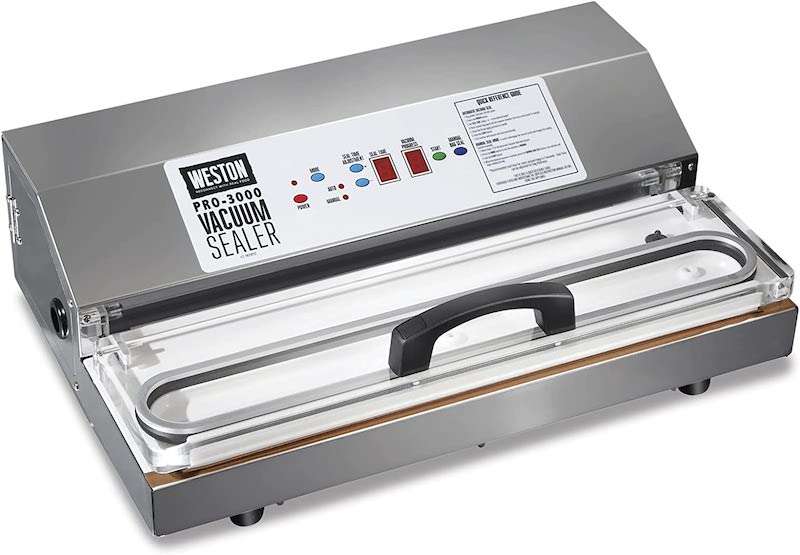
| This is the one we use and LOVE! Features an extra-wide, 5mm heat bar fits a variety of bags up to 15" (38 cm) across. The digital LED control panel monitors and displays the stages of the sealing process |
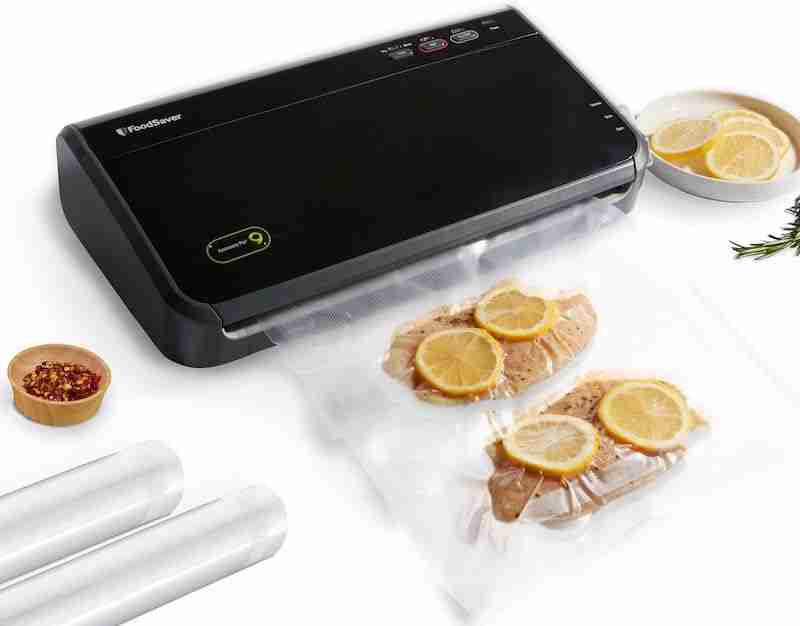
| If you're looking for a more budget-friendly option, this one is quite popular! |
Recipes:
Root Cellar
This is an excellent option if you have a root cellar, a cool garage or a NE corner of an unfinished basement. The ideal environment for a root cellar is 32-40 degrees with a humidity level of 85-95%. Think of it as a big refrigerator!

The 2 principles behind this food preservation method is that the cool temperature slows the growth of microorganisms, while the high humidity prevents moisture loss (no wilty veggies!).
If you don’t have these exact conditions, still give it a try! Just know that your produce may not last quite as long. Since moving my root veggies and winter squash from our basement (60-65 degrees) to our heated garage (45 degrees), it’s made a huge difference!
This method is the easiest of them all as there’s no processing involved. You’re not even supposed to wash your veggies before they go in! All you need to do is cure your produce properly first and set up some shelving. However, keep in mind that not all produce will hold up well in this type of storage.
What can I store in a root cellar?
- Apples (4-6 months)
- Potatoes (4-6 months)
- Onions (4-8 months) – here’s how to braid them for storage!
- Leeks (2-3 months)
- Garlic (4-8 months) – here’s how to plant them!
- Carrots (4-6 months)
- Winter squash (4-6 months)
- Pumpkins (4-6 months)
- Cabbage (3-4 months)
- Beets (2-5 months)
Nutrition Tips:
Tip #1: Produce starts to lose its nutritional value the moment it is picked, so keep in mind that while your produce may not be spoiling, it is slowly losing vitamins and minerals. Stored potatoes start to lose vitamin C after 2 months.
Tip #2: Because of this, my game plan is to use up my root storage first before I move on to my canned goods (which retains its nutritional value for up to a year).
Supplies:
- Shelving for big items (winter squash and pumpkins) – I use an old bookshelf!
- Baskets (potatoes) – I use these small laundry baskets and they work great! I sort my potatoes by size – 1 basket for small potatoes, 1 for medium, and 1 for large.
- Boxes filled with sand or peat moss (for carrots, beets, etc.) – read more about the process in this article by West Coast Seeds.
- Hooks for hanging onions & garlic
Recipes:
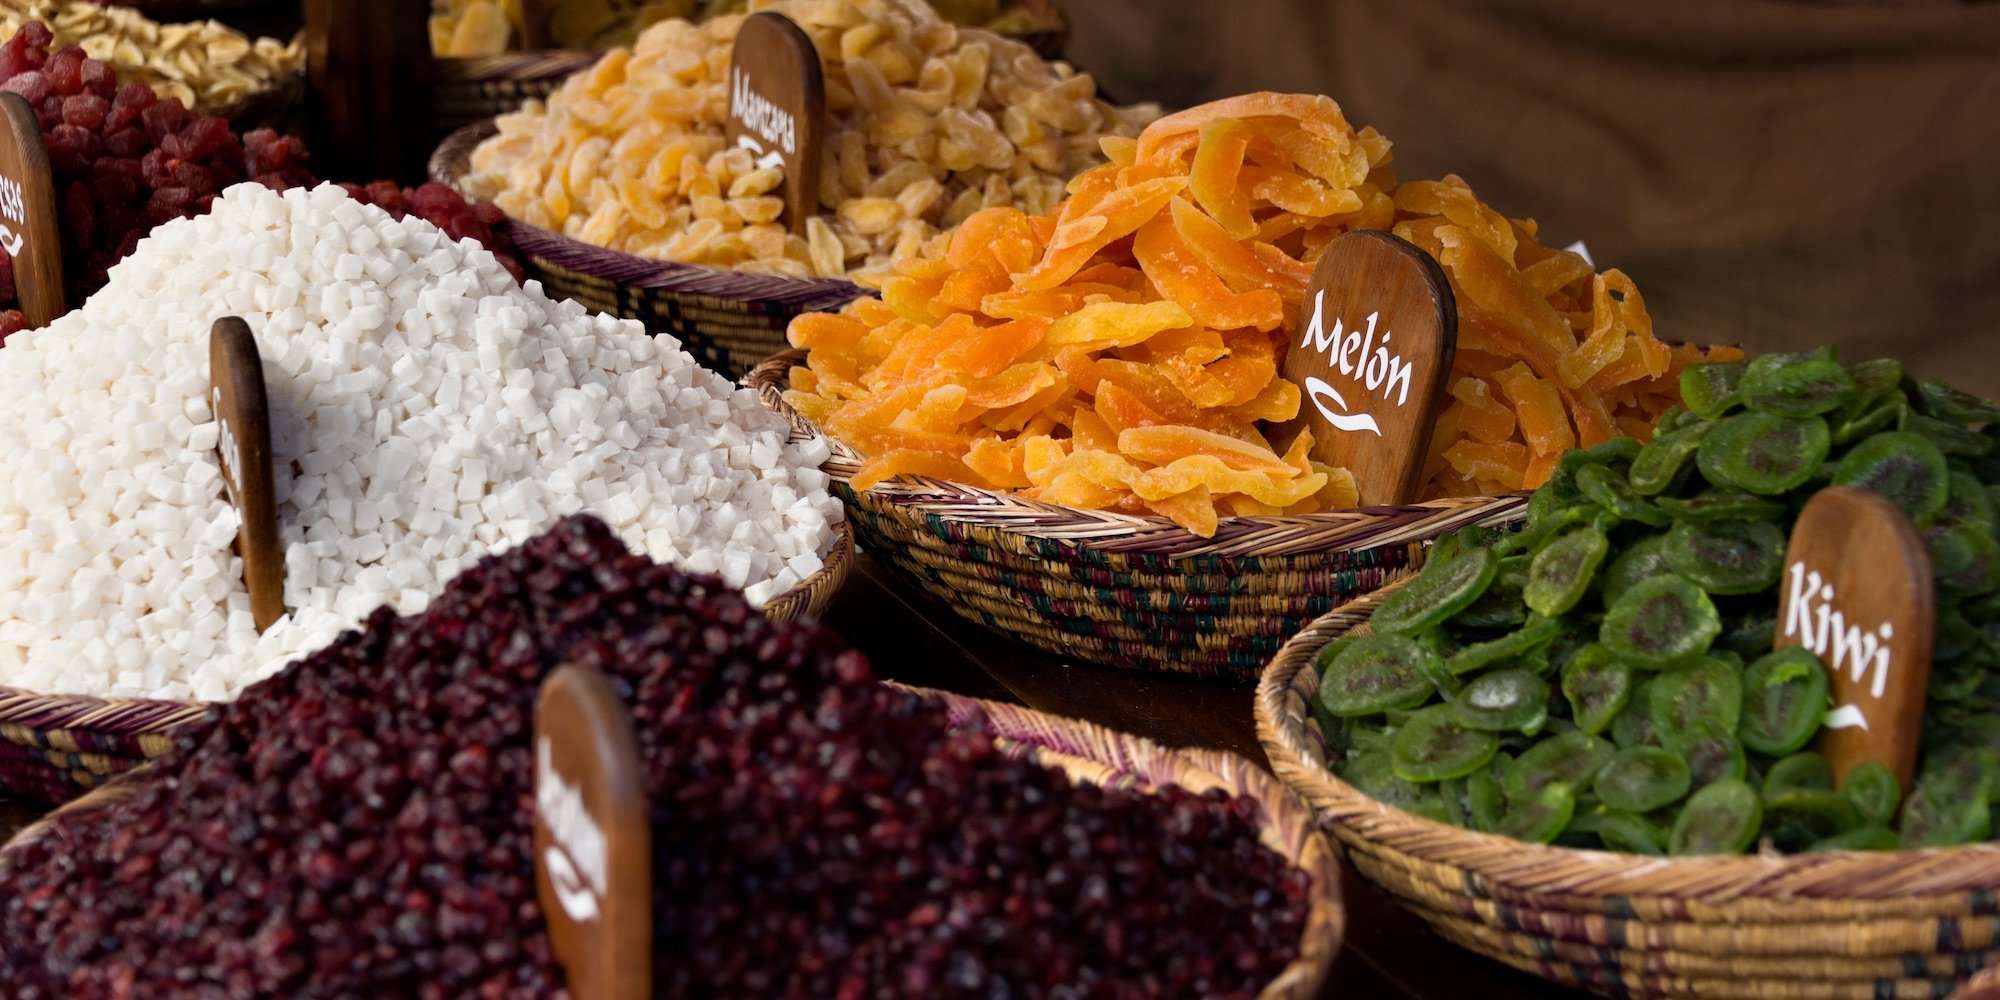
Dehydrating
This is one of the most ancient methods of food preservation and you can make it as simple or complicated as you’d like.
In its simplest form, just lay out your food in the hot sun (ideally on a screen) with a breeze and let nature do the work. However, this is an unpredictable method, subject to nibbling from wild creatures or pets, and you’ll need to bring it in before the dew settles.
My favorite way to dry herbs, produce and meat is by using a food dehydrator. That way it can run 24/7 and you have control over the temperature. For example, herbs need a low, gentle temperature, whereas meats should be held at a high temperature for safety.
The Homesteading RD's Product Picks | |
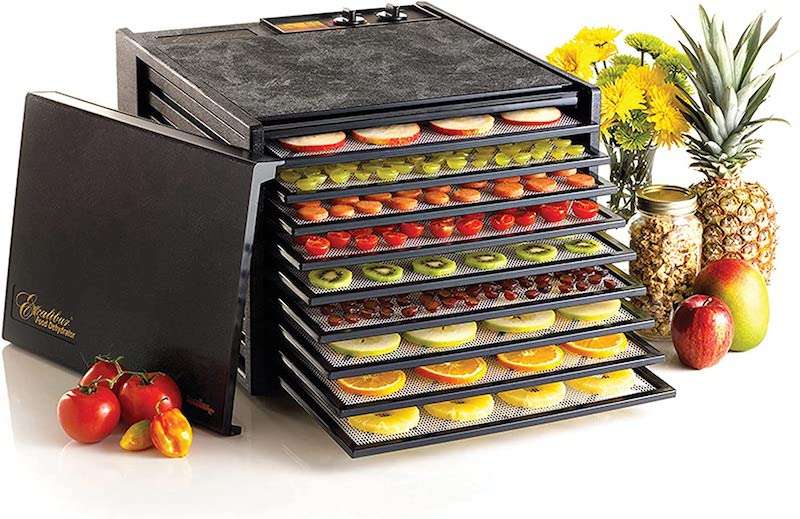
| This dehydrator is amazing and I love that it features a timer so you can set it and forget it. SIZE: 9-trays and 15 square feet of drying space provides extra-large capacity TIME AND TEMPERATURE: Features a 26-hour timer and adjustable thermostat from 105 to 165 degrees F. |
Dehydrating doesn’t affect mineral content at all, however most vitamin loss is around 50% with losses of up to 80% for vitamin C. Another thing to keep in mind is that blanching vegetables is often recommended before dehydrating (just like for freezing), so you’ll have additional nutrient loss to account for.
Nutrition Tip:
If you want to dehydrate something, your best option is to use fruit and/or herbs. Fruit naturally retains more flavor and vitamins due to their natural acidity, plus they don’t require blanching. Herbs utilize a very low temperature and don’t require blanching either.
Supplies:
- I use the Excalibur Food Dehydrator and it hasn’t failed me yet! I like that it has large trays so that I can fit a lot of medicinal herbs in there when I go foraging around our property 🙂
Recipes for dehydrating:
- How to Make Dehydrated Carrots
- How to Dry Lemon Balm (3 EASY Methods!)
- Delicious Soaked & Dehydrated Pumpkin Seeds
- Dried Radishes for Winter Storage
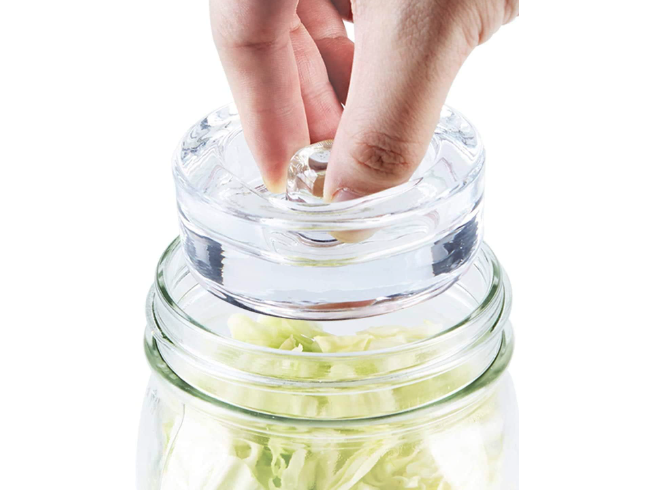
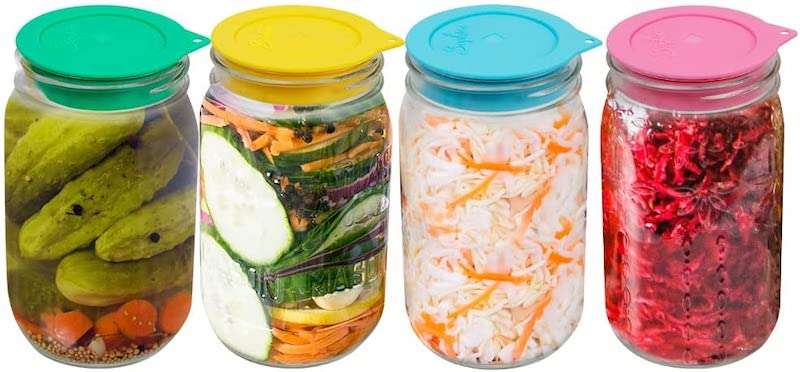
Fermenting
As a dietitian who specializes in gut health, I LOVE this method! Not only is it super easy and requires minimal equipment (just a jar and some salt!), but it’s teaming with those lovely probiotics that promote gut health.
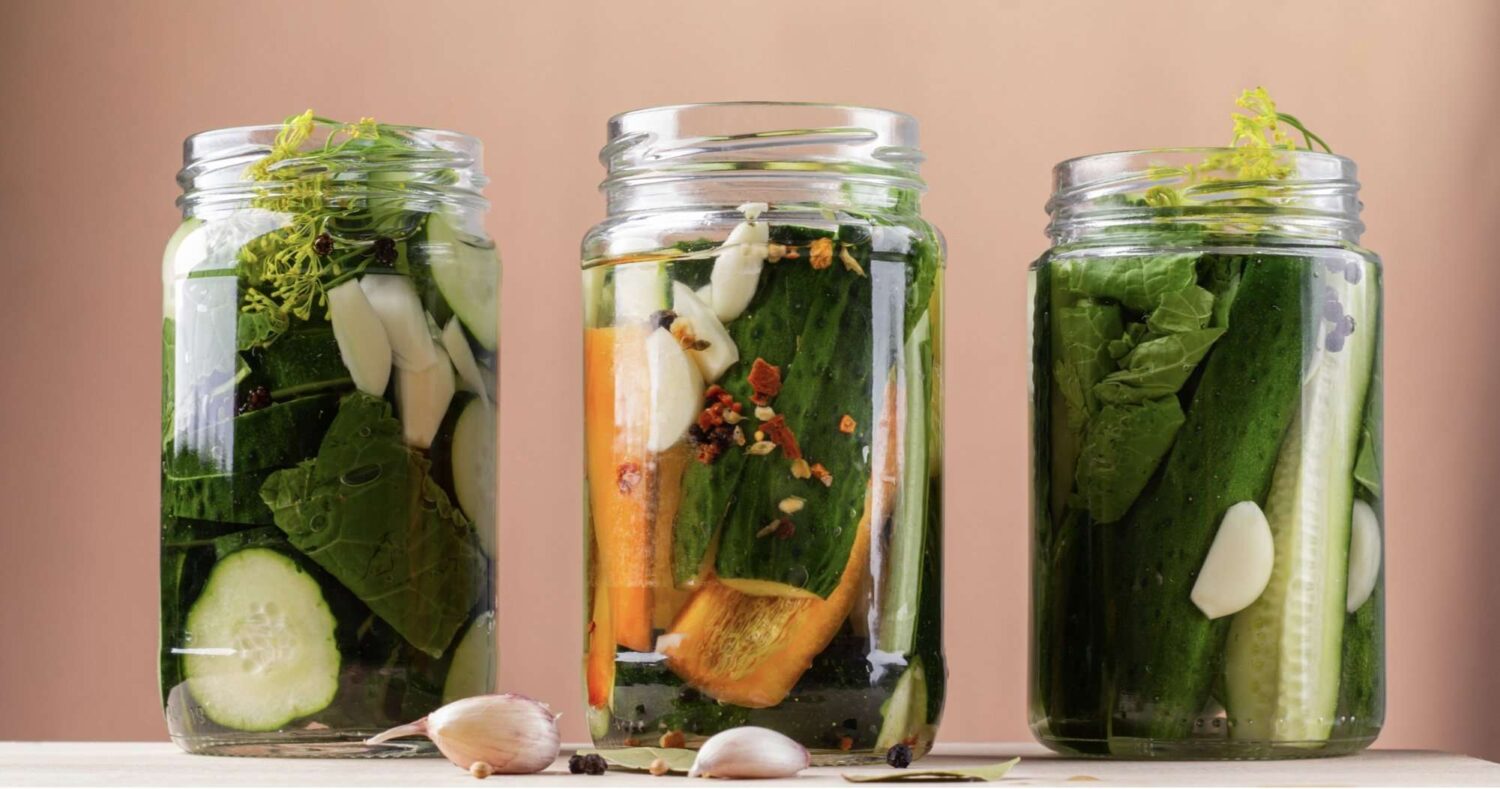
How it works is you pour a salt-water brine (1.5 Tbsp salt per 2 cups of water) over raw vegetables, which encourages naturally-occurring lactobacillus to grow in this anaerobic (no oxygen) environment. The lactobacillus feeds on the starches in the food to create lactic acid, which is a natural preservative. Once fermentation is complete (usually 4-7 days), the jar is moved to the fridge to slow the process down.
This is the only type of food preservation that actually increases the nutritional value! Yes! Lactic acid bacteria have the ability to synthesize b-vitamins. Plus, you can absorb the vitamins and minerals better than if you ate the produce raw because the tough cellular walls of the vegetables are partially broken down. Lastly, there’s those lovely probiotics.
Fermentation is such a nutritional powerhouse and a lost art in today’s culture. Let’s reverse this!
The one negative about this type of food preservation is that it needs to be stored in the fridge (or a root cellar if you have one). If you are choosing to preserve much of your harvest this way, that can take up a lot of fridge space!
Nutrition Tip:
Tip #1: Make sure that your fermented veggies stay submerged at least ½” below the water line, otherwise they will mold. I made this mistake my first year and was so sad to have to throw out several jars.
Tip #2: The health benefits from probiotics is more about consistency, than quantity. The ideal dose is 1-2 Tbsp, several times a day.
Supplies
- Recipe book: Fermented Vegetables – highly recommend!
- Glass jar or fermentation crock
- Fermentation weights and lids (see below for my favorites)
The Homesteading RD's Product Picks | |
| Using fermentation weights has been a GAME CHANGER for me! When placed on top of your fermented vegetables, it keeps the tidbits from touching the surface. If this occurs, mold will grow and the entire batch will be ruined. I've lost several precious jars to mold before I started using weights. |
| These silicone lids are excellent for sealing your ferments in the fridge. They are self-burping ferment caps with a one-way waterless valve to vent gas automatically! No need to burp them manually. Plus, they are silicone, so no rusting! Dishwasher safe and easy to clean. |
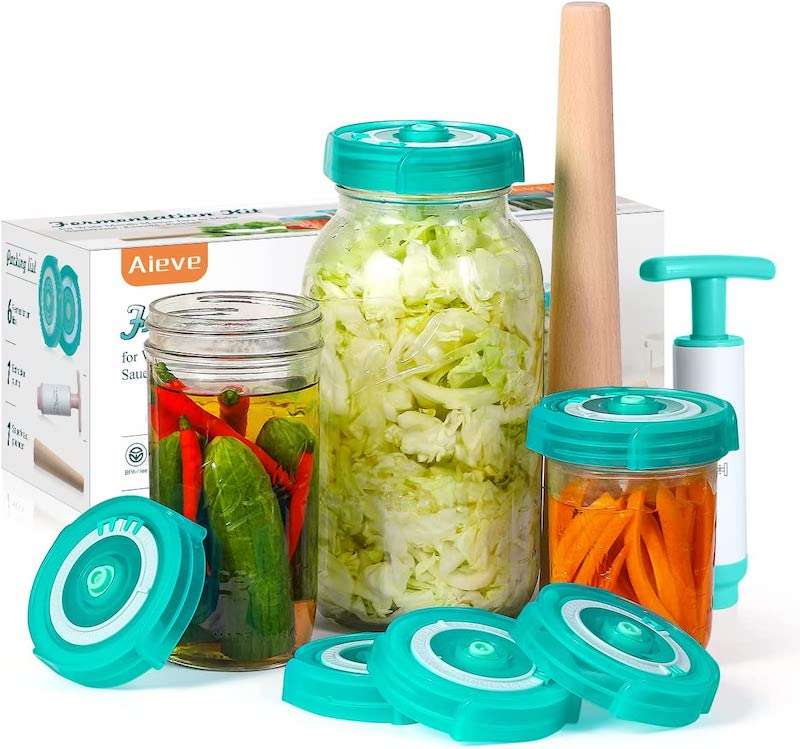
| This is a great starter pack! I love that it has a date dial on top so you can keep track of when the ferments should be complete. Use the extractor pump to pump air out from jars. Jars not included. |
Recipes for fermenting:
- Fermented Turnips (Sauerruben)
- Fermented Eggs – Yes, you can ferment eggs, too!
- Fermented Honey Garlic
Freeze Drying
Freeze drying (also known as lyophilization) is the process of freezing, then creating a vacuum to directly change the ice to vapor. By the end, 99.7% of the water is removed resulting in a food product that will last at least up to 25 years!
This process doesn’t include killing any microorganisms, however, they remain dormant due to the low temps followed by minimal moisture levels. We added a freeze dryer to our homestead this year and it has been so amazing!
If you are into backpacking or need easy off-grid meals, this is certainly an appealing option as well. Ryan and I love ultralight backpacking and are always looking for ways to reduce weight.
Nutrition Tip:
Freeze drying retains more vitamins compared to standard dehydrating, but there are still some losses, especially if you blanch beforehand. Also, keep in mind that in the process of rehydrating and reheating, more nutrient loss will occur.
Supplies:
- I personally use and LOVE the Harvest Right freeze dryer (I have the medium size) – it’s the best one on the market for home use
The Homesteading RD's Product Picks | |

| Freeze drying is my absolute FAVORITE way to preserve my harvest! It retains nearly all of the nutritional value, flavor, and texture! Plus, the food has a shelf life of up to 25 year when using mylar bags (WOW!) and rehydrates quickly, unlike with dehydrated food. |
Final Thoughts
While there is some loss of nutritional value with most forms of food preservation, you are still WAY ahead of what’s available “fresh” at the grocery store. Produce at the grocery store is OLD…. like super old.
How old is it?
- Apples: 9-12 months
- Potatoes 11 months
- Lettuce/spinach: 2 weeks
- Tomatoes: 6 weeks
- Carrots: 9 months
Shocking right?! Not only is your homegrown produce better quality to begin with, but you can process it within hours of being picked (at its peak nutritional value). Green beans lose 77% of their vitamin C after being stored for 7 days!
Then, there’s the added benefit of self-sufficiency that can’t be left unsaid. There’s something incredibly comforting about having a shelf-full of food ready and waiting for whatever is ahead.
The bottom line:
Don’t sweat it. Your processed and canned tomatoes probably still have way more nutritional value than “fresh” ones at the grocery store. Don’t short your processing times in hopes of retaining more nutrients; canning recipes are tested for food safety and should be followed. Pick a method that feels right to you and enjoy the process. Definitely give fermentation a go!
I think the best strategy is to utilize a mixture of methods and be mindful of when you are using up each one during the winter. Use your root cellar storage and frozen produce first, followed by your fermented and canned produce, and then your dehydrated or freeze-dried food last.
Other Food Preservation Articles You’ll Love:
- How to Make Dehydrated Carrots (EASY!)
- Fermented Turnips Recipe (Sauerruben)
- Can You Freeze Mason Jars? 7 Common Mistakes to Avoid!


Just shared with another blogger that when I first started working as a Nutritionist, we were taught that canned foods are unhealthy. This could be true in some cases. It wasn’t until later in one of my Nutrition classes that my professor explained why canning is so important for long-term food supply. She claimed that without canning or food preservation, people all over the world would go hungry and possibly die.
Katie, you are right, preserving food at home does decrease the nutritive value, but not as much as commercial food preservation. They sit in storage and on shelves for a very long period. Thank you for sharing the different types of food preservation methods.
I couldn’t agree with this more! It’s a bummer that nutrients get lost, but you are exactly right – without food preservation, we’d have a hard time getting through winter otherwise. Especially where I live in zone 4, Minnesota! I’m planning to increase my fermentation game this year to maximize as much nutritional value as possible
I have read so many posts about the blogger lovers however this post is really a good piece of writing, keep it up
Thank you!
Sounds interesting
This was very informative.
Super in-depth pillar content here, Katie! I’m very much into food preservation, and I’m so happy to see others doing it, as well! Now if I could only afford a freeze dryer. 😉
I would love one, too! Someday, maybe 🙂
Such a great post, you really explores all the aspects.
Thank you!!
A very in depth and detailed post! Thanks for the great info
You’re so welcome! Nice to see you here 🙂
Love this post! Definitely saving for later. I’ve been wanting to start food preservation for a long time and can tell you did your research and are very knowledgeable about all of this. Thanks for sharing!
Thank you so much! This was one of my favorites to write, by far. Best of luck to you on your food preservation journey! Be warned – it is addictive 🙂