
Pressure canning can feel really scary in the beginning. I get it! I was nervous when I started too, but with my step-by-step guide it’ll feel like a breeze and you’ll wish that you had tried it earlier!
Pressure canning is a wonderful way to open up your options beyond just pickles and tomato sauce. Now you can preserve all the things – seafood, meats, vegetables, and even things like beans and soup. A true self-sufficiency strategy!
If done correctly, pressure canning is very safe and won’t cause an explosion in your kitchen. Trust me! I’ve been pressure-canning for many years and have had ZERO issues. You can do this and I’ll help you along the way!
*Disclosure: This post may contain affiliate links to products (including Amazon). I’ll earn a small commission if you make a purchase through my link, at no additional cost to you! Regardless, I only link to products that I personally use on our homestead or believe in.
Pressure Canning 101
Before we jump into the how-to part of pressure canning, it’s important that we cover the basics. Pressure canning can be dangerous if not fully understood and respected.
How does a pressure canner work?
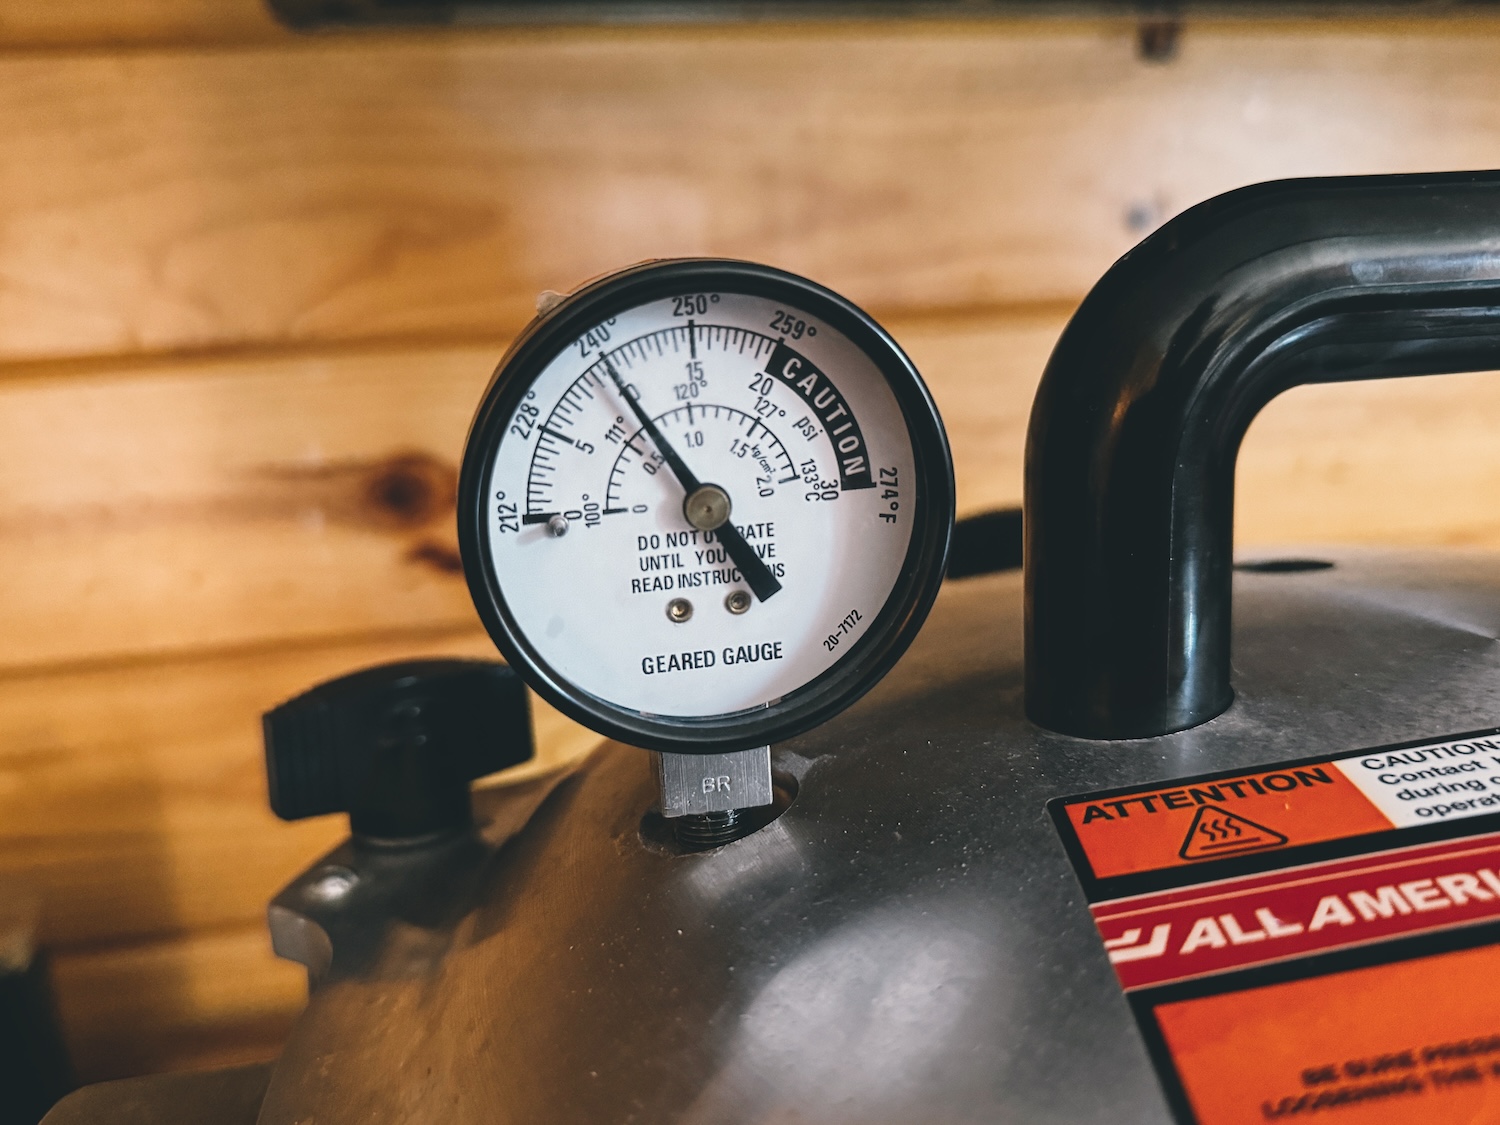
Pressure canning is unique from water bath canning in that it creates a high-pressure environment inside the canner, which results in a higher boiling point of water. Under normal conditions, water boils at 212 degrees F. Add some pressure and the temps can reach as high as 250 degrees F!
- 5 lbs of pressure = 228 degrees F
- 10 lbs of pressure = 240 degrees F
- 15 lbs of pressure = 250 degrees F
So, why does this matter? A bacterium called Clostridium botulinum is commonly present in food and can rapidly create a botulinum toxin in the right environment. Botulism is a serious condition that can result in paralysis and even death.
Heating canned goods via pressure canning kills the botulinum spores that otherwise might survive 212°F with water bath canning. Thankfully, the toxin does not replicate in an acidic environment (pH less than 4.6), so that’s why water bath canning is fine for acidic things like jelly, pickles, and the like. Fermented Honey Garlic is a grey-area product, so make sure to read all of my steps to avoid any issues there.
A note about botulism
Before you get too nervous, know that botulism is incredibly rare, so as long as you are following the correct steps, using a tested recipe, and utilizing pressure canning for low-acid foods, you should be good to go!
In 2019, there were only 21 cases of foodborne botulism, and nearly all of them were tied to commercially prepared food. Only 4 cases were linked to home-prepared fermented beluga flippers in Alaska. I don’t think many of us are making that, so you should be golden. As always, though, when in doubt, throw it out.
Which foods should be pressure-canned?
As discussed above, any foods that are considered “low acid” (having a pH of 4.6 or above) should be pressure-canned to kill off the botulinum bacteria. That includes things like:
- Meats
- Poultry
- Seafood
- Vegetables
- Broth and stock
- Dry beans
- Prepared meals like chili, soups, stews, etc.
Pressure canning benefits/uses
Utilizing pressure canning opens up more options to you when it comes to food preservation. Without a pressure canner, your only options are a lot more limited.
- Instead of only freezing or curing meat, now you can have a shelf-stable and ready-to-eat product.
- Instead of only canning dilly beans, you can pressure can them plain for a versatile product later
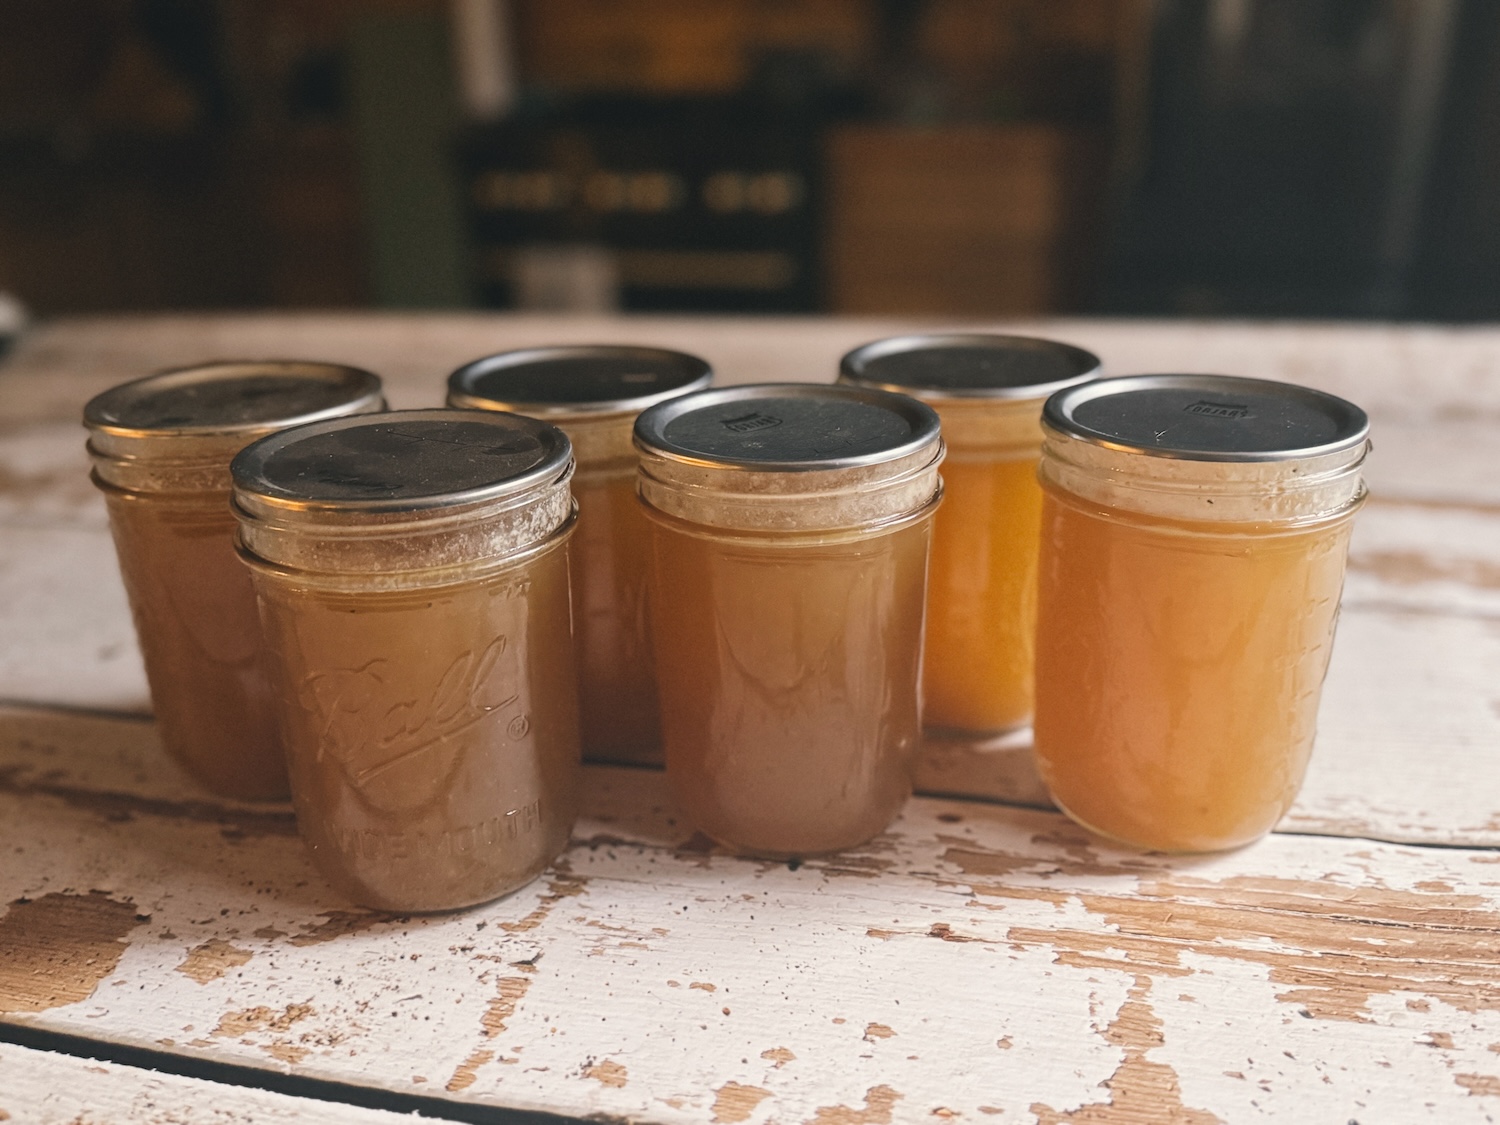
- Instead of freezing bone broth, you can pressure can it for a shelf-stable product that’s ready at any time (my favorite!)
- Instead of having to soak and prepare dried beans the night before, you can pressure can them so they are a ready-to-go product! Easy!
Isn’t pressure canning dangerous?
Yes and no. There is potential for some serious harm, but it’s very, very rare. Modern pressure canners have built-in safety features and as long as you’re following the steps in my guide below, you’ll be able to safely pressure can with no fear.
Here are some essential steps to keep in mind:
- Never move the pressure canner while it’s under pressure.
- Never force it open before the internal pressure has completely released
- Fasten wing nuts properly (more on this later!)
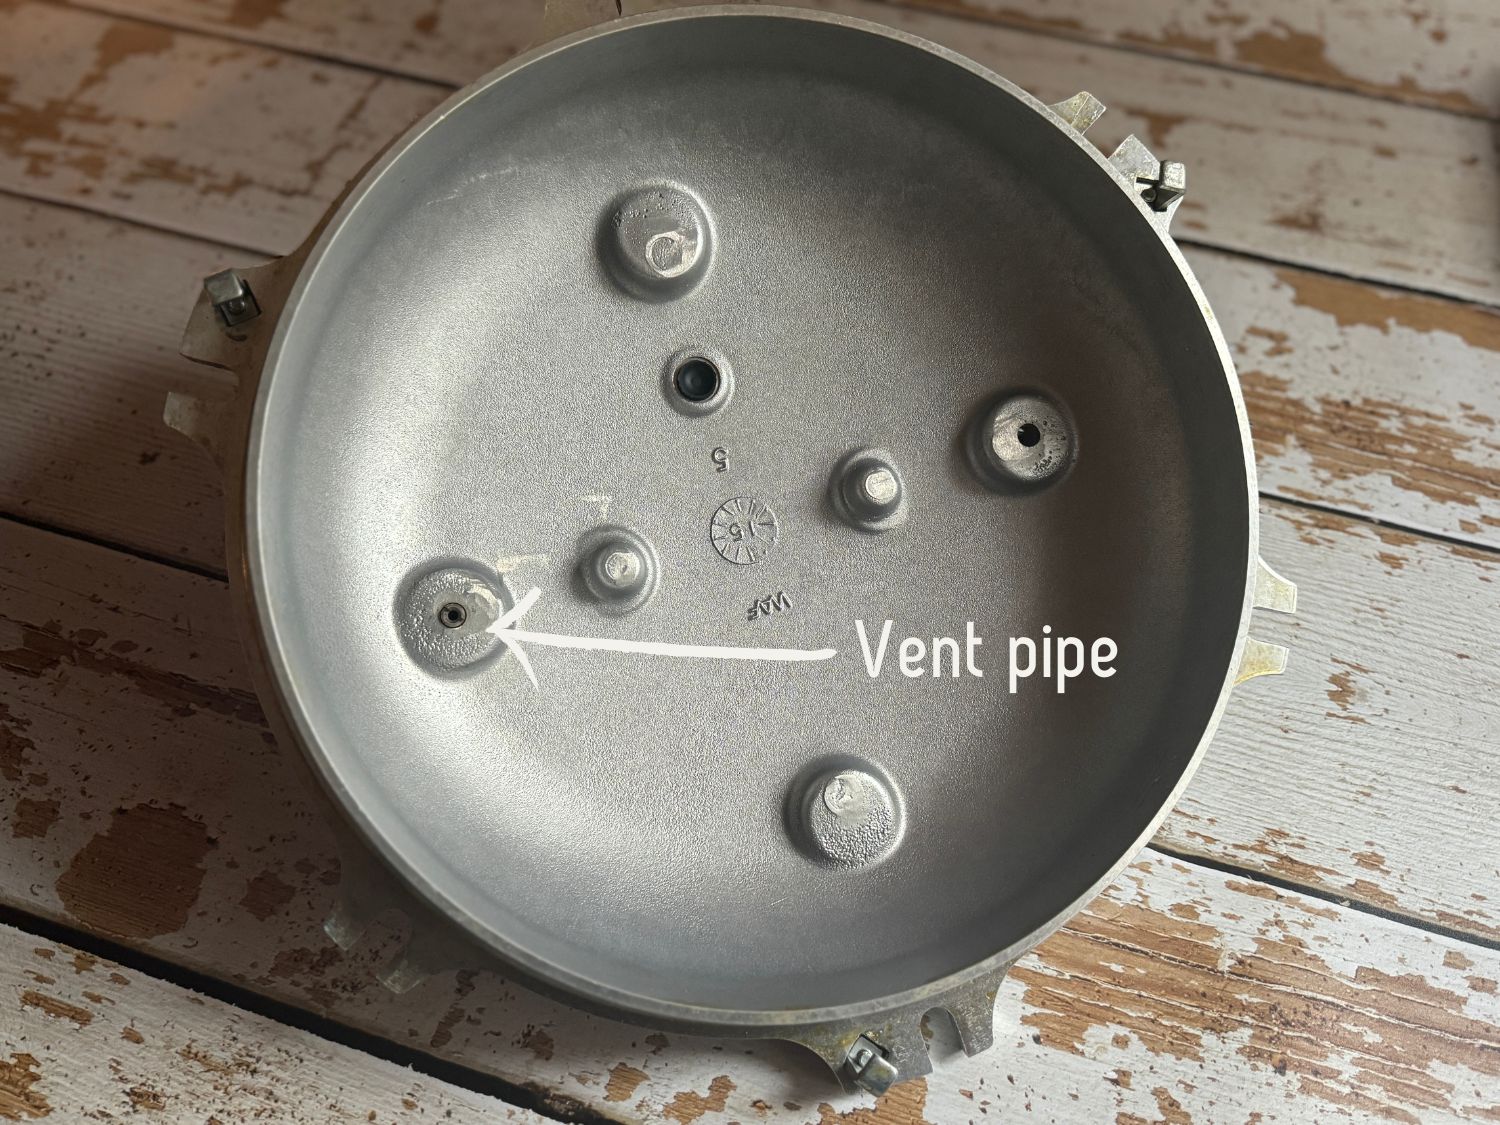
- Look through the vent pipe to make sure it’s open and can release pressure
- Always be present when the pressure canner is running
Types of Pressure Canners
Did you know that there are different kinds of pressure canners? Yep! Some are more hands-on than others. It all comes down to your preferences and budget. Let’s break them down!
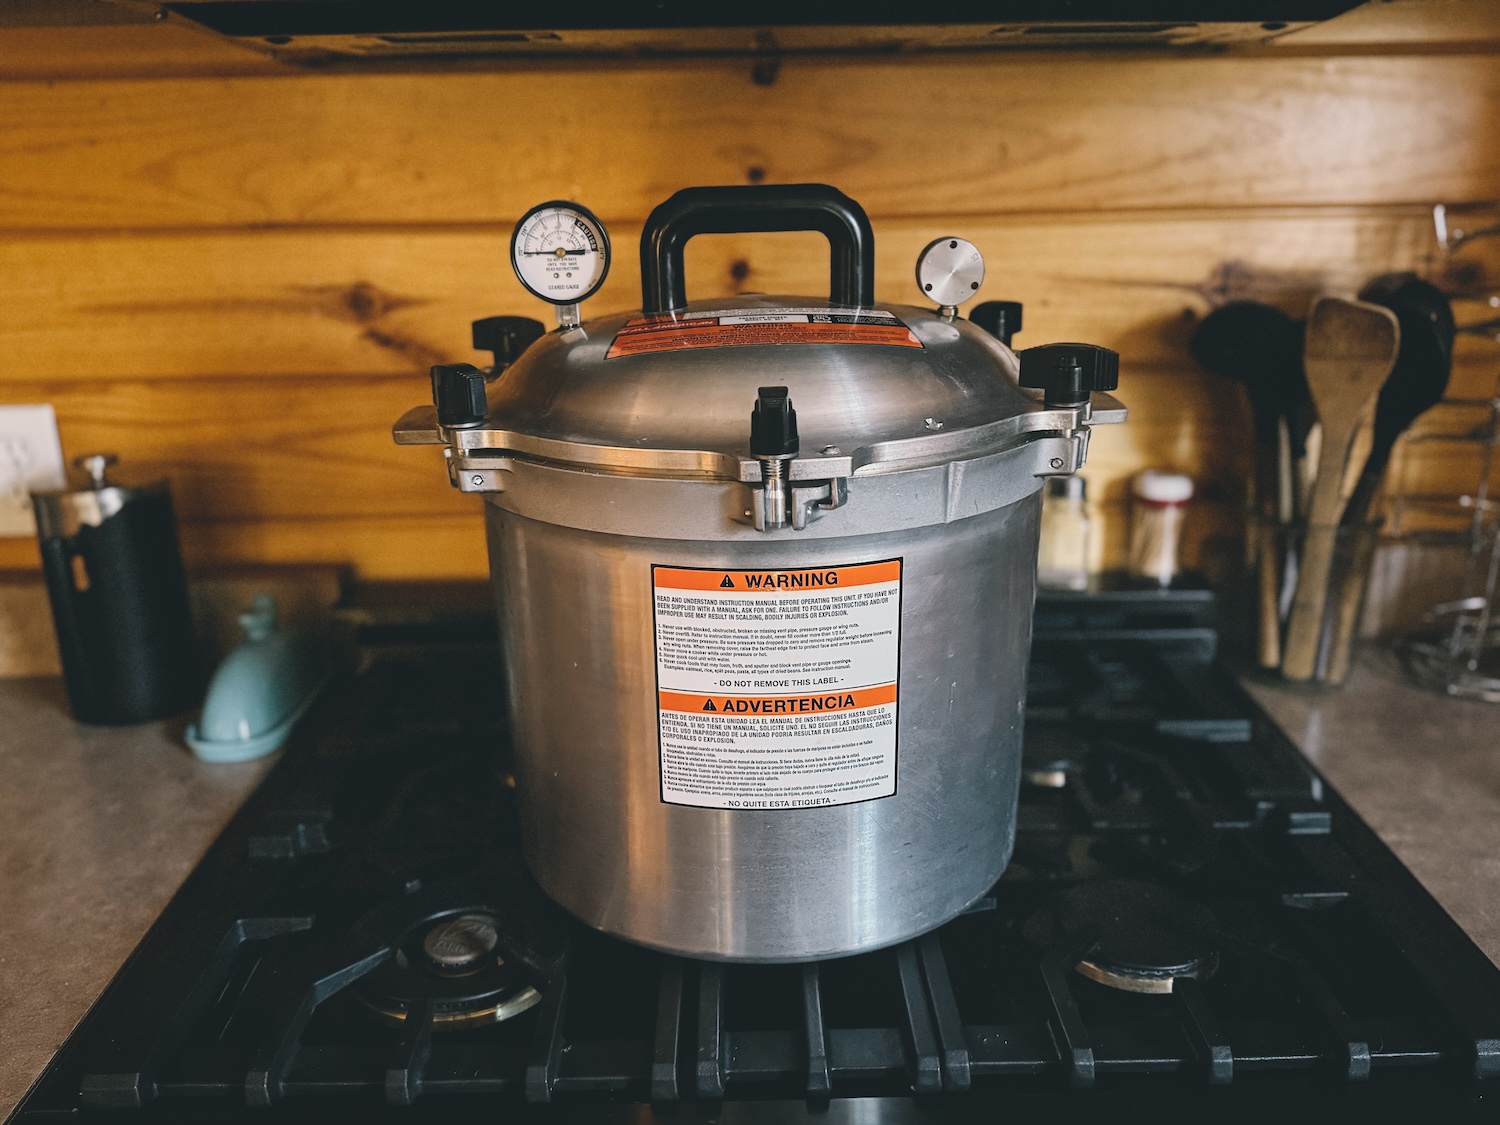
Dial Gauge Pressure Canner
This is the most basic type of pressure canner, and it requires the most babysitting while in use. It features a pressure gauge on the cover to display the internal pressure. It’s up to you to monitor it and adjust the heat as needed to maintain the appropriate pressure. Don’t worry, though, there is a safety pressure regulator to release any pressure above 15 pounds.
While dial gauge pressure canners are cheaper at first glance, they are a bigger headache to run and have parts to replace. The gauge needs to be calibrated yearly (check with your local Cooperative Extension to see if they offer this). Also, the sealing ring and overpressure plug should be replaced every 3 years.
The Homesteading RD's Product Picks | |
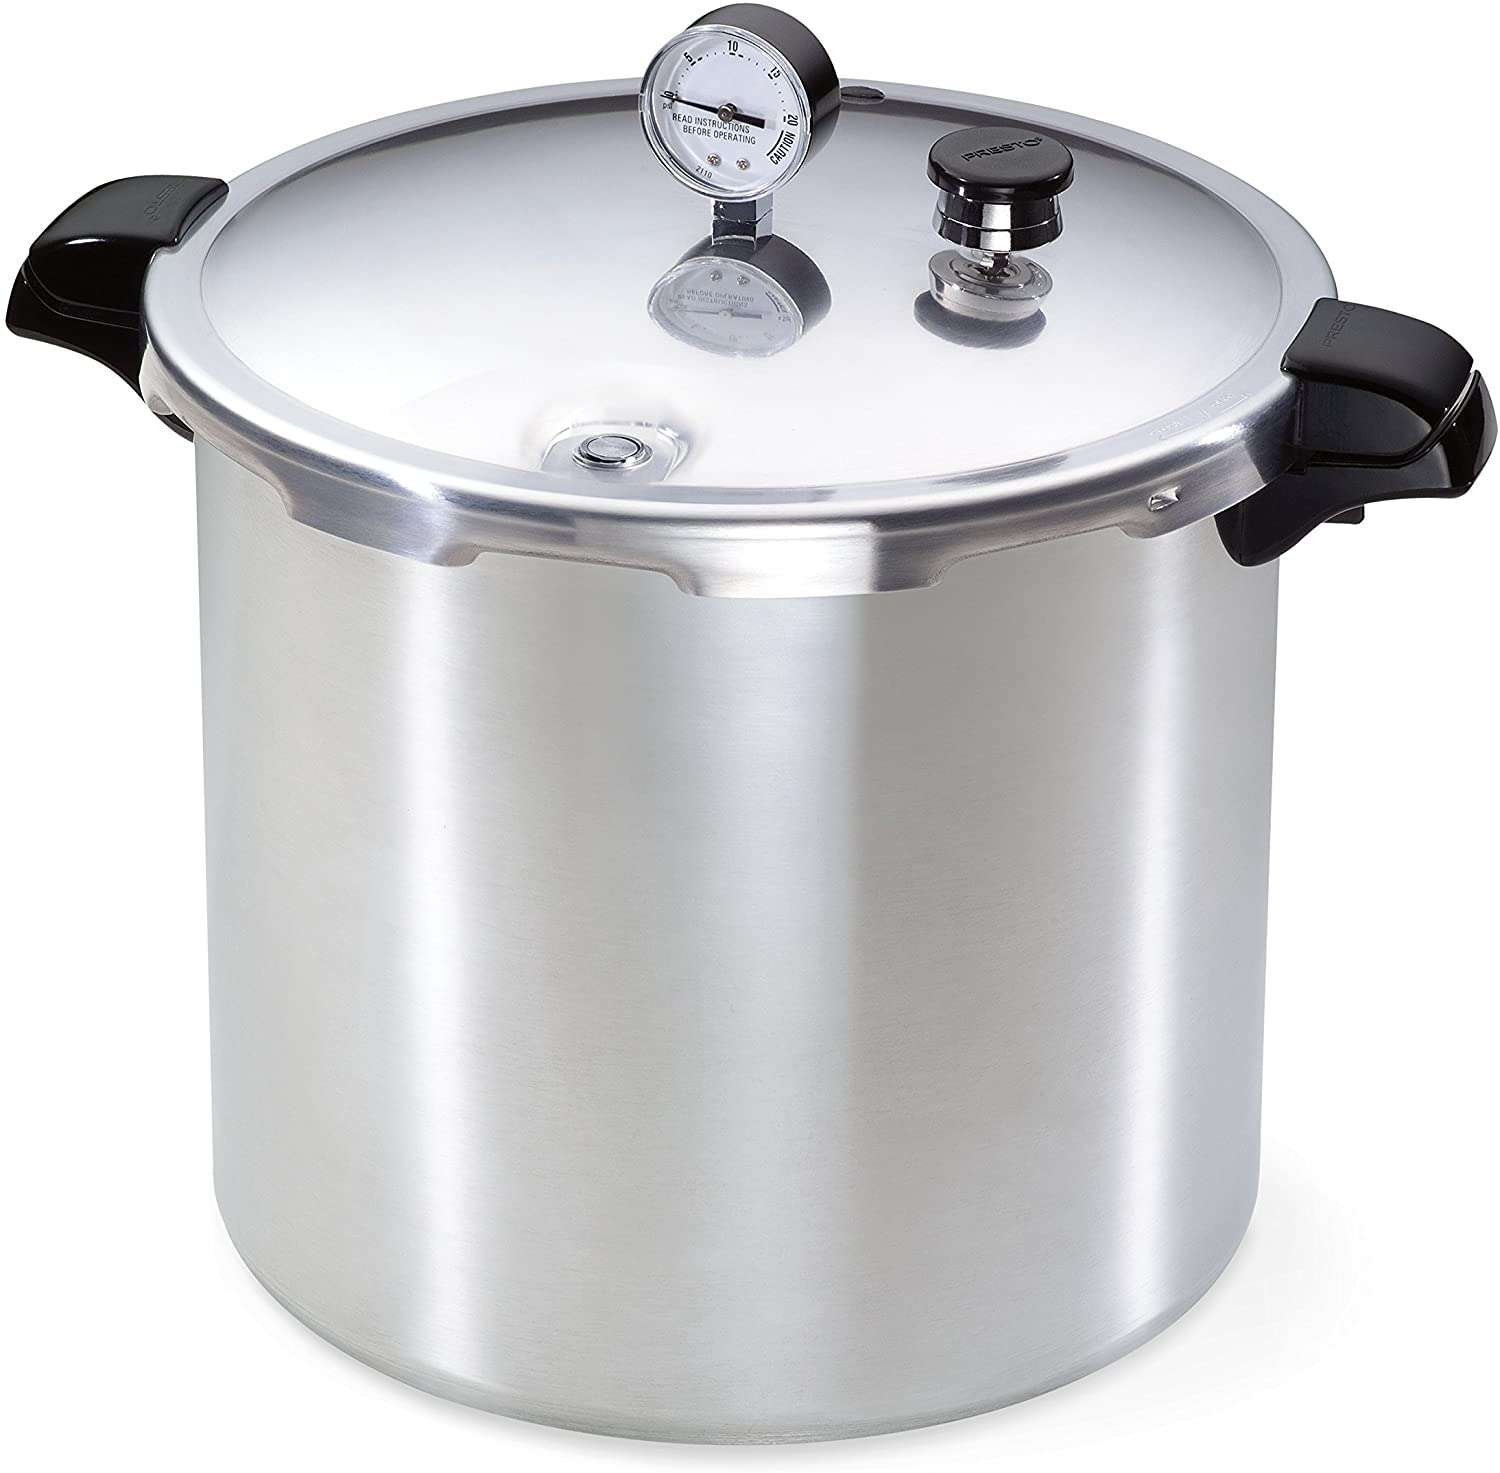
Budget Choice | If you're on a tight budget, this Presto Pressure Canner will do the trick! Constructed of warp-resistant heavy-gauge aluminum for fast, even heating; Works on regular and smooth-top ranges; Extended 12-year limited warranty |
Weighted Gauge Pressure Canner
While more expensive, weighed gauge pressure canners are worth every penny in my opinion, and are the type that I personally use. It features a weight (5 lbs, 10 lbs, or 15 lbs) that is placed on top of the steam valve to set what pressure it should run at. This creates a much more precise (and less stressful) canning experience.
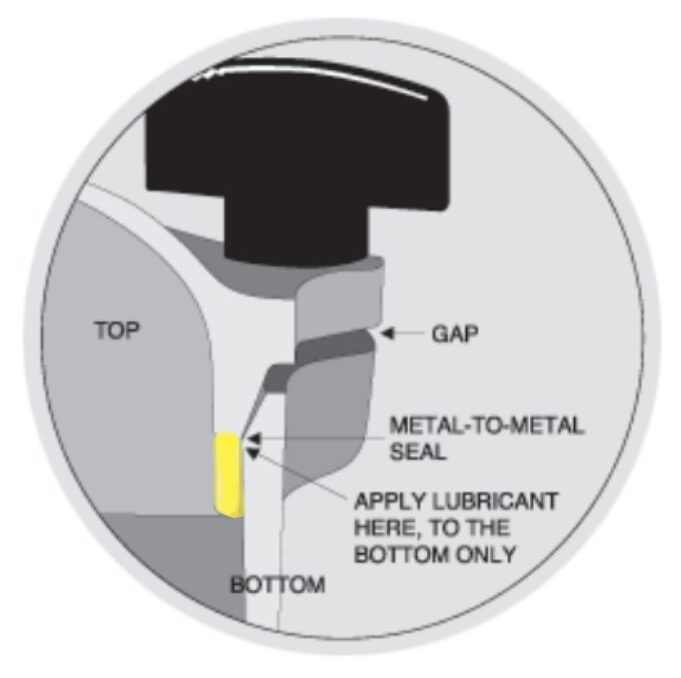
Another benefit of the All-American pressure canner is that it uses a metal-to-metal seal, so there are no sealing rings to replace. Wahoo! It comes in many sizes, but I prefer the 921 model (21.5 quarts). It’s large enough to hold 19 pints or 7 quarts, but it’s not so large that it can no longer be used on glass top ranges.
Lastly, it’s made in the USA, unlike the Presto model above, which is made in China. A pressure canner is an investment, but these are made to last and will be at your side for a lifetime.
The Homesteading RD's Product Picks | |

Best Choice | The best pressure canner on the market and the one that I personally use on our homestead! Only All American pressure canners feature an exclusive, precision-machined, metal-to-metal sealing system. Positive action clamping locks form a steam-tight seal without any costly-to-replace gaskets. |
How to Pressure Can: Step-By-Step
Alright, we’ve made it to the fun part! As we covered above, there are several different kinds of pressure canners, but I’ll be going through the steps using my own weighted gauge All American pressure canner. While the basic steps are similar, please refer to your product manual if you are using a different pressure canner.
Before you begin
If this is your first time using your pressure canner, wash all of the surfaces first (except for the pressure dial gauge) to remove any manufacturing oils. Hand wash with hot, soapy water. Don’t put it in your dishwasher!
Next, apply a thin layer of petroleum jelly along the metal-to-meatal seal between the lid and the pressure canner (see highlighted portion in the diagram below). I know I’m not a huge fan of petroleum jelly either, but hear me out.
I used olive oil for several years, and it eventually got so sticky that my lid was (nearly) permanently stuck on. Ryan had to get out some heavy-duty tools to pry it back open! Since switching to petroleum jelly, I’ve had no issues.
Lastly, take a look through the vent pipe from under the lid to make sure it’s open and can release pressure.
Step 1: Prepare your pressure canner and jars
The really nice thing about pressure canning compared to water bath canning is that you don’t have to sterilize the jars first. Wahoo! However, you do want them to be fairly warm since you’ll be scooping in warm contents.
I like to add all of my empty jars to my kitchen sink and just fill them with hot tap water. If you have a dishwasher, you can run them through a quick cycle, too!
While the jars are heating up, add 2-3” of water to the bottom of your pressure canner. Pressure canning is different than water bath canning in that the jars will not be fully submerged.
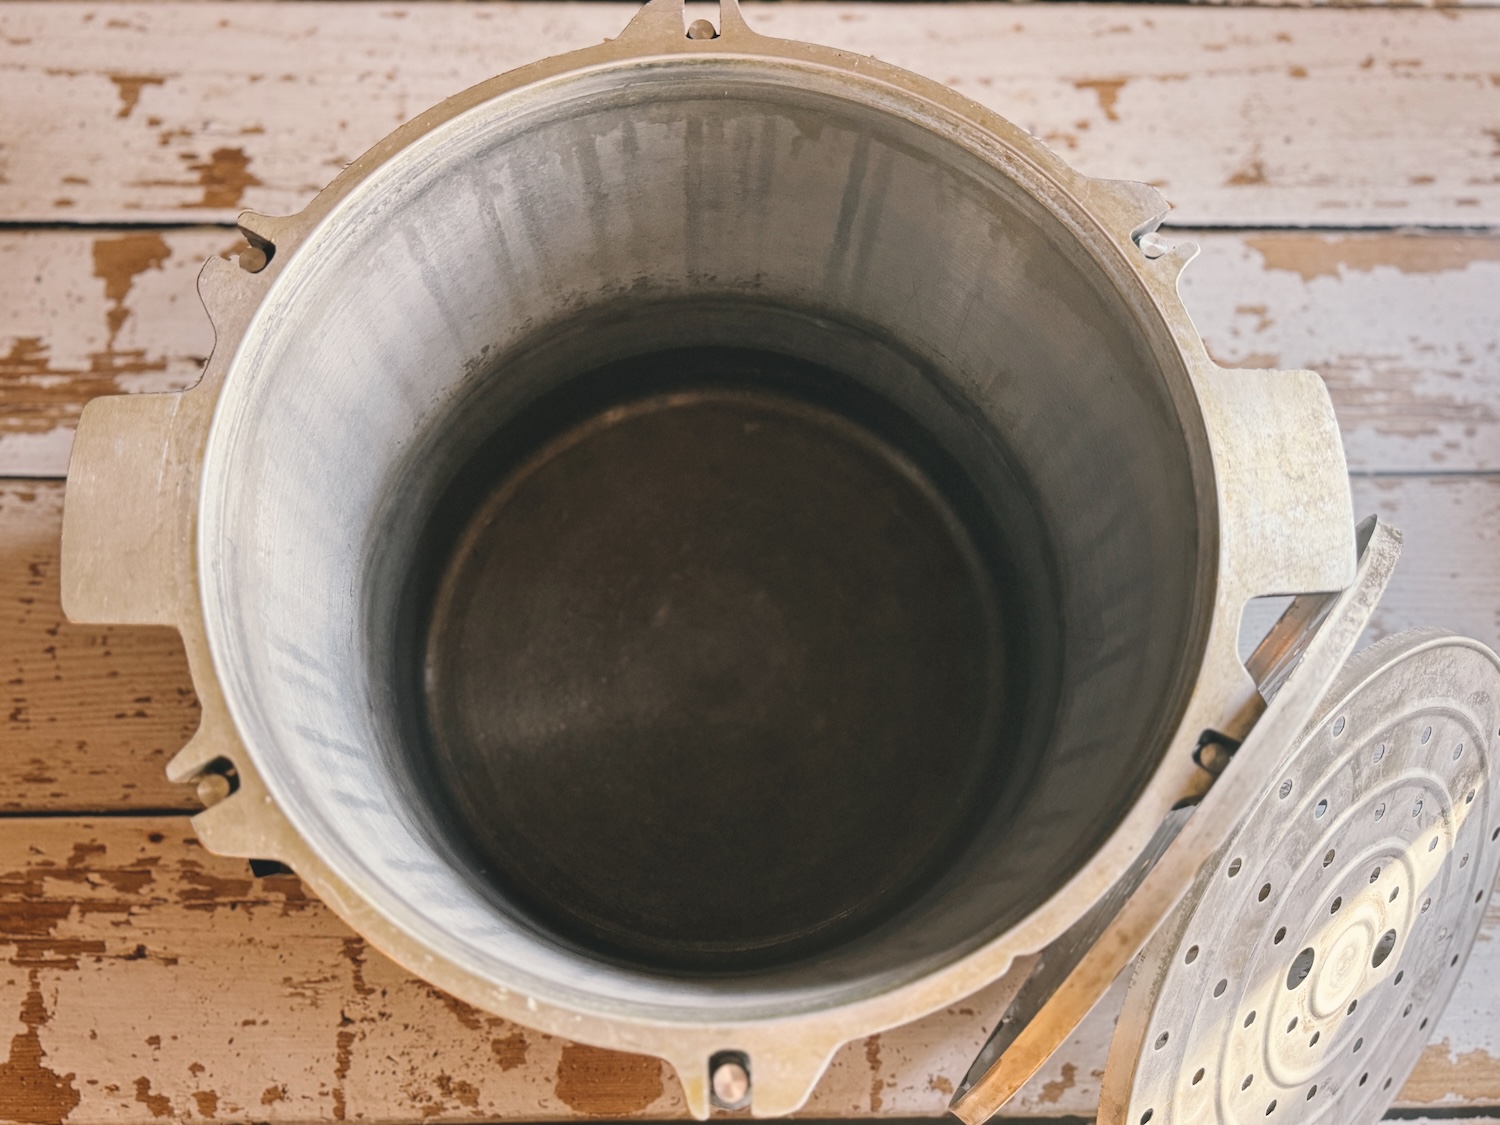
Next, place the first canning rack directly on the bottom and move the canner to your range.
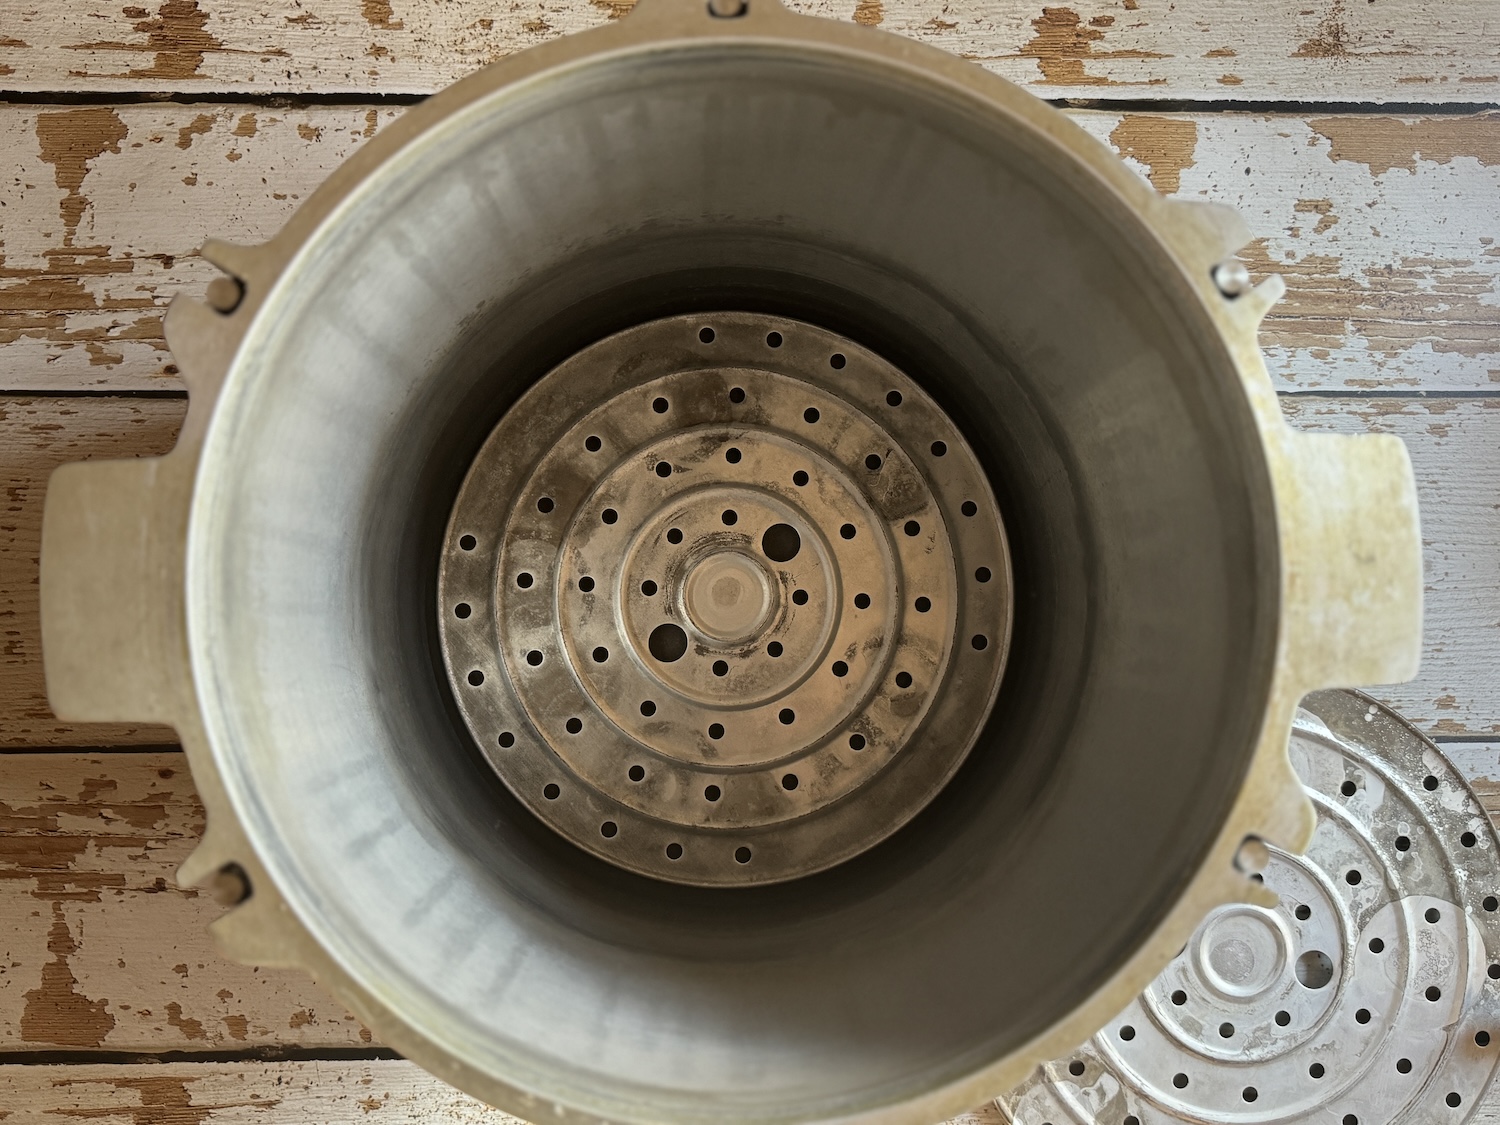
*TIP: Orient the canning rack so that the rimmed edge is facing downward and the flat surface is on the top. You want a gap between the bottom surface of the pressure canner and the top rack where the first set of jars will sit.
Turn the heat on low to start warming the water. You don’t want the water boiling, but warm is good so that you don’t shock the hot jars.
Step 2: Load up the pressure canner
Pour the hot water out of the canning jars and then add your hot food contents, allowing for proper headspace according to the recipe you’re using. Always use a tested recipe! I like to use the Ball Canning Book for both pressure and water bath canning recipes.
The Homesteading RD's Product Picks: | |
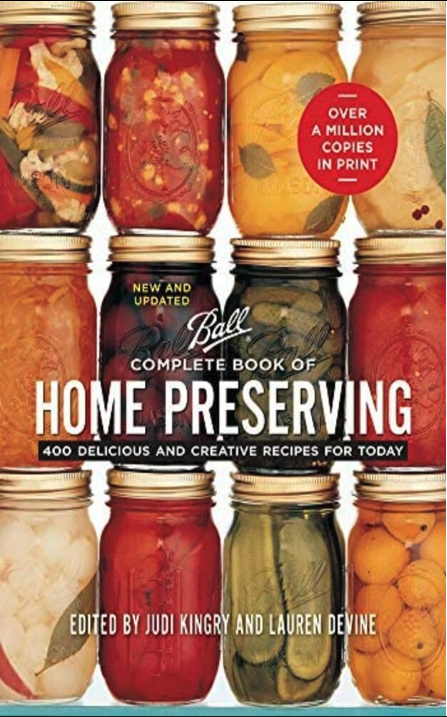
| An absolutely essential book for anyone who has a garden and wants to preserve their havest for the years to come. Easy to follow with over 400 creative recipes along with problem solving sections. A must have resource for any gardener or homesteader! |
Once filled, add a canning lid and place the jar into the pressure canner. I like to work on 2-3 jars at a time – pouring out the hot water, filling with contents, placing into the pressure canner, then repeating with the next 2-3 jars.
*I love For Jars canning lids! I often have a 100% seal rate, which is awesome! Use my code “THRD10” for 10% off!
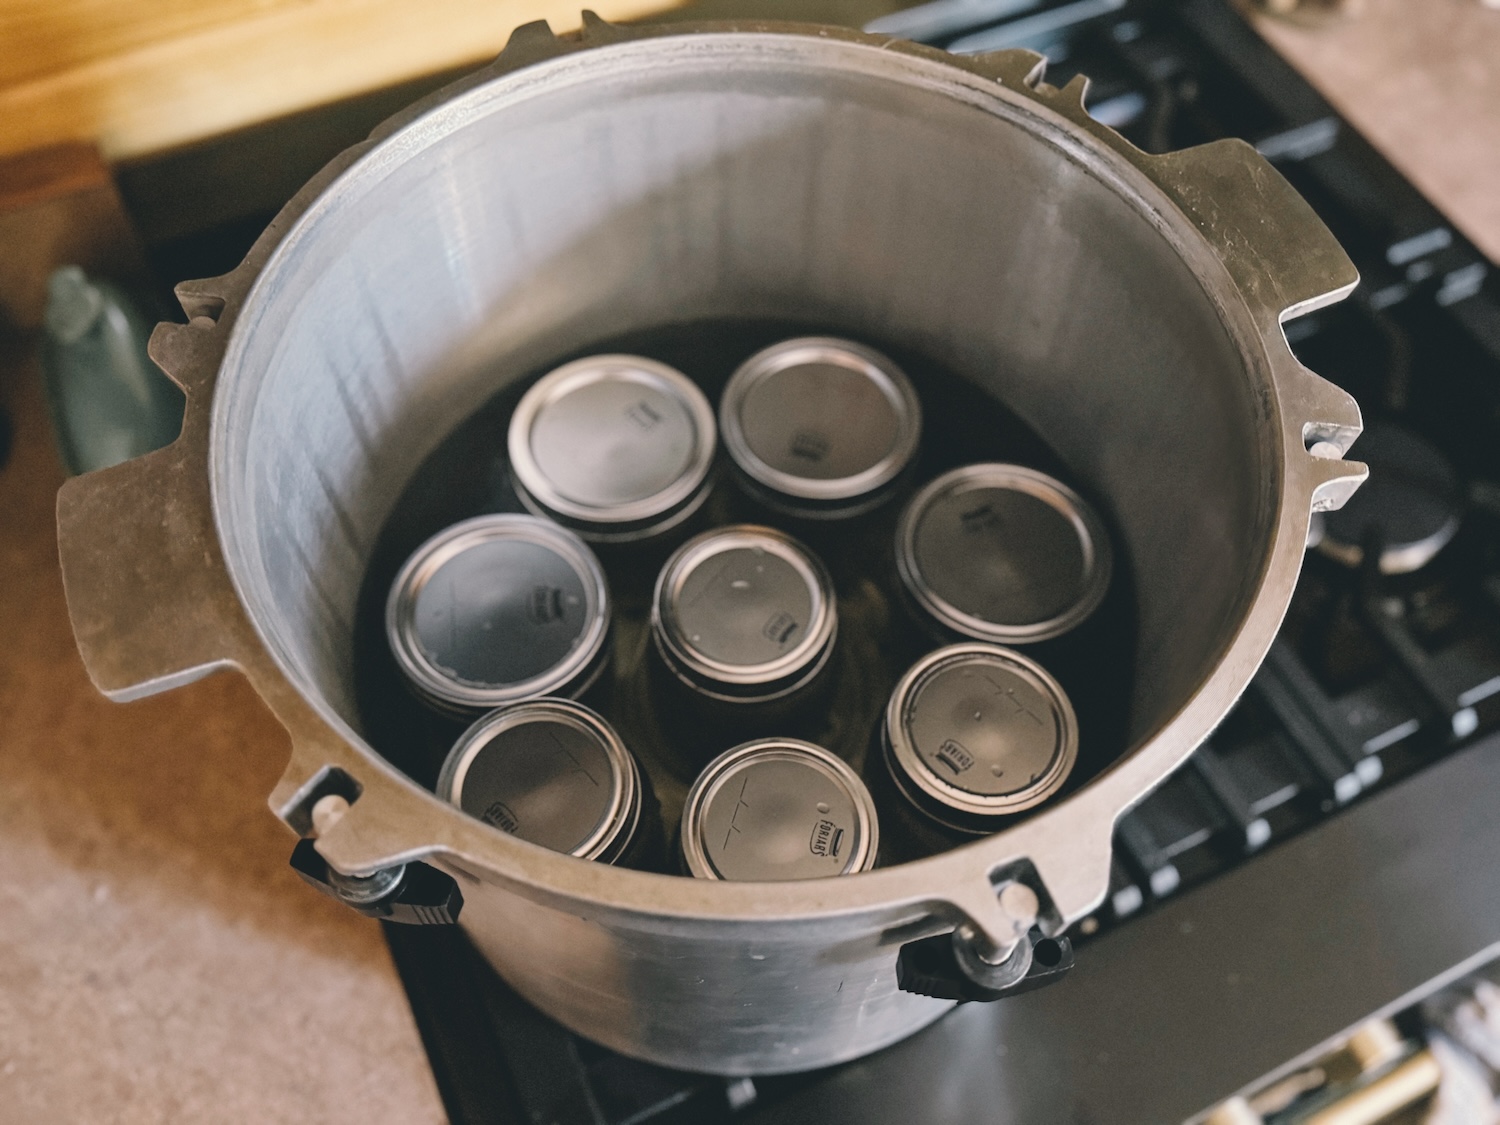
If you are canning more than 8 pint jars, you can add a second row. Keep in mind that only the larger models feature a second layer; models 910 and 915 only come with 1 rack.
Take the second canning rack and place it on top of your canning jars, then continue to add more jars. Just be sure that all of the jars on the bottom row are the same size and height so that the second canning rack sits flat.
Step 3: Secure the pressure canner cover
Take a look at the pressure canner cover and identify where the arrow is. Then, take a look at your pressure canner and identify where the notch in the metal is.
Then, grab the cover by the black handle and set it on the pressure canner so that the arrow is just to the right of the notch. Then, twist the cover clockwise so that the arrow and notch line up. Ta-da!
![]()
Now it’s time to clamp everything in place but in a specific order. Hold onto 2 wing nuts that are opposite of each other, and swing them straight up into the notches. You may need to loosen the wing nuts so that they can make it up.
Once set into place, begin to twist the wing nuts clockwise to tighten them. Try to tighten both of them at the same time so that the lid is secured evenly. Never tighten only 1 wing nut at a time.
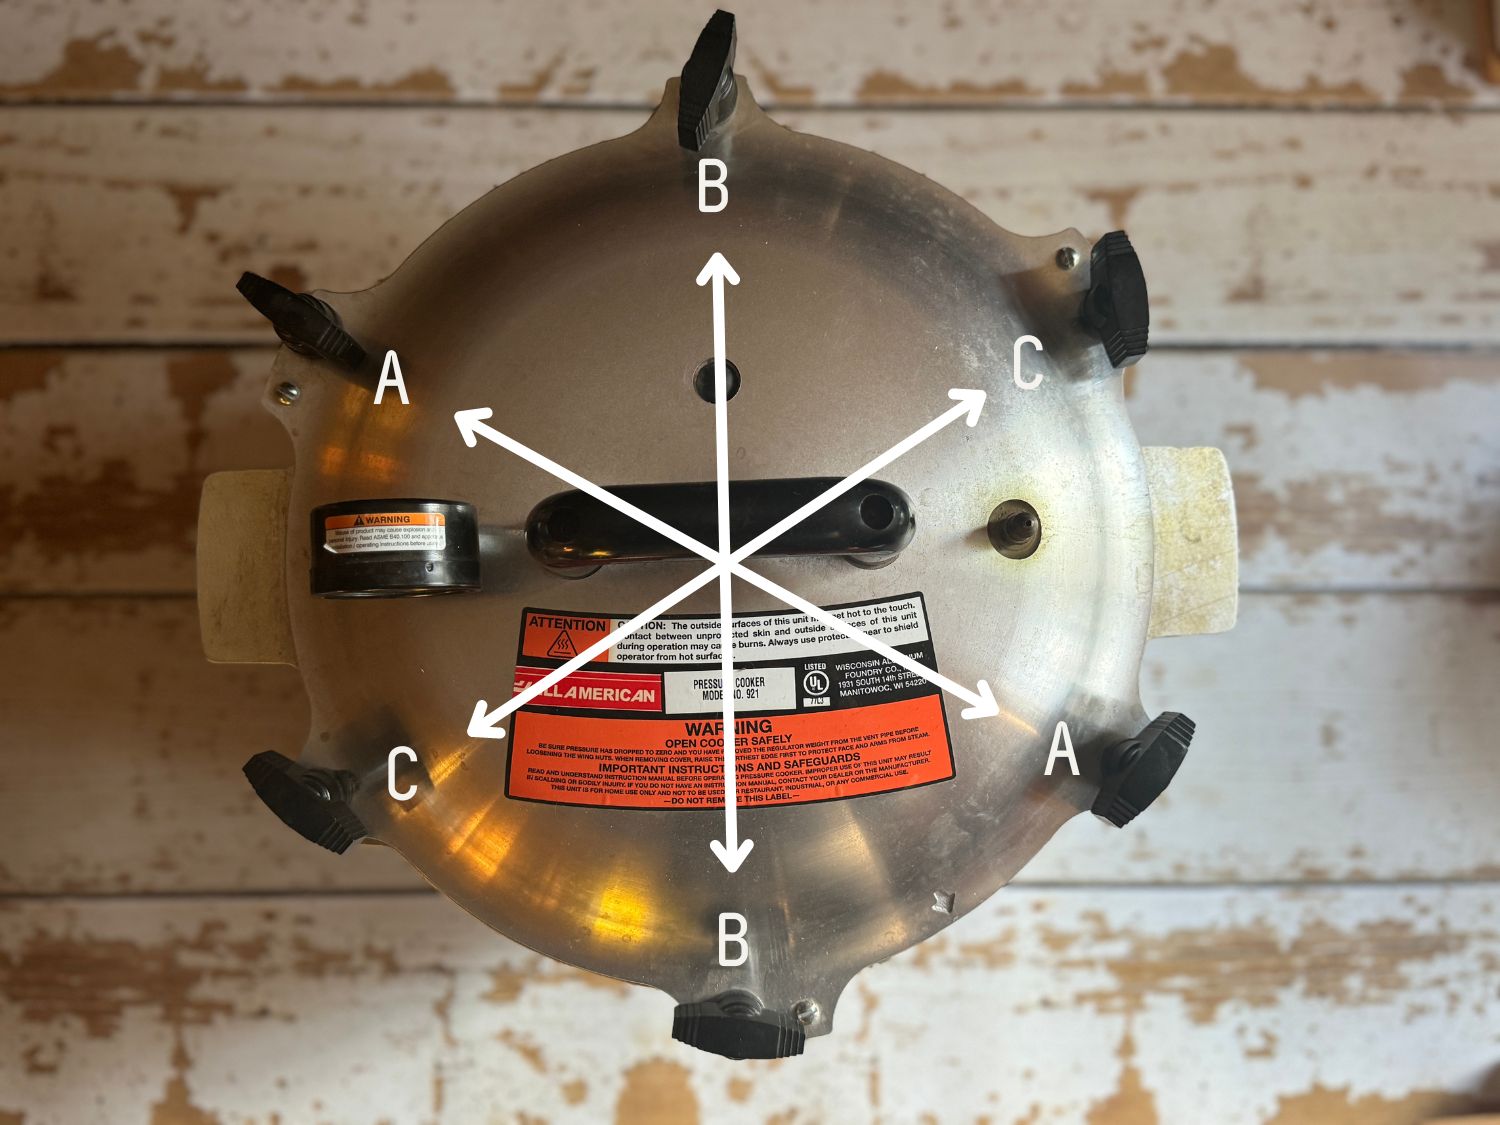
Take a look at the gap under the cover. Is the gap even? If so, great! Grab the next 2 wing nuts that are opposite of each other and repeat the process. If not, loosen the low side and tighten the high side.
*Always tighten the wing nuts by hand. Don’t use any hand or power tools!
Step 4: Start building pressure
The jars are in and the lid is on tight, so now it’s time to get to pressure canning! The pressure gauge should be reading 0 right now. Turn the heat on high and wait until steam starts to sputter out of the vent pipe. Once it does, set your timer for 10 minutes.
After 10 minutes, place the pressure regulator weight on top of the vent pipe (wear an oven mitt – the steam is hot!). Make sure to arrange the pressure regulator weight correctly. For example, if your recipe calls for 10 lbs of pressure, place the hole with the number 10 marking over the vent pipe (as shown below).
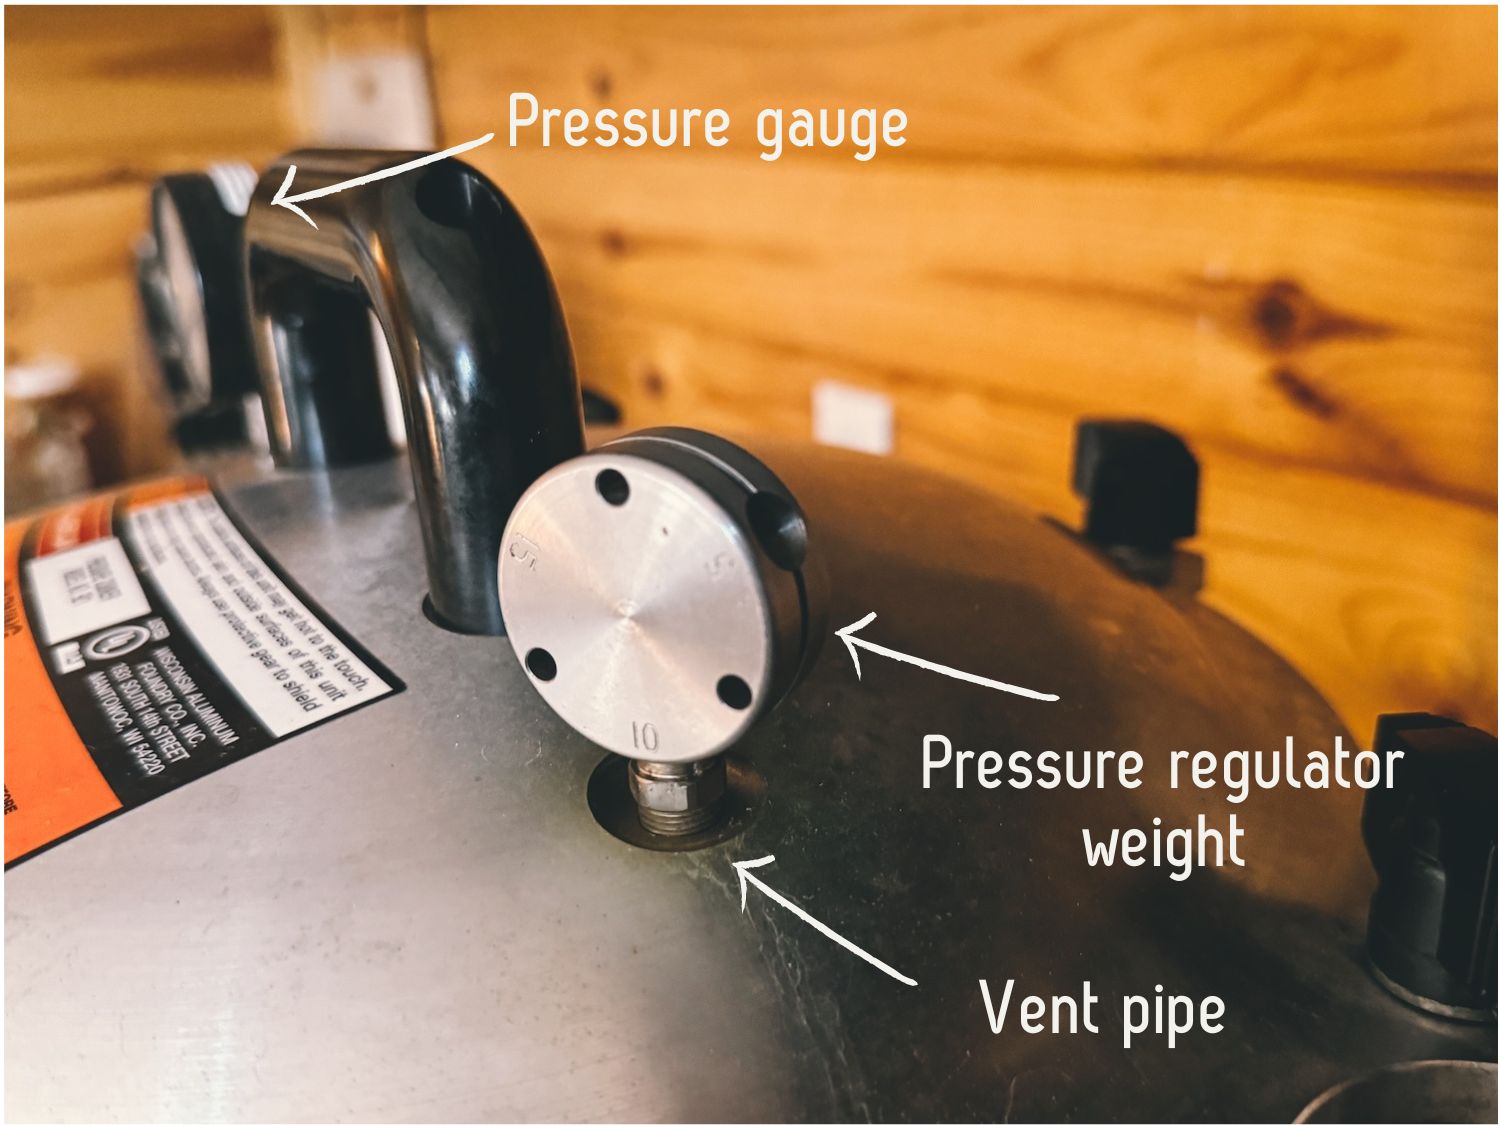
Watch the pressure gauge – it should start slowly increasing. Once the internal pressure reaches the set level (ex: 10 lbs of pressure), the weight will make an audible jiggle. This jiggling motion releases a bit of pressure to keep it at your set level.
Once you notice the first jiggle, set your timer for the processing time according to your tested recipe and turn down the heat. Every range and pressure canner is different, but for me, just a hair above low is perfect.
The goal is to have the pressure regulator weight jiggle 1-4 times per minute. Stay nearby throughout this process to make sure that things are on track.
- If it jiggles too often, turn down the heat; otherwise, too much steam will release, potentially running your pressure canner dry. This can permanently damage your pressure canner.
- If it jiggles too infrequently, turn up the heat; otherwise, adequate pressure won’t be maintained.
*If you are at altitude, you will need to adjust the pressure level. ALWAYS use 15 pounds of pressure if you are 2,000+ feet above sea level, no matter what the recipe says.
Step 5: Cooling it down and removing the cover
Once your timer goes off, simply turn off the heat and walk away. Don’t touch or move the pressure canner, the pressure regulator weight, or the cover!
Check on your pressure canner regularly to see what the pressure is reading at on the gauge. It should slowly come down. Once it reaches zero, it’s time to remove the cover.
While waiting for the pressure to come down to 0, don’t wait too long, either. If the pressure canner is allowed to fully cool while the pressure regulator weight is still on, this can form a vacuum inside, making the cover challenging to remove.
Wearing an oven mitt, remove the pressure regulator weight (it’s hot!) and set it aside. Some residual steam might hiss out, and that’s okay! Wait 2 more minutes to let any remaining steam escape.
Then, unfasten the cover by loosening the wingnuts in an opposite fashion – similar to how you tightened them on. Once released, remove the cover facing away from you so the hot steam doesn’t burn your face or arms.
Step 6: Remove the jars
Now, using your jar lifter, carefully lift out the jars one at a time and place them in a location where they can rest undisturbed for 24 hours. I like to set them on a towel or a cutting board on my kitchen counter or table.
Leave the pressure canner sitting on your range until it cools a bit, then dump out the warm water. However, if you need to can more jars, verify that you have 2-3″ of water (you may need to top it off a bit) and load it back up with new jars starting with step 2.
Step 7: Cleaning and Storage
Hand wash the inside of your pressure canner and canning rack(s) with hot soapy water, rinse, and allow to dry. Never put them in a dishwasher!
Store the cover separately from the bottom pot to allow for some air circulation. Alternatively, the cover can be carefully placed upside down on top of the bottom pot.
How are we feeling? Still nervous? If so, do a practice round! Add 2-3” of water to the bottom of your pressure canner and go ahead and run it without any jars. You can also try canning some jars of water for extra practice.
FAQ About Pressure Canning
What maintenance is required?
Every few uses, wipe off the metal-to-metal seal with a clean towel in case there’s any leftover debris stuck in the lubricant. If needed, use a 3M Scotch Brite pad (red color only) and rub in a horizontal motion. Then, wash with hot soapy water, rinse, fully dry, and finally add another thin coat of petroleum jelly to the metal-to-metal seal.
On a yearly basis, add a small amount of petroleum jelly to the threads and metal surfaces at the base of the wing nuts. This will make them easier to operate and hold the cover more securely.
If you are using a dial gauge pressure canner, be sure to also replace the sealing ring and overpressure plug every 3 years.
What adjustments should be made for altitude?
If you are at an altitude, you will need to adjust the pressure level. ALWAYS use 15 pounds of pressure if you are 2,000+ feet above sea level, no matter what the recipe says.
Why is my pressure canner discolored?
Discoloration inside the pressure canner is very common. It’s due to hard water deposits and is harmless. If it bothers you, add a mixture of 1 Tbsp vinegar and 2 Tbsp cream of tartar to a quart of water and boil, followed by some scrubbing.
Can I use a pressure canner on a glass top range?
Pressure canners are not ideal for glass top ranges, but it is possible, and I’ve done it for years in the past. Make sure to check with the manufacturer. For the All American pressure canner, the 930 and 941 models are too heavy and could cause damage. Be careful not to slide it over the glass range surface as it can scratch the surface.
How do you pressure can without a canner?
Without a true pressure canner, you cannot pressure can. Instapots don’t count, either (keep reading to learn why). I know that pressure canners are expensive, but they are well worth the cost in the long run!
Is pressure canning different from pressure cooking?
Yes! Pressure canning involves preserving food within a jar under pressure, whereas pressure cooking involves cooking food or a meal under pressure. Pressure canners can (usually) do both, while pressure cookers can only do pressure cooking (no pressure canning).
The popular Instapot is an example of a pressure cooker. They cannot be used for pressure canning because they aren’t able to maintain a consistent or accurate pressure level.
Other Food Preservation Articles You’ll Love:
- Principles for Food Preservation
- Can You Freeze Mason Jars?
- How to Braid Onions for Long-Term Storage
Final Thoughts
That’s it, my friends! I hope you are feeling a little less scared about pressure canning now and are feeling ready to give this a go. It’s normal to feel a bit intimidated, but I guarantee that after a couple of rounds, you’ll be feeling like a pro. You’ve got this!


I love this so much 🙂 Thank you!
You’re welcome!
Thanks for sharing these clear and helpful tips, very informative and encouraging for beginners. I appreciate the practical guidance and easy-to-follow advice 🙂 http://www.myconcretecompanytx.com
Hello, I’ve had my BigBoy pressure canner (apparently the equivalent of the All American in Europe) for more than a year but haven’t used it yet as I’m concerned about heat source. I was interested to see that you mention a glass-topped stove. I have a ceramic halogen hob (so it ‘pulses’ the heat) Would this work? I also have a free-standing gas ring linked to a butane gas bottle. Would this be better?
So many thanks for ALL your wonderful insights…and patience!
Hi There! I took a look at your BigBoy pressure canner and it looks like (see page 27 on: https://www.hawkinscookers.com/downloads/2021%20July%20PC%20Catalog%20w%20MRP.pdf) they are only stating gas, kerosene, coal, or firewood stoves are suitable (as long as a gap of 1″ is kept between the fuel and the bottom of the cooker). I see on other models, they are listing halogen ranges as an option, so I believe this is not an option for your range, but it sounds like your free-standing gas ring with butane would work!
Thank you Katie, your time and help is very much appreciated. I’ll set up the batuane stove then 😃
I understand gauginging at 15 over 2000 ft sea level. But if recipe ask for 10 guage with 15 min time. Do i change the time for 15psi. Or do the same time.
Great question! For pressure canning, the processing time doesn’t change (only the pressure level). For water bath canning, yes, longer processing times are needed.
Thank you! It seems so possible to do now and I’m going to try it soon! I bought an all American canner a while ago that you’ve given me courage to finally take on its maiden voyage!
Hooray! I’m so proud of you – you can do it!