
Rendering fat is a traditional skill that involves slowly cooking down animal fats and it’s making a comeback in homestead kitchens. It’s easy to do, affordable, and provides a versatile fat source for high-heat cooking and making things like candles, soap, and skin care products!
Another thing that’s great about using animal fats is that they can be sourced locally vs using imported fats such as coconut, olive, or avocado oil. It’s also an excellent nose-to-tail eating strategy!
Let’s jump in!

*Disclosure: This post may contain affiliate links to products (including Amazon). I’ll earn a small commission if you make a purchase through my link, at no additional cost to you! Regardless, I only link to products that I personally use on our homestead or believe in.
Rendering Fat 101
Rendering is the process of gently cooking down and clarifying raw animal fat. Raw fat contains impurities and rendering it down causes the impurities to clump together, allowing for easy removal. This results in a clean, usable, shelf-stable fat source. A true nose-to-tail eating strategy!
This rendered fat source can now be used for high-heat cooking, body balms, soap, candles, etc.! It is so versatile! There are two different ways that rendering can be done: dry heat and wet heat.
Dry Rendering
This method includes gently cooking down the animal fat on its own (no added water). It may require close supervision to make sure that it doesn’t burn. However, the risk of burning is super low if you’re using a crockpot, which is the method I recommend.
Wet Rendering
This method includes gently cooking down the animal fat with some water. This protects it from potentially burning, but will require an extra step to ensure that all of the water has been removed (otherwise, it will spoil).
What are Tallow, Lard, and Schmaltz?
Once the animal fat has been rendered down, it is a new product with a new name! There are many different kinds of rendered fats that can be made and used on the homestead.
- Suet (raw beef or venison fat) -> tallow
- Leaf fat (raw pork fat) -> lard
- Raw chicken fat -> schmaltz
- Butter -> ghee
- Raw duck fat -> rendered duck fat
- Raw bear fat -> bear grease
- That’s just to name a few!

Which one is best to use?
Each type of rendered fat has slightly different properties, making each one better for one task or another. Generally, rendered fats that are softer (lard, schmaltz, etc.) are better for baked goods and greasing pans, whereas harder fats (tallow) are better for making candles, whipped balms, and deep-frying.
*For a detailed analysis of uses for rendered fats, check out my article: Tallow vs Lard: Which One to Use?
Are Rendered Fats Healthy?
This is such a HUGE topic, but the short answer is YES! Rendered fats are largely made up of saturated fat, which is much more stable than unsaturated fat (oils) when heated. A stable fat means less oxidation, which is tied with inflammation, premature aging, plus cellular membrane, mitochondrial and DNA damage (Wickens, 2001).
*Want to learn more? Check out my articles Tallow and Lard: The Saturated Fat Controversy & The Health Benefits of Tallow and Lard. They are fascinating reads!
Sourcing Ingredients for Rendering Fat
The important takeaway is that you absolutely need to ensure that you are sourcing organic, grass-finished suet or organic, pasture-raised leaf fat or chicken fat.

Toxins are stored in fat (Jackson, 2017). Therefore, if you’re using the fat from a cow that was stuck in a feedlot, eating corn sprayed with herbicides, and being injected with antibiotics… you’re rendering down a high toxin load to be rapidly utilized in your own body.
The same goes to pigs or chickens that live their life in a crowded building and are fed inflammatory grains. No thanks!
Where can I find it?
We harvest chicken fat from our female meat chickens and retired laying hens (roosters are generally too lean), and get raw suet and leaf fat from our favorite local CSA (TC Farm).
If you aren’t already connected with a local CSA, I’d recommend checking out Local Harvest or the USDA Agricultural Marketing Service to see if you can find one near you!
When you are CSA shopping, confirm they are offering organic and grass-finished for beef and pasture-raised for pork and poultry. Finding a CSA that offers other products that you might be interested in (eggs, raw milk, wool, etc!) is a bonus! That way the CSA can become a one-stop-shop for you!
How to Render Animal Fat:
Ingredients
- Raw fat (beef, chicken, pork, bear, goose, duck, etc.!) – make sure that it’s organic and grass-finished/pasture-raised
Tools
- Knife
- Cutting board
- Food processor (optional, but highly recommended!)
- Crockpot
- Fine mesh strainer or cheesecloth
- Storage container (I like glass pyrex containers)
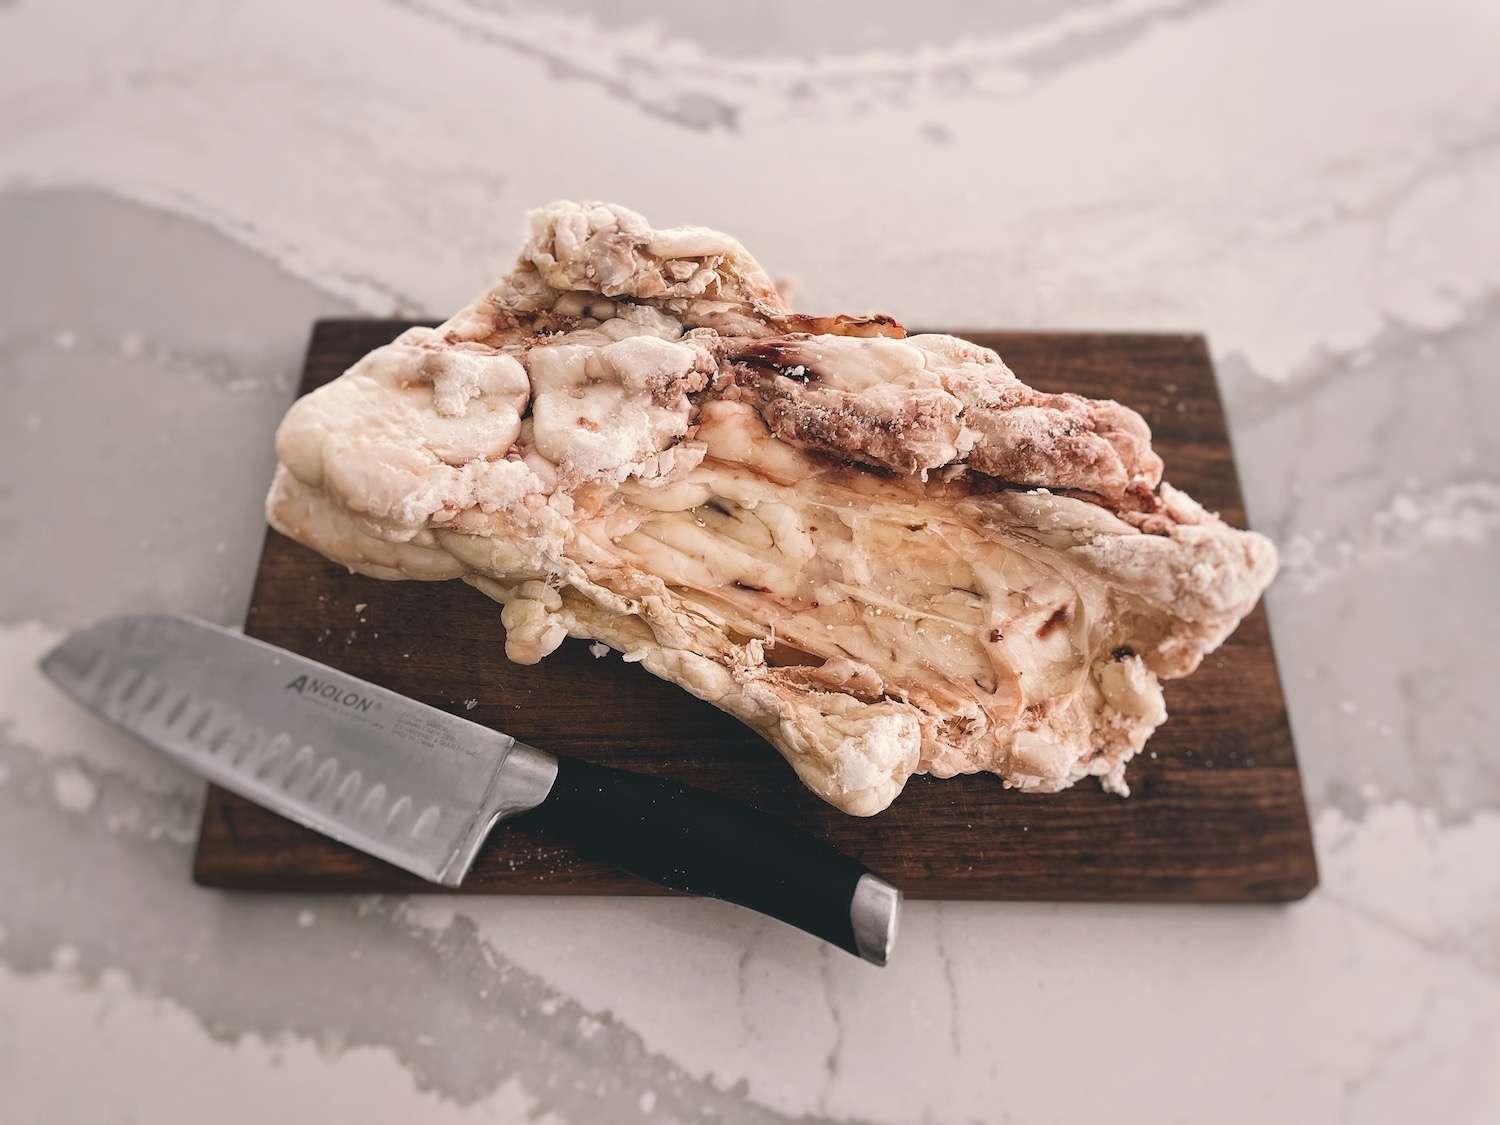
Step 1: Chop and trim the raw fat
Start with very COLD fat (straight out of the fridge or freezer) – this makes it much more manageable and less sticky. Roughly chop the fat into 2” chunks and trim off any bits of meat, gristle, or blood.
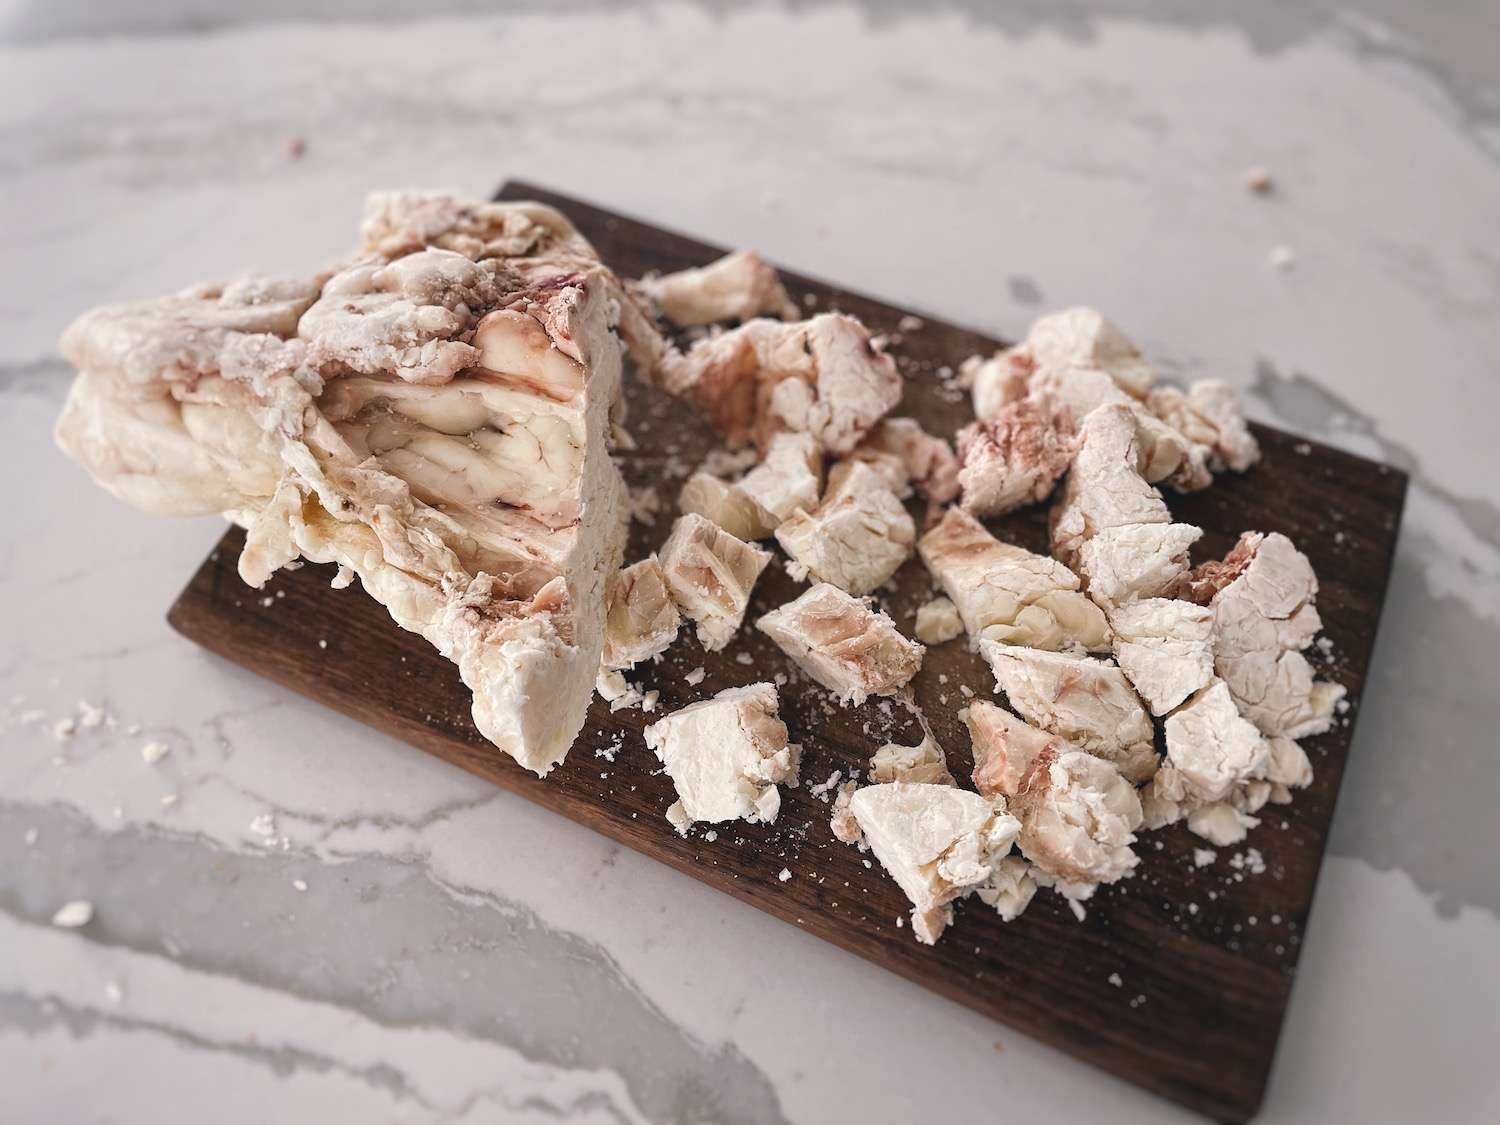
It doesn’t have to be perfect, just do the best that you can. Don’t throw these trimmed-off tidbits away! Give these to your dogs or cats; they will love them 🙂
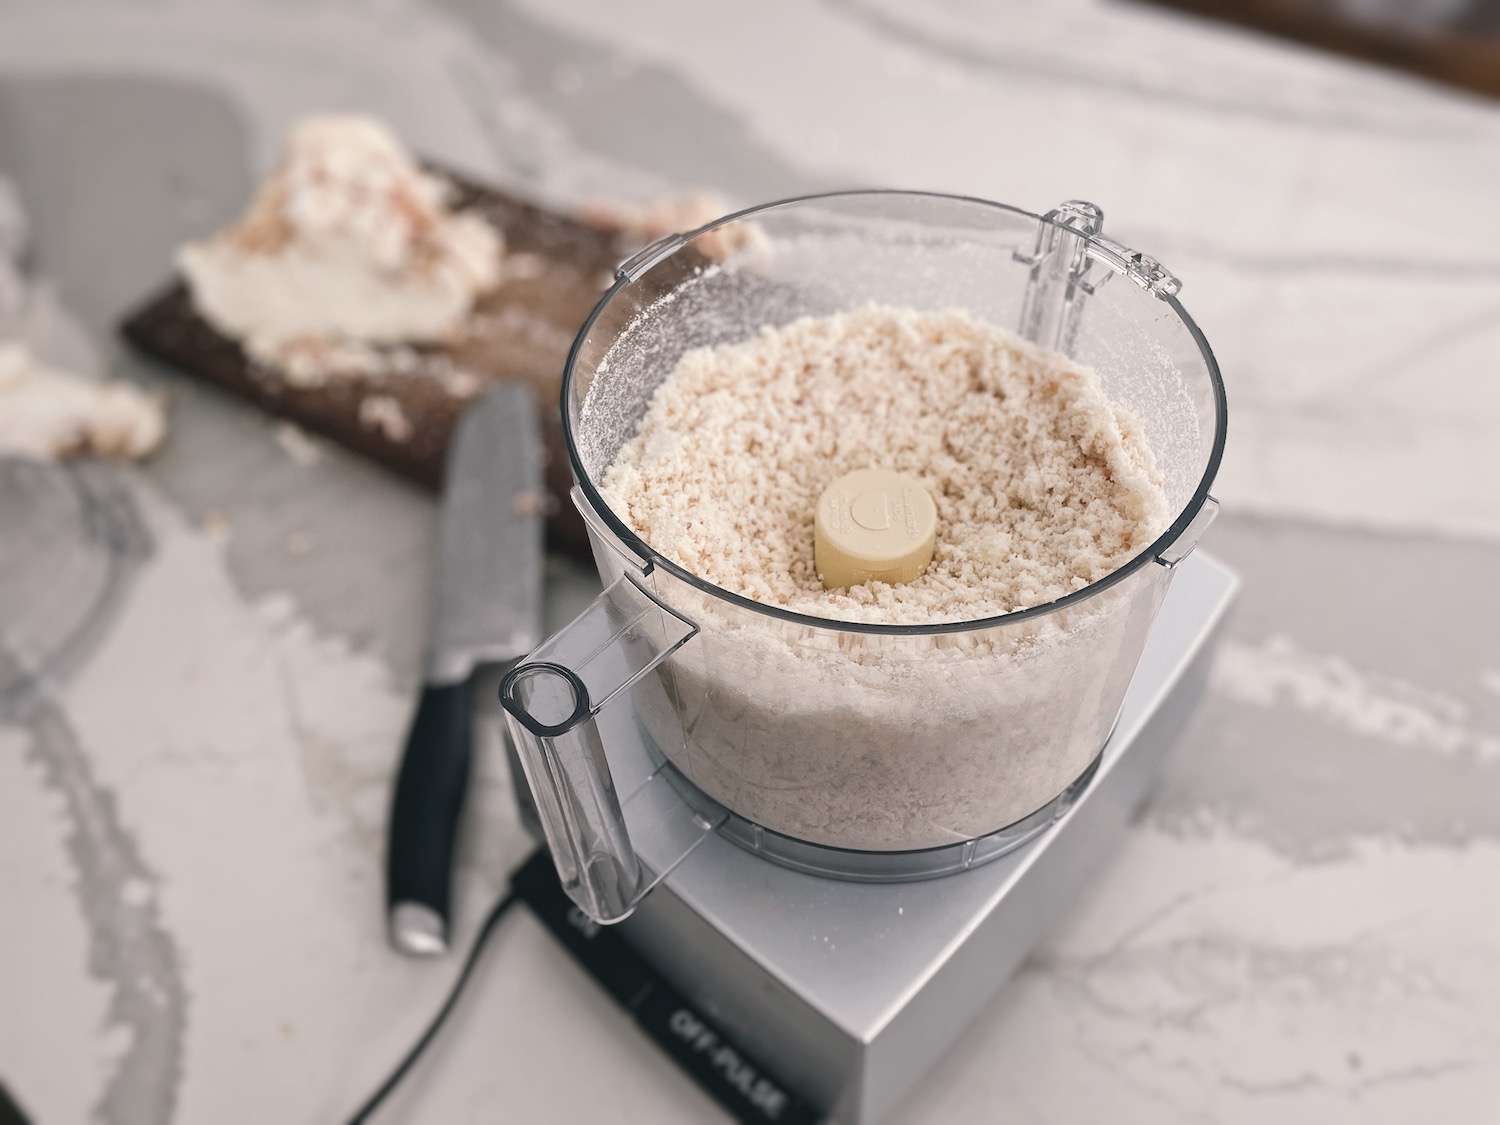
Step 2: Grind the raw fat
Next, add the chopped and trim raw fat to a food processor and blend until it resembles ground beef. This step is such a game-changer! The smaller pieces will render down faster and cleaner than large chunks. If you don’t have a food processor, that’s okay! Just chop it up as finely as possible with a knife.
*Pro tip: If it gets sticky and gums up, the fat is too warm. Place in the freezer for 10 minutes and try again.
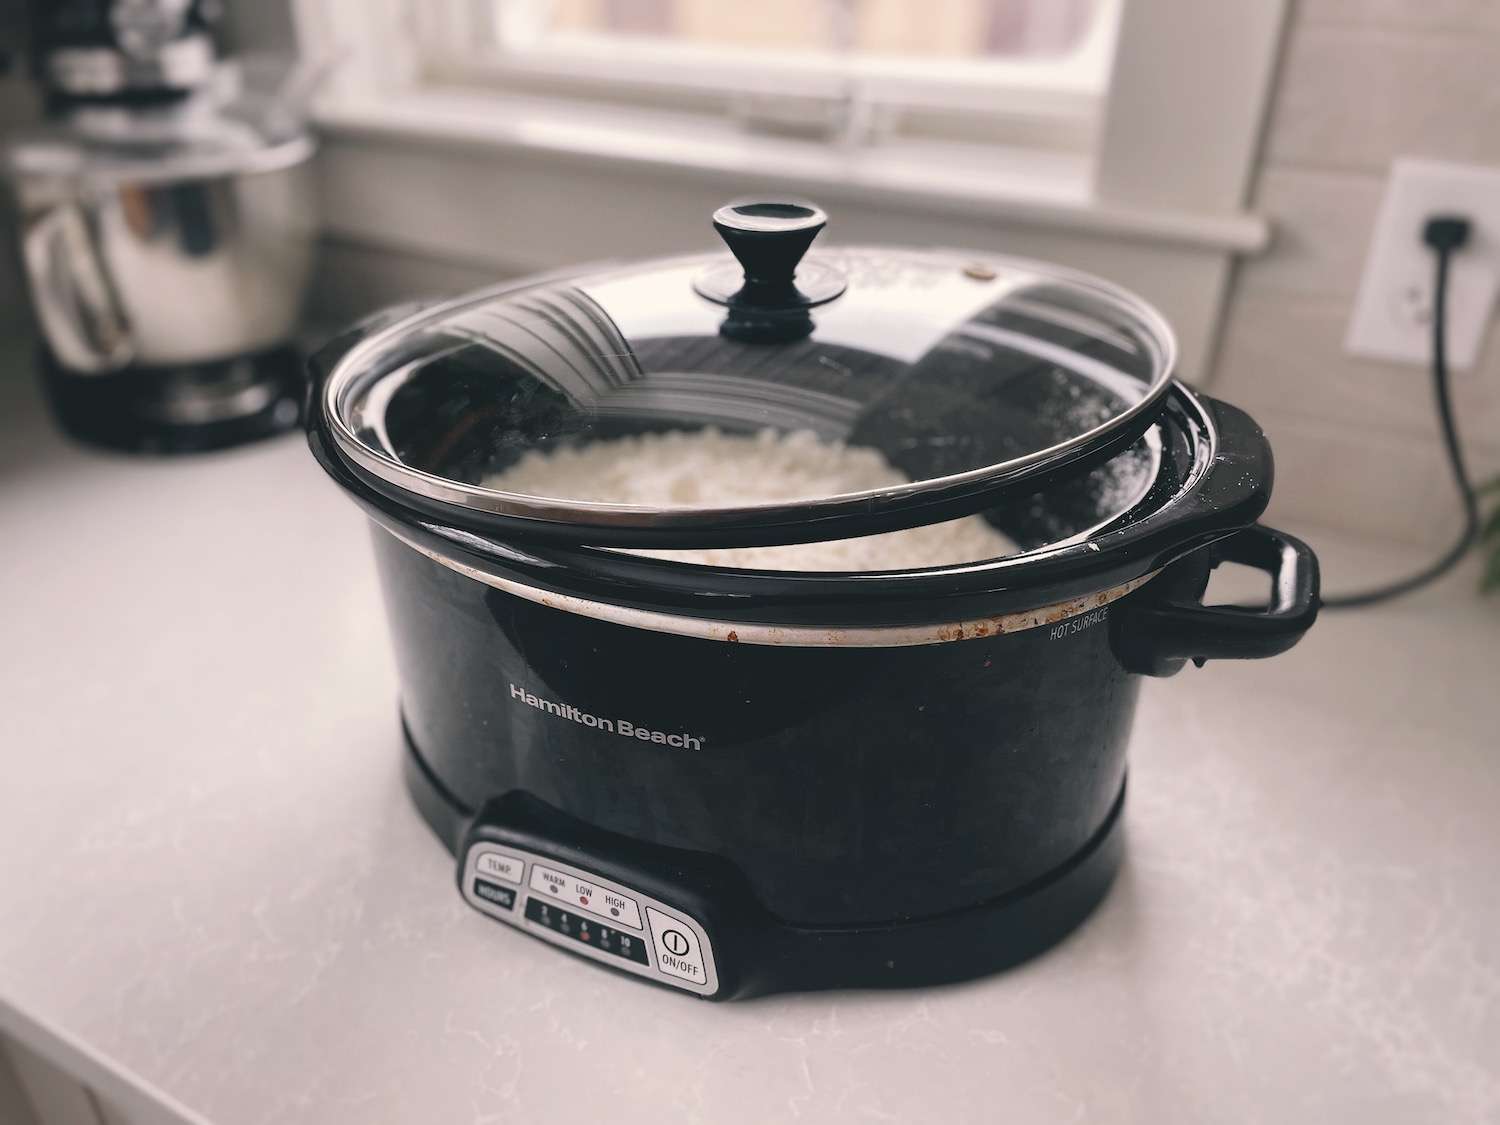
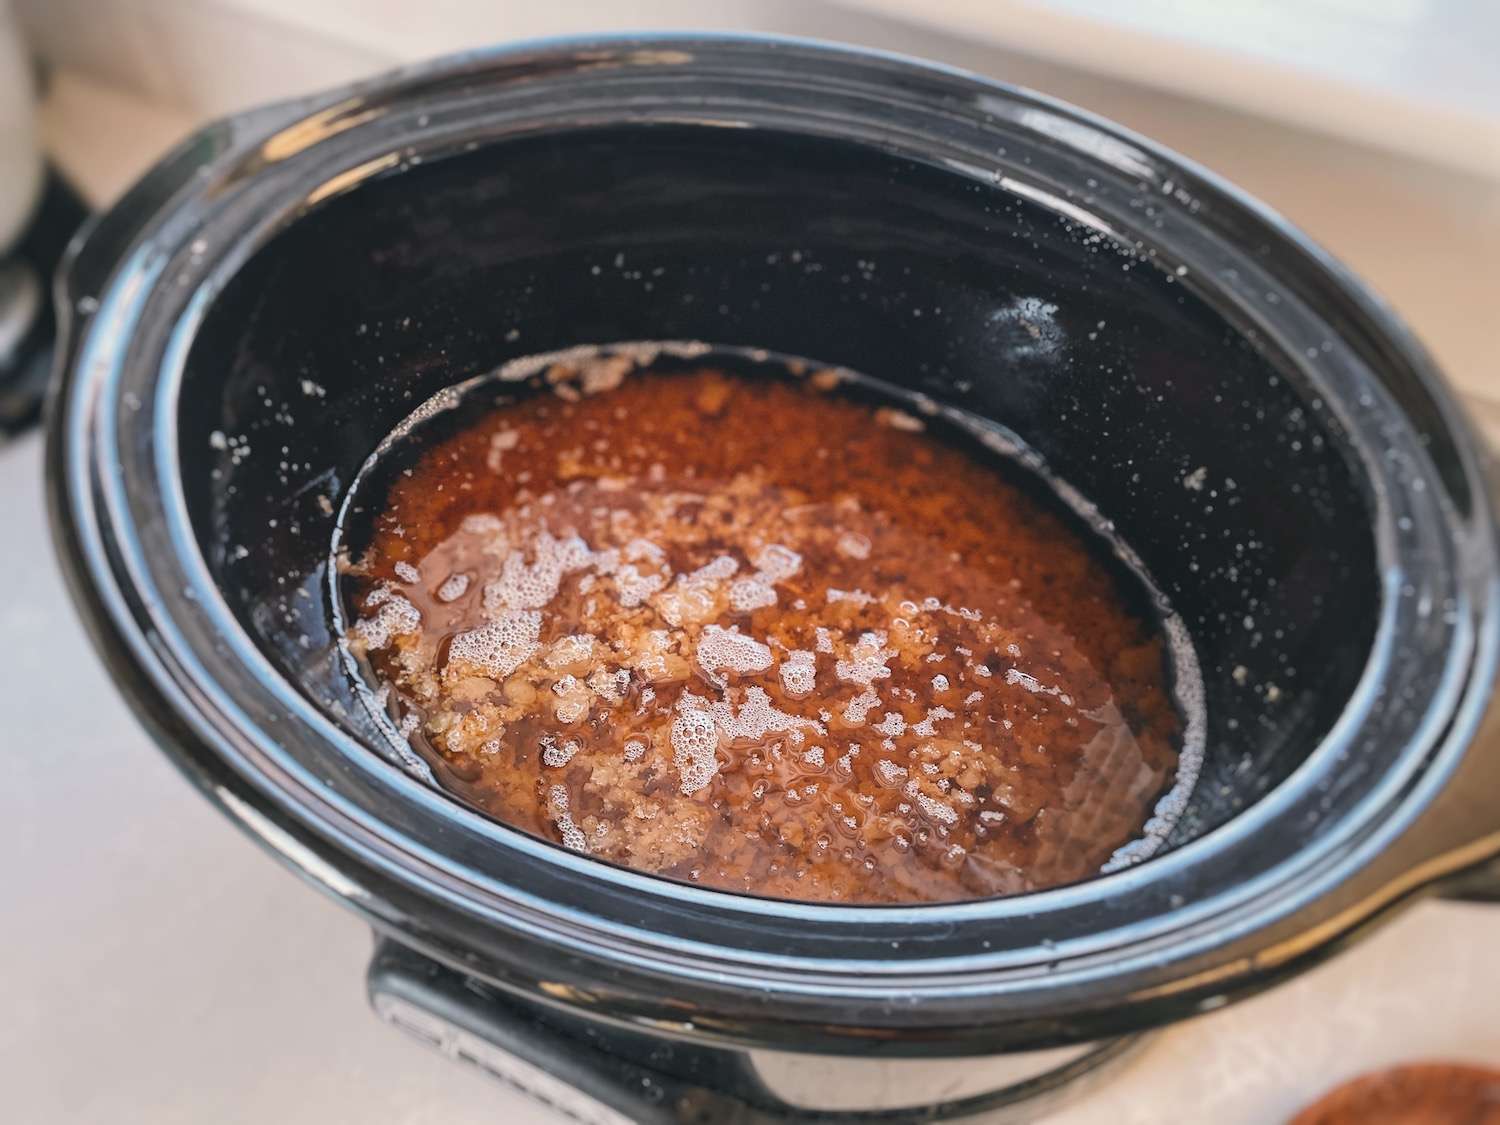
Step 3: Add to a crockpot
Add the ground-up raw fat to a crockpot and cook on low (with the lid ajar) for 6-8 hours. A super-low heat is ideal here to preserve the nutrients and reduce any potential oxidation. Keep an eye on it and stir occasionally. You can also use a large stockpot on the stove, but keep it on the lowest heat setting possible!
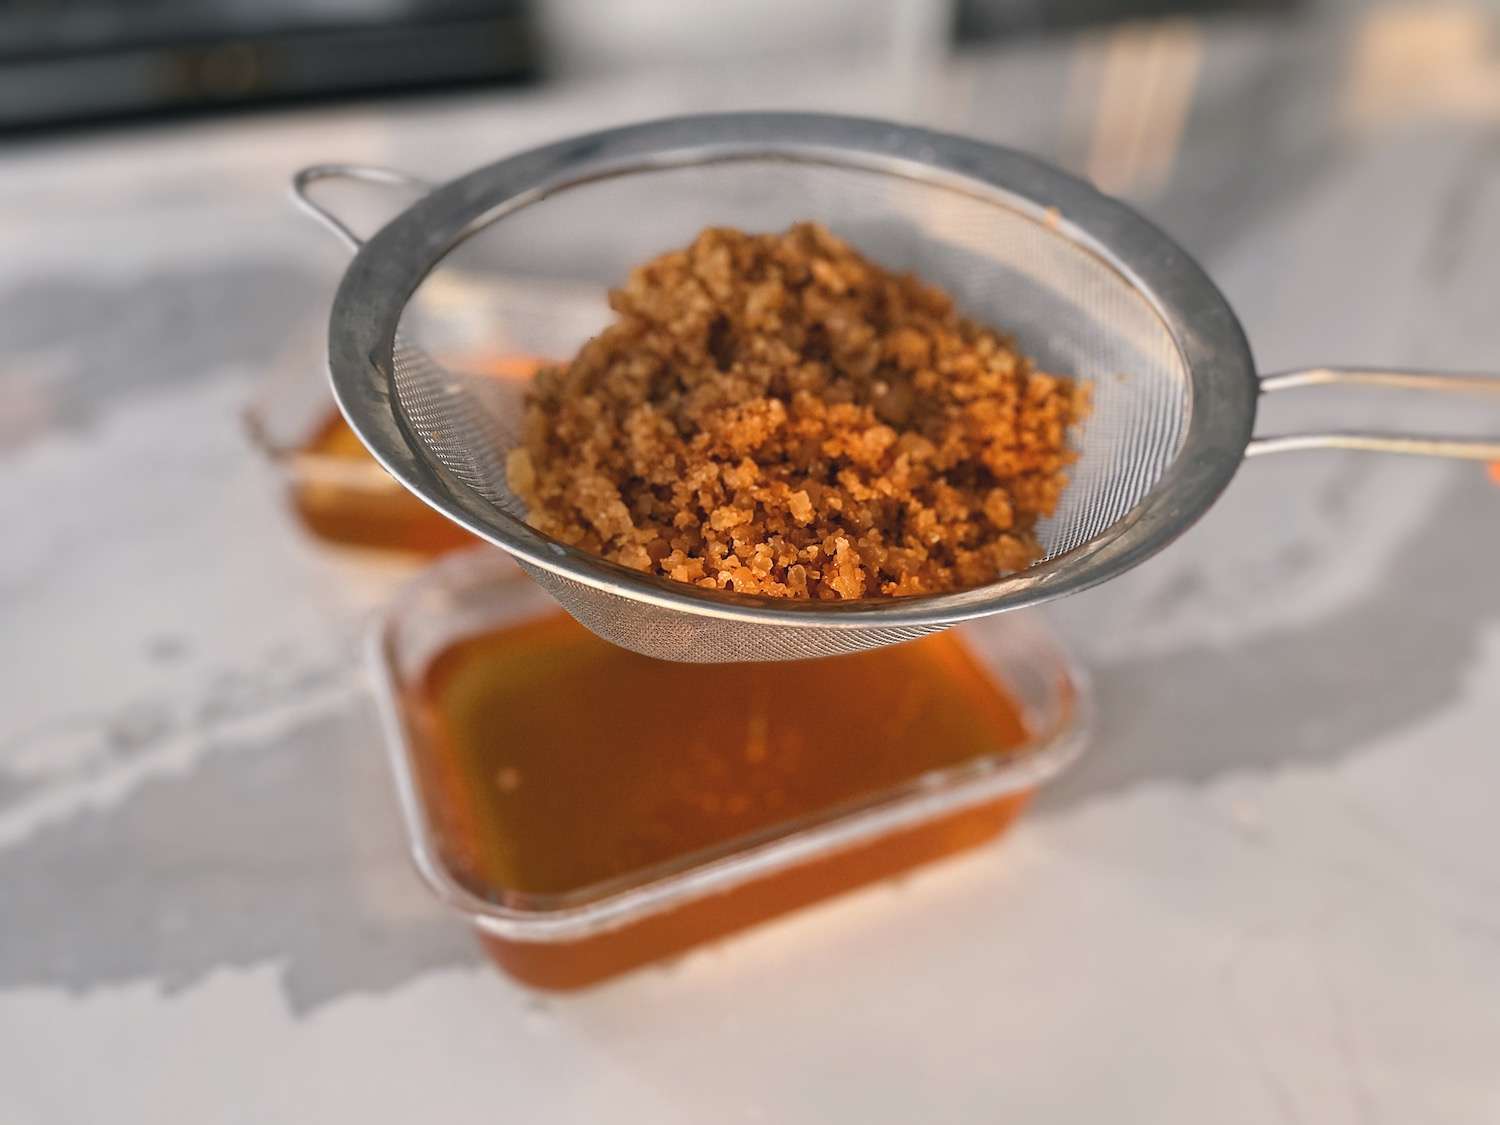
Step 4: Strain out the impurities
You know that the rending process is complete when the fat is clear and golden, and the impurities (or “cracklings”) have accumulated together. They might float or sink, either is fine.
Strain out the impurities using a strainer or cheesecloth. Save the impurities to sprinkle in a salad (or your dog will enjoy them for a tasty snack).
Step 5: Transfer to a storage container
Pour into a storage container and wait until it cools completely before replacing the lid. The rendered fat will typically turn from a golden yellow to a soft white as it cools, depending on the type of fat. Schmaltz fat tends to be yellow (if pasture-raised), whereas lard and tallow tend to be white or off-white.
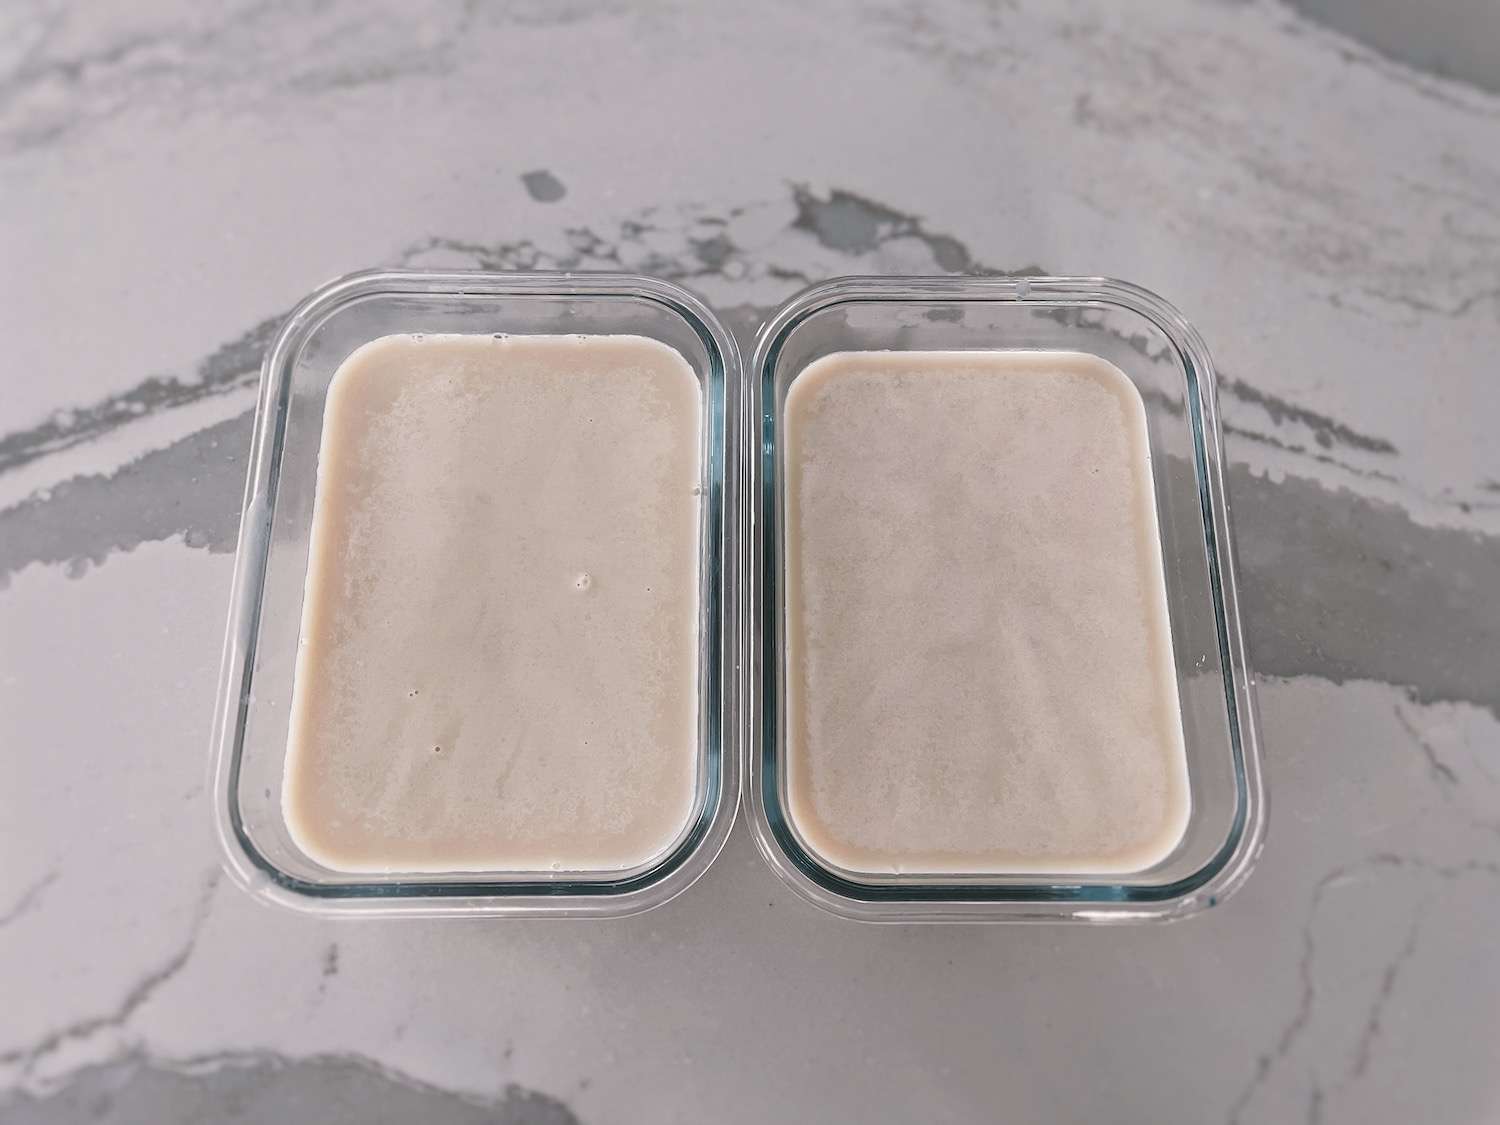
The storage container you want to use depends on the type of fat that you are rendering. Most rendered fats (lard, schmalz, bear grease, etc.) are fairly soft and spreadable, so a mason jar works well. They also make super cute lard containers!
The Homesteading RD's Product Picks: | |
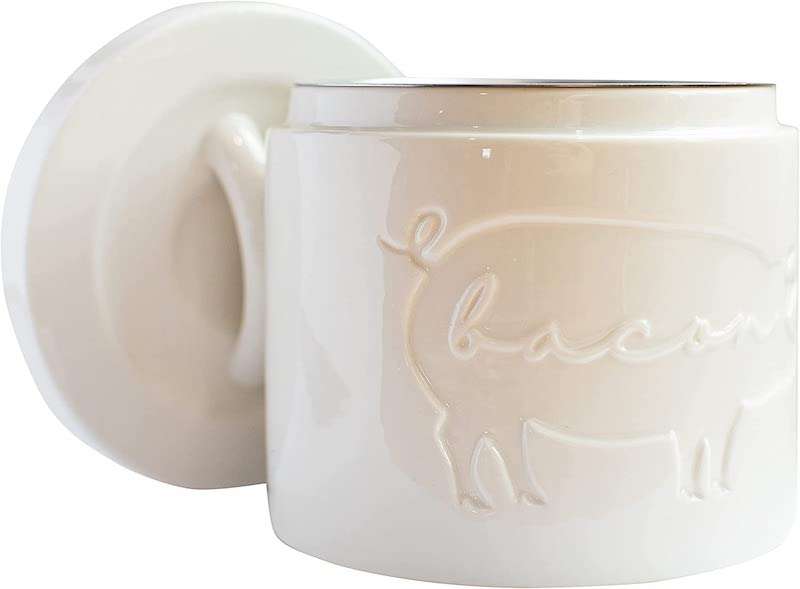
| Not your ordinary grease can! Proudly display this classy bacon drippings container in your modern farmhouse kitchen. 3.5 cup capacity provides excellent cooking grease storage. |
However, tallow is hard and needs to be “chipped away” to be used, so I like to use a shallow, glass food storage container. You can use a mason jar, but it can be challenging to get it back out.
Watch Me Render Tallow!
How to Store:
Store fully cooled, rendered fat in an airtight container for 4-6 months in the cupboard, 12 months in the fridge, or indefinitely in the freezer. I like to make big batches and keep one container at room temperature for easy accessibility, while the rest wait in the freezer.
How to Use:
Once animal fats have been rendered down, they are so incredibly useful! Humans have been using rendered fat for centuries and I’m glad it is finally making a comeback!
Here are just a few of the things that you can use it for:
- High-heat cooking
- Baked goods
- Greasing pans
- Lotions, balms, and chapsticks
- Healing salves
- Bar soap
- Candles
*To see a full breakdown of all of their uses (and which type is best for what purpose), definitely check out my article Tallow vs Lard: Which One to Use?
Other Articles You’ll Love
- Tallow and Lard: The Saturated Fat Controversy
- Tallow vs Lard: Which One to Use?
- The Health Benefits of Tallow and Lard
- DIY Whipped Tallow Balm
- How to Make Tallow Candles
Final Thoughts on Rendering Fat
See? It’s pretty easy to do yourself while obtaining a locally sourced, inexpensive, and versatile fat source to meet all of your needs. Whether you just want to use it for cooking, or for more DIY projects like making soap or tallow balm, I know you won’t be disappointed!


Rendering Fat: How to Make Tallow, Lard and Schmaltz
Equipment
- 1 Knife
- 1 Cutting Board
- 1 Food processor optional, but highly recommended
- 1 Crockpot
- 1 Fine mesh strainer or cheese cloth
- 1 Container for storage
Ingredients
- Raw animal fat suet, leaf fat, chicken fat, duck fat, bear fat, etc.
Instructions
- Start with very COLD fat (straight out of the fridge) and roughly chop into 2" chunks and trim off any bits of meat, gristle, or blood.
- Next, add the chopped and trim raw fat to a food processor and let it go until it resembles ground beef. If you don't have a food processor, just chop it up as finely as you can.
- Add the ground raw fat to a crockpot and cook on low (with the lid ajar) for 6-8 hours. We want super low heat here to preserve the nutrients and reduce any potential oxidation. Keep an eye on it and stir occasionally.
- You know it’s done when the rendered fat is clear and the impurities (or “cracklings”) have accumulated together. Strain out the impurities using a strainer or cheesecloth.
- Pour into a storage container and wait until it cools completely before replacing the lid. The rendered fat will typically turn from a golden yellow to a soft white as it cools, depending on the type of fat.
- Store fully cooled, rendered fat in an airtight container for 4-6 months in the cupboard, 12 months in the fridge, or indefinitely in the freezer.
Video
Notes

Kathleen, your blog post always brings me back to my childhood in Jamaica. Fat rendering is not new to me. My family often rendered chicken fat for cooking; it was a flavor enhancer to many dishes and another sustainability practice. Thanks for sharing; a very easy recipe.