
Once you see how EASY it is to make pumpkin puree at home, you’ll never go back to that bland, canned stuff at the store again! Trust me, you’ll totally get spoiled once you try homemade pumpkin puree, especially if it’s a pumpkin you grew yourself. There’s nothing more satisfying than turning your summer’s labor into a delicious meal!
Here’s the bonus surprise…not only is this recipe super simple, but preserving the puree so that you can enjoy homegrown pumpkin all year round is just as easy. Double win! Plus, don’t forget to save the seeds for making my delicious Soaked & Dehydrated Pumpkin Seeds!

*Disclosure: This post may contain affiliate links to products (including Amazon). I’ll earn a small commission if you make a purchase through my link, at no additional cost to you! Regardless, I only link to products that I personally use on our homestead or believe in.
Why Make Homemade Pumpkin Puree?
Before we jump in, you might be on the fence about whether you actually need to make pumpkin puree or not. There are so many great reasons why you should, but let’s run through some of my favorites!
- Save money – Making your own vs buying it in the cans is certainly cheaper, especially if you grew your own pumpkins!
- Reduce waste – Did you buy some cute pumpkins for fall decorations? Once the season is over, don’t throw them out! Make some pumpkin puree instead.
- Control of the product – I don’t trust most of the food that comes out of the grocery store, so I like making it myself so I know exactly what’s in it.
- Accessibility – Sometimes pureed pumpkin is hard to find (it certainly is in my small town), so making your own might be your only option.
- Build up food stores – Pureed pumpkin is super easy to preserve for later and is a great way to build up food security. Keep reading to learn how to do it!
- It’s delicious – I suppose this should be reason number 1… you’ll want to eat it! It’s delicious and great in all sorts of recipes from pancakes and muffins, to soup and pies.
How to Make Pumpkin Puree

Tools
- Cutting Board
- Knife
- Ice cream scooper (optional, but recommended)
- Large baking sheet
- Food processor
- Large bowl
Ingredients
- Fresh pumpkin – I love using Cinderella pumpkins!
Instructions
Step 1: Prepare the Pumpkin
Preheat your oven to 375F. Using a sharp knife, carefully cut the pumpkin in half. If your pumpkin is excessively large, you may need to cut it into wedges to fit in your oven (I typically have to do that with my large Cinderella pumpkins. You can remove the stem if you wish, but I usually leave it on unless it gets in the way.
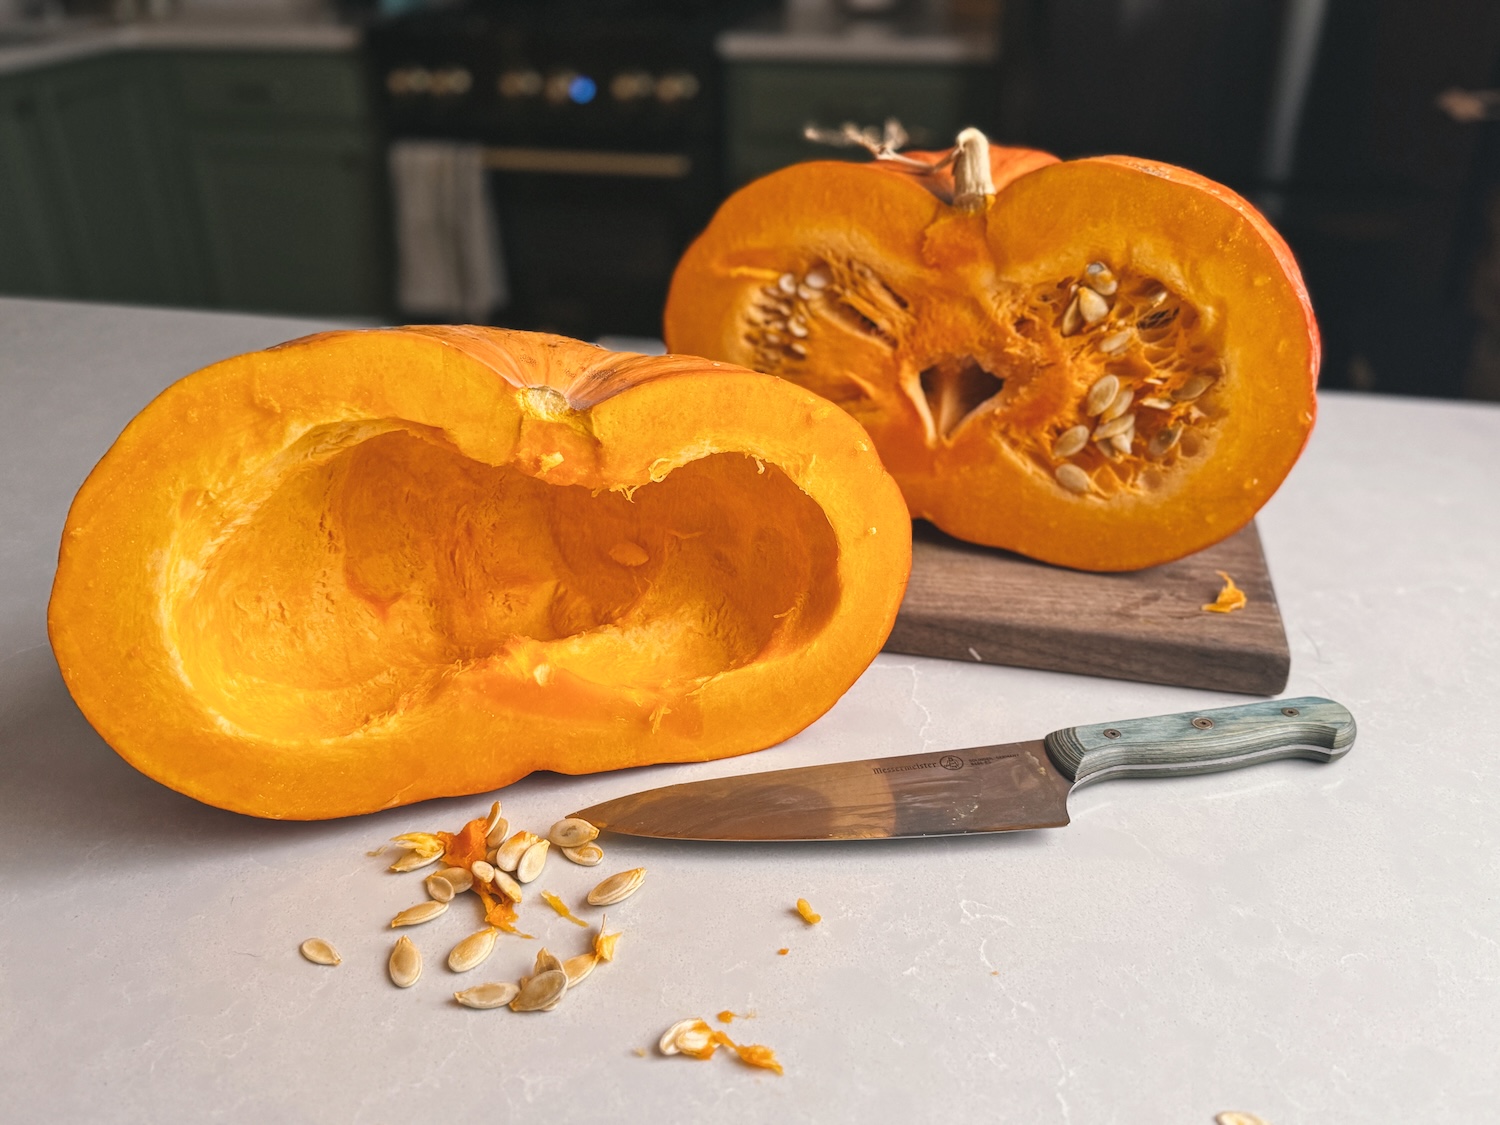
Next, scoop out the seeds and any of the stringy goop. I’ve found that an ice cream scoop makes this a breeze! Make sure to save the seeds for making my delicious Soaked & Dehydrated Pumpkin Seeds recipe!
Step 2: Bake the pumpkin wedges
Place the pumpkin halves/wedges (cut side down) on a baking sheet and roast in the oven for 45-90 minutes, depending on how large your pumpkin is. You will likely have to remove the top rack from your oven so that the pumpkin halves/wedges will fit.
At the 45-minute mark, poke the pumpkin flesh with a fork. If it’s still firm, it needs more time. If it’s soft and the fork easily slides in, it’s done! My large Cinderella pumpkins usually take 75 minutes.
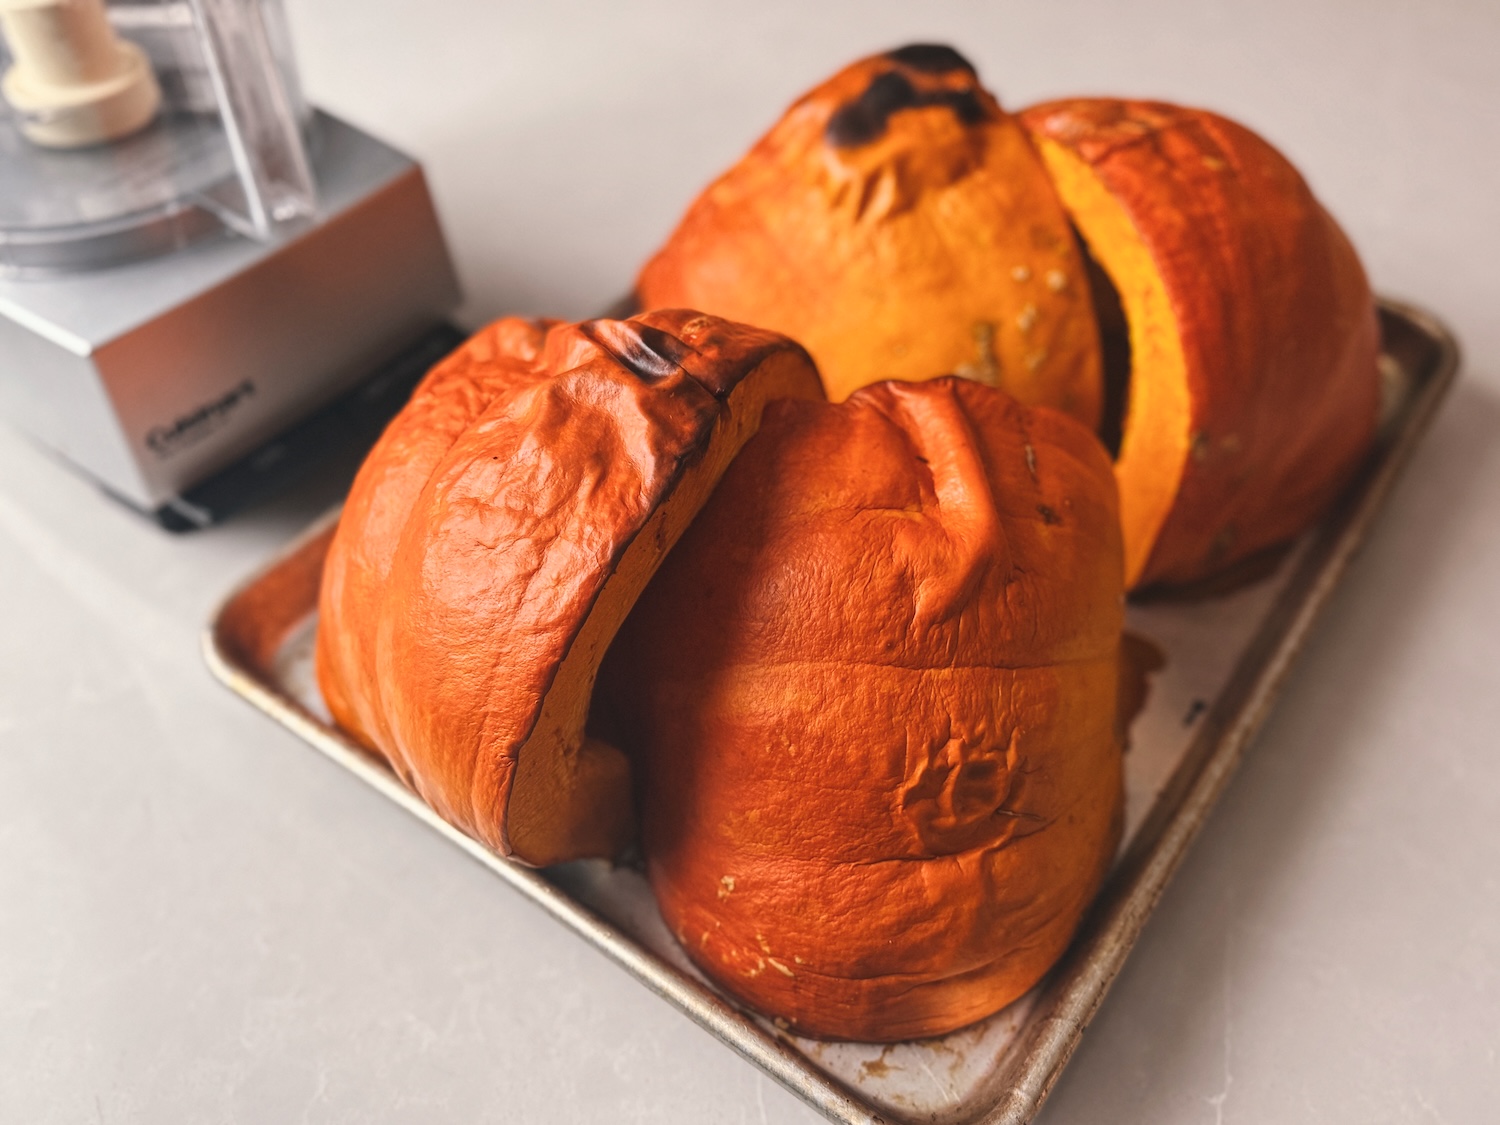
*TIP: You might notice some watery liquid at the bottom of the pan and that’s normal. I reserve it to add back to the puree later if it comes out too thick for my liking. Usually, I don’t have to do this, but it’s nice to have the option!
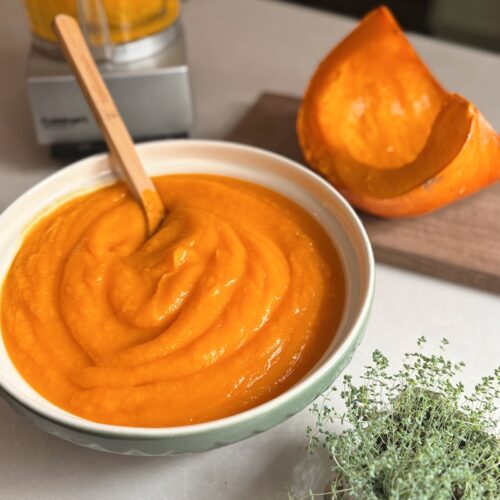
Step 3: Puree the pumpkin
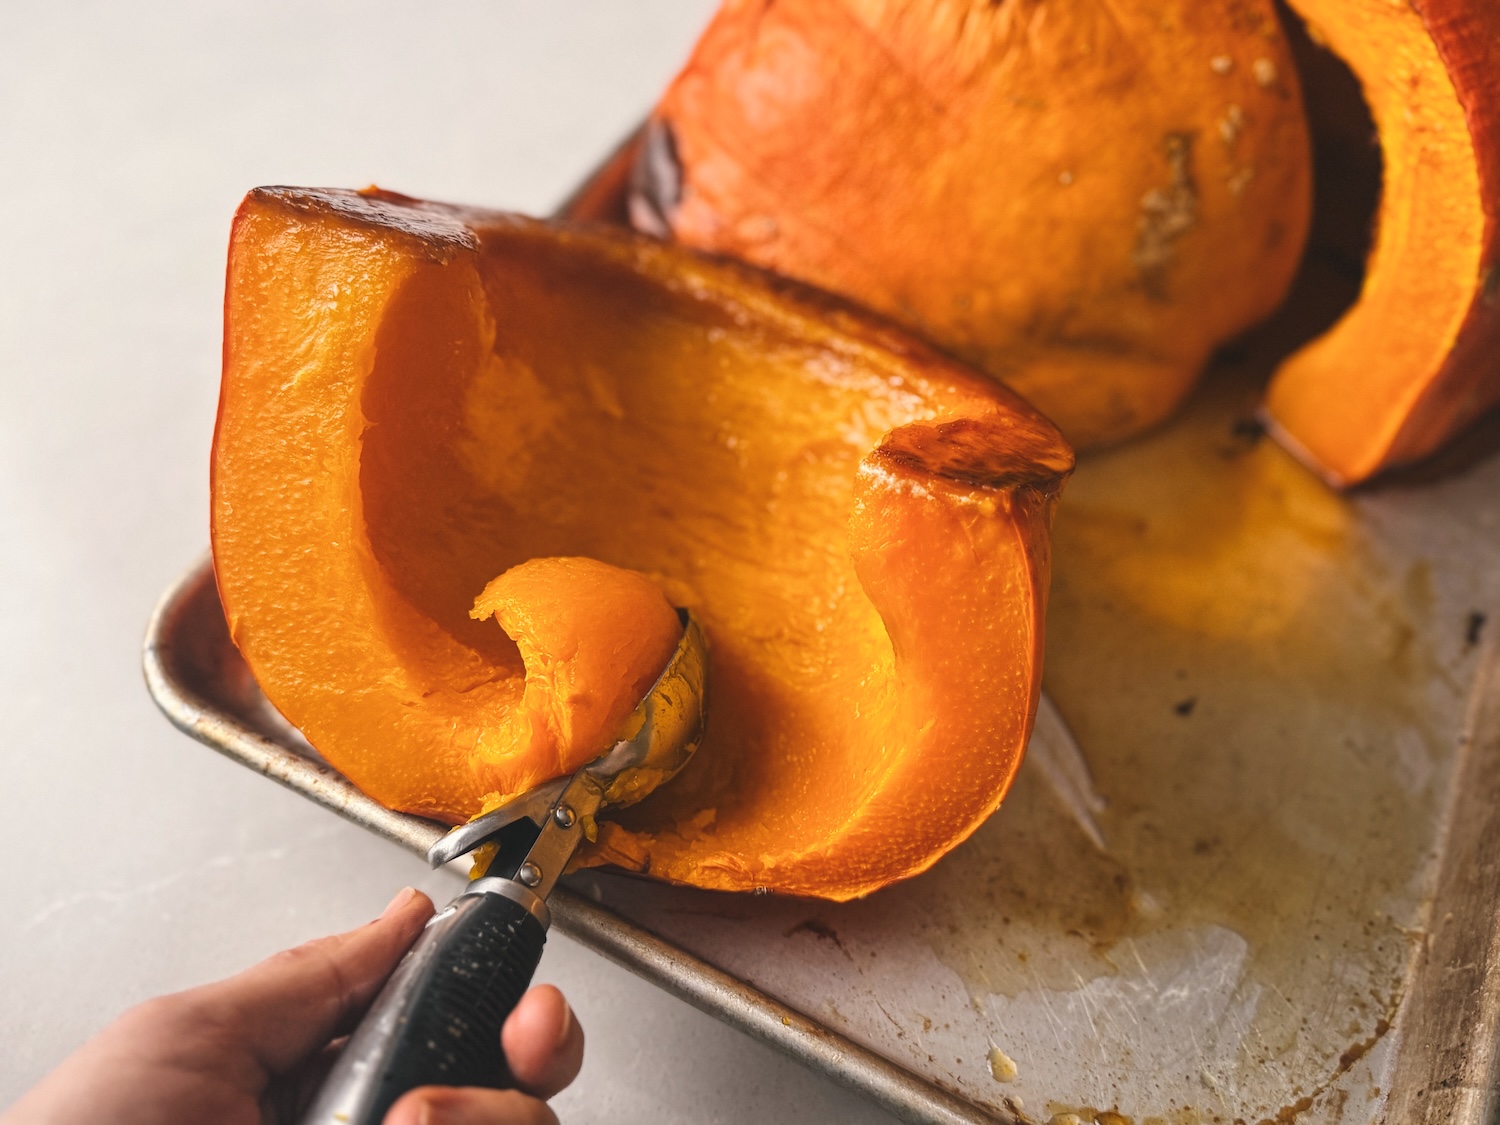
Let the pumpkin cool for about an hour (it’s going to be hot!), then scoop out the flesh straight into your food processor. I like to use my ice cream scooper again here – such a handy tool! If you don’t own a food processor, a blender will also work. Discard the skin to your compost bin, or let your chickens enjoy it!
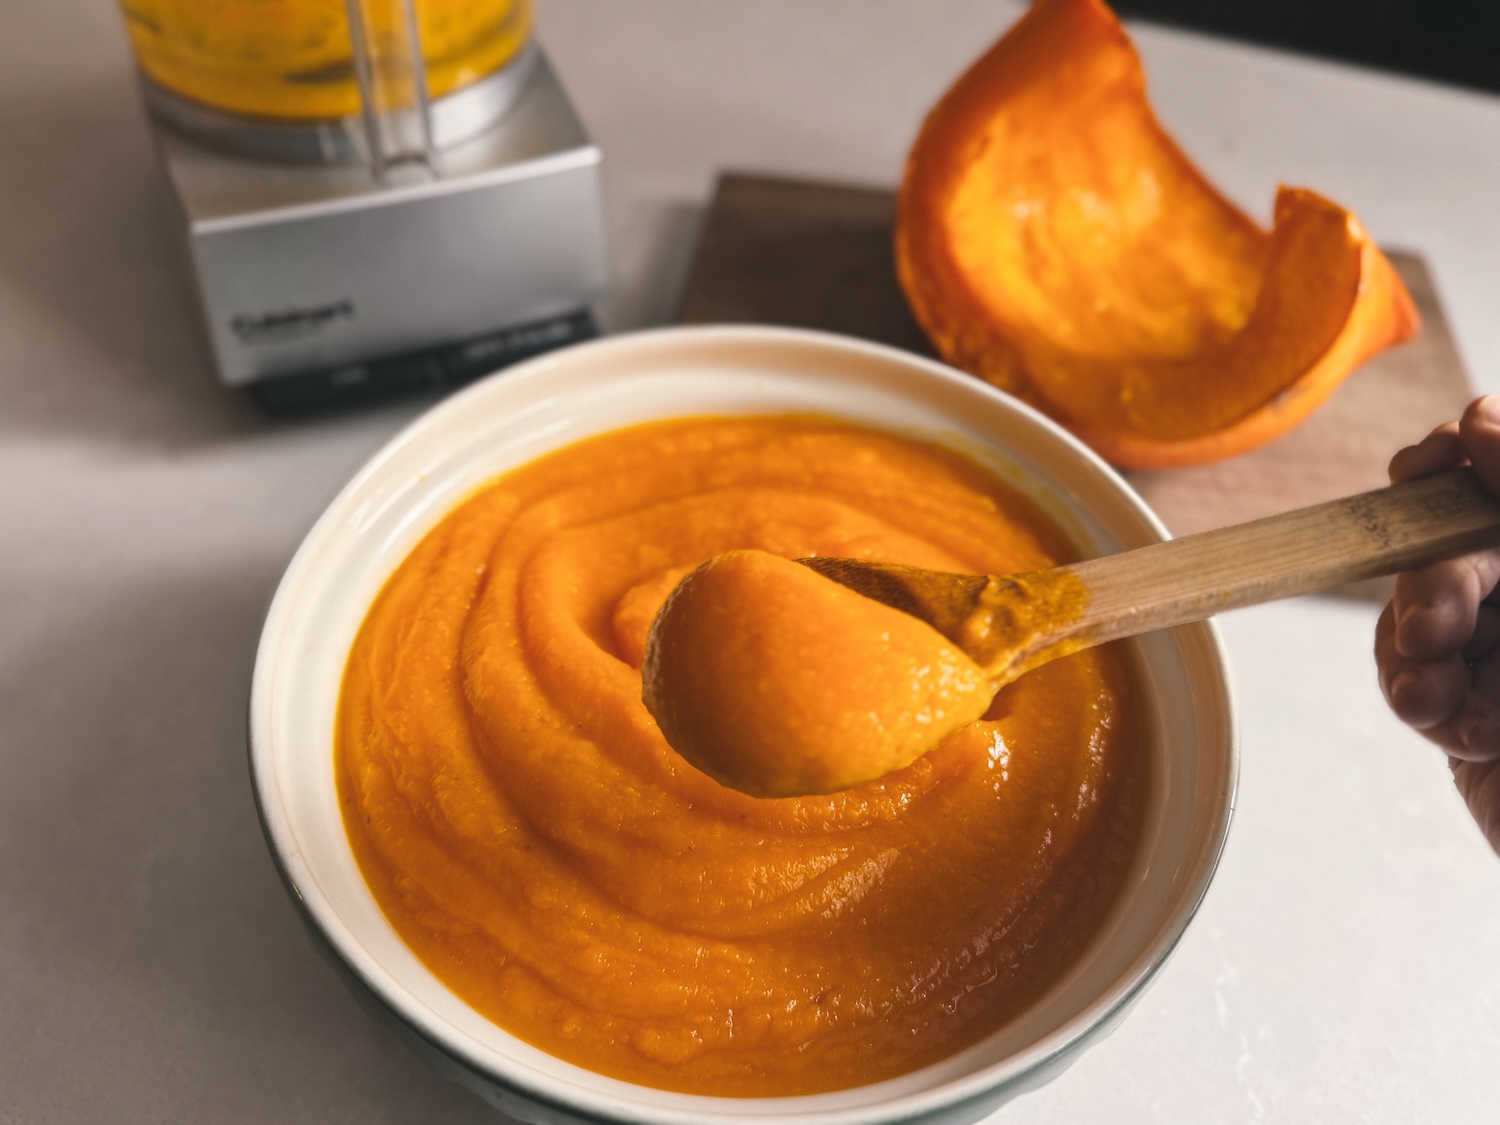
Puree the pumpkin until it achieves a nice, smooth texture (about 30-45 seconds). Then, transfer to a large bowl. You’ll likely need to work in several batches to get everything to fit in your food processor.
Step 4: Assess the texture
Depending on the variety and age of your pumpkin, the pumpkin puree could turn out quite thick or fairly watery. It’s all a matter of personal preference and what you intend on using the pumpkin puree for.
- Too thick? Add the pumpkin watery stuff that we reserved from the baking sheet
- Too thin? Strain it through some cheesecloth for 2-3 hours
How to Preserve Pumpkin Puree
Some pumpkins can be quite large and will provide more pumpkin puree than you need at one time. My 1 Cinderella pumpkin produced 15 cups of pumpkin puree! So, I like to cook with some of it freshly made, and then preserve the rest for later in 2-cup portions. You can pick whatever portions make the most sense for you and what recipes you use it for.
- Freezing – So easy! Simply fill ziplock or vacuum seal bags with your desired amount of pumpkin puree and freeze laying flat for efficient storage. I prefer ziplock bags for this because it’s easy to get the air out and then I can wash and reuse the bags for years. Use within 9-12 months.
- Freeze drying – If you have a freeze dryer, this is an awesome option! Fill your trays with pumpkin puree, pre-freeze, and then freeze dry according to your machine instructions. Remember to weigh the puree before freeze-drying so you know how much water to add later when reconstituting!

It might be tempting to pressure can pumpkin puree since canned pumpkin puree is available at the store, right? However, commercial processing equipment processes at much higher temperatures than our home pressure canners. Home pressure canners cannot effectively penetrate through the thick puree to the center of the jar and is unsafe to do.
The only way that pressure canned pumpkin is safe is if you cube the pumpkin, boil the cubes for 2 minutes, add the cubes and hot liquid to hot jars (leaving 1″ of headspace) and pressure can at 55 minutes for pints and 90 minutes for quarts at 11 lbs of pressure.
FAQ About Making Homemade Pumpkin Puree
What kind of pumpkin can I use for pumpkin puree?
All pumpkins are edible, but some are sweeter than others. The best pumpkins for making pumpkin puree are Cinderella (which is what I love to grow and what I’m using in this recipe) and Sugar pumpkins (also called pie pumpkins).
What about Halloween pumpkins? Totally edible, but they tend to be somewhat bland. I would still use them vs tossing them out, but consider using the pumpkin puree in something with some spices to kick it up a notch.
What’s the best way to use pumpkin puree?
My favorite way to use pumpkin puree is in pumpkin muffins! I always make a double batch and then freeze them for later. They are great for a grab-and-go healthy snack, especially when paired with a piece of my Ground Venison Jerky!
Other great options are pumpkin pie, soup, lattes, and even pancakes! Pumpkin is pretty versatile and can be used in so many ways.
Can I steam the pumpkin?
Unfortunately, no. The steam will add too much moisture and you’ll end up with a watery pumpkin puree. Roasting is the best!
Other Recipes You’ll Love:
- Delicious Soaked & Dehydrated Pumpkin Seeds
- Homemade Fermented Hot Sauce
- How to Make Dehydrated Carrots (EASY!)
- No Cook Refrigerator Pickles (Quick!)

Homemade Pumpkin Puree Recipe
Equipment
- 1 Cutting Board
- 1 Knife
- 1 Ice cream scooper optional
- 1 Large baking sheet
- 1 Large bowl
Ingredients
- 1 whole Pumpkin
Instructions
- Preheat your oven to 375 degrees F
- Using a sharp knife, carefully cut the pumpkin in half. If your pumpkin is excessively large, you may need to cut it into wedges to fit in your oven.
- Scoop out the seeds and any of the stringy goop with an ice cream scoop!
- Place the pumpkin halves/wedges (cut side down) on a baking sheet and roast in the oven for 45-90 minutes, depending on how large your pumpkin is.
- At the 45 minute mark, poke the pumpkin flesh with a fork. If it’s still firm, it needs more time. If it’s soft and the fork easily slides in, it’s done!
- Let the pumpkin cool for about an hour (it’s going to be hot!), then scoop out the flesh straight into your food processor. I like to use my ice cream scooper again here - such a handy tool!
- Puree the pumpkin until it achieves a nice, smooth texture and then transfer to a large bowl. You’ll likely need to work in several batches to get everything to fit in your food processor.
- Assess the texture. Add some pumpkin liquid from the bottom of the sheet pan if too thick, and strain through cheese cloth for 2-3 hours if too thin.
- To preserve, fill ziplock or vacuum seal bags with your desired amount and freeze laying flat for efficient storage. Freeze drying works well too, If you have a freeze dryer!
Notes
